December 31, 2012

Thai Chicken Curry


I hope everyone is having a great New Year's Eve. In my twenties I loved going to friend's parties and ringing in the New Year. Now that I have two kids and am in my mid-thirties (we aren't talking about what age I am turning this year :) I prefer to stay at home and enjoy the beginning of the New Year with my family. 2012 had a lot of ups and downs for my family. My health for the first 6 months was all over the place with pneumonia, low potassium levels and a high heart rate. Luckily everything seems to be better now, but I am definitely ready for 2013 to be rung in. I will be surprised if my two kids make it much past 10 pm, but they might surprise me and stay up until midnight. I think I will make it to midnight and not much farther. When I was in college I could stay up all night and still be at work the next morning at 7 am, now I need my beauty sleep. My cooking this week has been easy. I haven't been motivated to spend a lot of time in the kitchen since my oldest is home for winter break until Thursday. This weekend I tried a new recipe for Thai Chicken Curry from the January issue of Bon Appetit magazine.

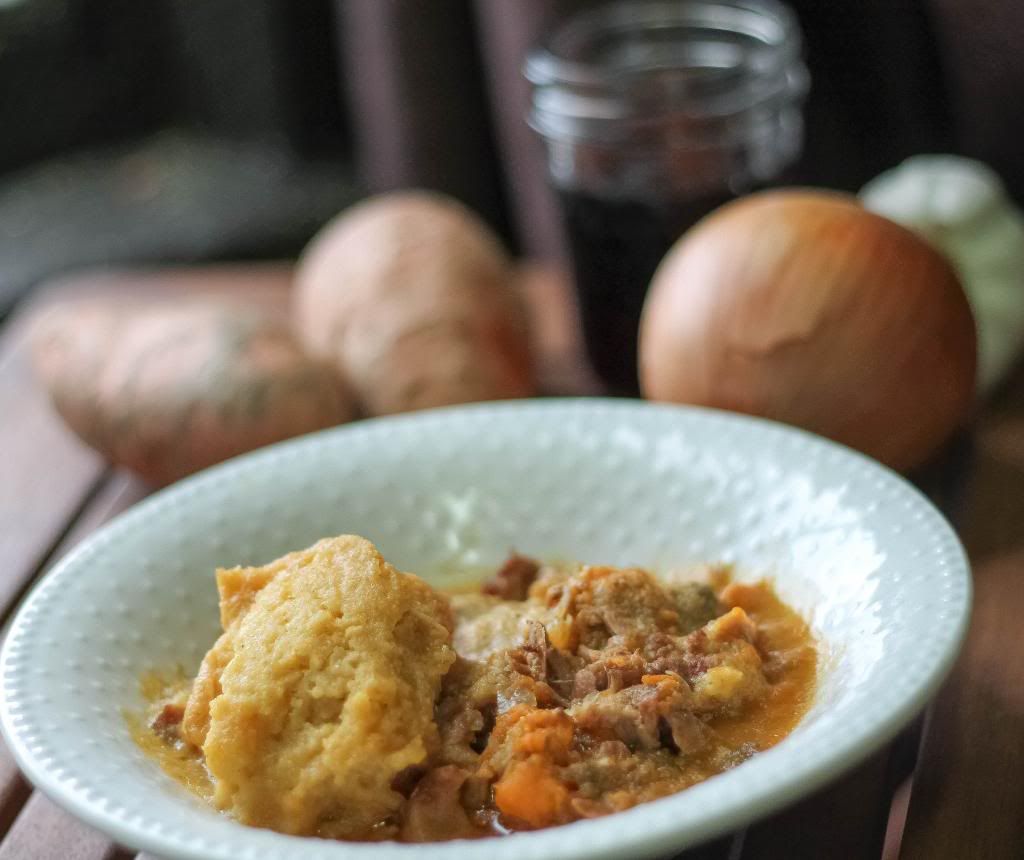
This recipe has 10 ingredients. It takes a total of 45 minutes, 30 minutes of which is active and makes 4 servings. I did have to make a few modifications based on ingredient availability. First I have never seen yellow curry paste at any of my local grocery stores so I substituted green curry instead. Additionally, instead of regular Yukon gold potatoes I used baby Yukon potatoes. I prefer the baby Yukon potatoes when cooking since they are smaller and cook much quicker than their larger counterparts. I had no problems finding any of the other ingredients and made no further ingredient modifications. The recipe states to cook the curry on a simmer for a total of 20 minutes. I let my curry cook for closer to 30 minutes to ensure that it had thickened adequately. I followed the remainder of the recipe as written.

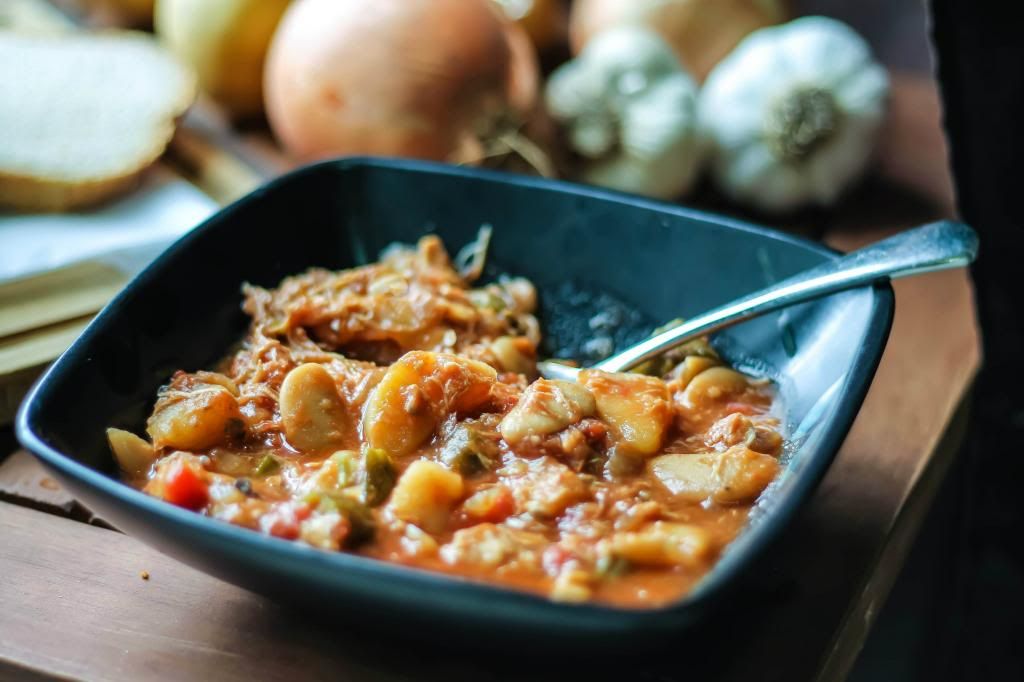
I wasn't sure what my kids would think of this curry. They can be hit or miss with ethnic foods. Sometimes they love them and other times they won't even try a bite before they decide that they don't like the dish. However, I am happy to report that they loved this recipe. My oldest was especially fond of the chicken. The chicken turned out very tender and the potatoes were a nice addition. I chose not to serve the dish with fresh herbs since my kids were eating it, but it would be delicious either way.

For the recipe go to Thai Chicken Curry.

December 30, 2012

Quinoa-Pumpkin Seed Granola


My normally good eating habits haven't been so great since Thanksgiving. The holidays seem to have gotten to me this year and my food choices have gone down hill. Don't get me wrong I still have cooked from scratch and enjoyed healthy dinners, but I have snacked more than usual and eaten more sugar. Luckily I haven't gained any weight, but I feel less than my normal self so I know that it's time to get back on track. One of the major things that I haven't been doing well with the last couple of months is breakfast. I have been good about eating breakfast since I had low potassium last winter. However, since Thanksgiving I have been skipping breakfast or not eating enough protein in the morning. This weekend I decided to get back on track and made some healthy snacks for the week. One of the new recipes I tried was for Quinoa-Pumpkin Seed Granola from the January issue of Better Homes and Gardens magazine.

This recipe has 9 ingredients. It takes 50 minutes of total time, 20 minutes of which is active and makes 13 servings. I had no problems finding any of the ingredients at my local grocery store. I chose to use dried cherries for the dried fruit called for in the recipe. The recipe states to stir the mixture twice, but I forgot one of the stirs, so I only did a total of one stir half-way through the baking time. I kept my granola in larger pieces since I was going to eat it as a snack instead of with milk. I think I prefer the large chunks like I made. I followed the remainder of the recipe as written.

My husband and I really enjoyed this granola. The quinoa was great, I loved how it was crunchy and the whole almonds were delicious. The cranberries provided a nice sweet contrast to the crunchiness of the nuts. My husband thought that it would be even better for adults with a small amount of cayenne pepper to have a sweet/spicy combination.

For the recipe go to Quinoa-Pumpkin Seed Granola. (registration required)

December 29, 2012

Roasted Chicken Thighs with Lemon and Oregano


The weather today was unpleasant. I love snow when I'm inside warm in my house with the gas heat turned up. However, today the weather was cold, windy and there was lots of sleet. I hate sleet. It's not rain, it's not snow, it's just miserable. I think I might also be a weather wimp. In the summer I begin to hate the heat in about July and I complain the rest of the summer. In the winter I complain that it is too cold and I am always wrapped up in three blankets. I seem to never be able to find the right heat to feel just comfortable. It would help if the area that we lived actually had 4 seasons every year. There are a lot of years when we are lucky if we have two seasons. I do love winter foods. There is something very comforting and relaxing about soups, stews and winter meat dishes. One of my favorite winter dishes is roasted chicken. There are so many ways to prepare it and a little change in flavor can make a huge difference. Last week I tried a new recipe for Roasted Chicken Thighs with Lemon and Oregano from the December issue of Bon Appetit magazine.

This recipe has 11 ingredients. It takes a total of 30 minutes, 20 minutes of which is active and makes 4 servings. I have never seen boneless skin-on chicken at the store so I used bone-in skin-on thighs instead. Since my chicken had bones I increased the cooking time to 25 minutes in the oven instead of the 6-8 minutes in the recipe. I also doubled the recipe in order to have 8 large breasts so I had leftovers. Be very careful when taking the skillet out of the oven. I have had the misfortune of touching the handle of the skillet after taking it out of the oven one too many times. I suggest putting a pot holder or towel over the handle after taking the skillet out of the oven to prevent burns. I chose not to drizzle the oil over the chicken at the end of the recipe. The sauce was more than adequate to keep the chicken moist. I followed the remainder of the recipe as written.

My family really liked this recipe. If you have never browned chicken on the stove before there are a few things to keep in mind. First don't use a non-stick pan. Non-stick pans are okay for many things, but roasted chicken isn't one of them. I use stainless steel pans and love them. Second, do not try flipping the chicken until it releases naturally from the pan. If you try flipping the chicken before it is fully browned the skin will break and you will not end up with that crispy browned skin that everyone loves. For this recipe I modified the step where the thighs were kept skin side down in the skillet once in the oven. I flipped them over to cook during their oven time in order to keep the crisp beautifully browned skin.

For the recipe go to Roasted Chicken Thighs.

December 28, 2012

Pumpkin-Chocolate Torte with Pumpkin Whipped Cream


My kids are able to make huge messes. As I sit here writing this post my living room floor which I have picked up 5 times today is once again full of toys. I think I might pick up the same toy over and over again everyday. My husband doesn't seem to be much better than my kids. I think he believes that his socks will actually walk themselves to the hamper. They don't. When I was gone for a week this fall my husband didn't pick-up any of his dirty clothes and dishes and was genuinely confused how nothing was clean or put away. Part of it has to do with my expectations of cleanliness. Growing up my mother had a lot of stuff. Not just a few things, but literally our house and then apartment were full of stuff. Nick-knacks covered every available space and there was always stuff everywhere. I am the opposite. I like everything put in its place. My living room is decorated, simply with everything having a spot. It drives me crazy when things are cluttered. Christmas has a tendency to stress me out not for the reason that most people deal with, but for the clutter. As soon as my kids open their gifts I am going around organizing. One way that I keep myself sane is chocolate. I love chocolate and it has an immediate effect on my anxiety. This week during the craziness of the holidays I made a Pumpkin-Chocolate Torte with Pumpkin Whipped Cream from the December issue of Eating Well magazine.

This recipe has 12 ingredients. It takes 4 hours 50 minutes of total time, 50 minutes of which is active and makes 10 servings. I had no problems finding any of the ingredients at my local grocery store. I did not line my pan with parchment paper and I had no problems taking out my torte, so I don't believe that the step is necessary. For the whip cream I chose to just make a straight whip cream without the pumpkin puree and with just a small amount of vanilla. Finally I let the torte firm up overnight before serving. I think this helped it to firm up completely. I followed the remainder of the recipe as written.

My two boys and I really loved this recipe. I like that it only has 11 grams of fat per serving, which is much lower than most dessert recipes. The taste isn't overly sweet, but still has a nice chocolate flavor. I did not drizzle the top with melted chocolate, but I think it would be delicious if you wanted to add this step.

For the recipe go to Pumpkin-Chocolate Torte with Pumpkin-Whipped Cream.

December 27, 2012

Lentil Sliders with Sesame Sauce


 I took the Christmas tree down yesterday and put away all the decorations. As soon as the holiday is over I like to box up all the decorations and get back to normal. I have always been like this. Growing-up my mother would keep our tree up until well into January and it would drive me nuts. I like to get things over with and move on, Christmas is one of those things. Don't get me wrong I like Christmas, but all the dust from the decorations and the lack of space from the Christmas tree drives me nuts. So as soon as Christmas is over I get up the next day and put everything away. My living room is now back to the state that it the rest of the year and I am happy and content. I have survived another Christmas and things can start settling into the cold winter months ahead. Winter to me always means beans. I cook with beans a lot in the winter, I find them filling and comforting when the weather is cold and depressing. Last week I tried a new recipe for Lentil Sliders with Sesame Sauce from the January issue of Parents magazine.

This recipe has 12 ingredients. It takes 1 hour of total time, 10 minutes of which is active and makes 8 sliders. I did have to go to multiple stores to find all the ingredients, but that is normal when I am looking for tahini. Be very careful when cooking these sliders, they have a tendency to burn if you follow the amount of oil in the recipe. Watch the sliders very carefully and add more oil if necessary. I served my husband and kids portions with pita, but I ate mine with just the sauce since I can't eat gluten. For the lemon juice I used fresh squeezed, the taste is better and lemons are inexpensive. I followed the remainder of the recipe as written.

The sauce in this recipe was too sweet. I think it would be better if the honey was eliminated or there was a touch of crushed red pepper. As the recipe is written the sauce is just too mild and sweet. The sliders on the other hand were delicious and everyone in my family enjoyed them. My husband thought that they were actually better the way that I ate them without the pita.

This recipe is currently not available online, but can be found in the January 2013 issue of Parents magazine.

December 26, 2012

Spicy Maple Baked Beans


Today was my annual after Christmas cleaning day. After the gifts are all unwrapped comes the fun part, finding room for everything. So I spent the day cleaning, organizing and moving new toys etc. into their proper places. Luckily I had already spent the Sunday before Christmas taking an entire carload of items to donate, so I had made lots of room for new toys. I have always been adamant with my kids that in order for them to receive new gifts they have to donate some of the toys that they don't play with anymore. That way my house stays organized and they understand that donating toys to those in need is a good thing. The one task that I don't enjoy is all the laundry and dishes from guests and cooking. I don't have a dishwasher so everything has to be washed by hand. On a normal day it isn't a big deal, but on the holidays it can be a little overwhelming. Luckily I am on the last load of laundry and then I plan on allowing myself to relax and read a book this evening. I have definitely earned it. Last week I made a number of dishes to freeze for meals this week so I could cut down on my after Christmas cooking. One of the new recipes that I tried was for Spicy Maple Baked Beans from the January issue of Food and Wine magazine.

This recipe has 19 ingredients. According to the recipe is takes 3 hours and 30 minutes, 45 minutes of which is active and makes 8 to 10 servings. First things first I do not understand how this recipe states that it takes 3 and a half hours. If you follow the directions it should take no more than approximately an hour and 45 minutes. Maybe they are taking an additional almost two hours to slice the hot dogs, or I am completely missing something. I did have to make a few modifications. I have never been able to find canned navy beans in my area. So instead I used plain white beans, which while slightly different worked just fine. Since I eat gluten free I made sure that the Worcestershire sauce that I bought didn't include wheat. Additionally I used gluten free beer, since regular beer has gluten.  I used a dutch oven to cook the beans which worked very well, especially keeping the lid half open. I followed the remainder of the recipe as written.

These beans were very popular in my household. My husband thought that they were the best baked beans that he had eaten in a long time and ate multiple bowls. Since the dish had hot dogs, my two boys were quite excited and ate a number of leftovers the next day. The best part was that since it made 10 servings I had enough for a meal last week plus leftovers for an entire other meal after Christmas.

For the recipe go to Spicy Maple Baked Beans.

December 24, 2012

Carrot Cake Pancakes

IMG_0152-2_zps6f4bb266

I spent 4 hours last night wrapping presents. Luckily I got everything wrapped and my two kids are now asleep so I can finish up with stockings and then go to sleep. I would love to say that I find the thrill of the pre-holiday prep exciting, but I don't. I'm a perfectionist so I tend to spread myself way too thin. For example last night while wrapping presents I was dying my hair since it was the only time I had. I decided to tip-dye my hair turquoise, which looks great (I know everyone is now dying to know what I look like-blue hair and all :). My house is now quite and this is my favorite time of the holidays, when my kids are in bed and I can relax since everything is done until I cook tomorrow. Everything is quite and perfect. And I'm eating pancakes, no joke, I love them. Last week I tried a new recipe for Carrot Cake Pancakes from the December issue of Southern Living magazine, which looked like a great recipe to make gluten-free.

This recipe has 13 ingredients. It takes 50 minutes of total time, 40 minutes of which is active and makes 24 pancakes. Since the original recipe isn't gluten-free I made a number of changes. First I switched out the regular all-purpose flour for gluten-free all-purpose flour. I used low-fat buttermilk instead of full fat since that is the type I normally use in recipes. The recipe states that 1 pound of carrots equals 2 cups. I found that it took me far less than 1 pound of carrots to make 2 cups of shredded. Finally, I chose to top my pancakes with butter and maple syrup instead of the mascarpone cream suggested by the recipe. The cream looked way too rich for a breakfast food. I followed the remainder of the recipe as written.

These were really fun pancakes. My kids liked that they tasted like carrot cake, but were pancakes. I liked that they were delicious with just butter as a topping and could be eaten as a breakfast or a dessert. I found the nuts a little rich, I think if I made the recipe again I would chop them smaller or reduce the amount.

For the recipe go to Carrot Cake Pancakes.

December 21, 2012

Cinnamon Streusel Coffee Cake

IMG_0127-2_zpsd541aa5a

Today was my oldest son's first day of winter break. My two boys spent the day fighting over who could play with which action figure, while watching the same episode of their favorite cartoon for the 50th time. They have watched the show so many times that my oldest can recite the words, honestly, I probably could too. I made pancakes for lunch since the weather has turned nasty today. I love snow, just not the biting cold wind that has gone along with it for the entire day. It just felt like a breakfast for lunch kind of afternoon. This seems to be a pattern that I have been in for the last couple of weeks. Whenever I am stressed or I am not feeling up to par, I bake/make breakfast foods. There is something very home-like and comforting about baking a coffee cake or pancakes. It instantly makes you feel better about whatever is bothering you. This week I made a new recipe for Cinnamon Streusel Coffee Cake from the January 2013 issue of Family Circle magazine, which looked perfect for a cold winter morning.

This recipe has 14 ingredients. It takes 65 minutes of baking, 20 minutes of prep and makes 16 servings. I made a number of changes to this recipe. First, I made it gluten free since I can't eat gluten. For the flour I used a brand of gluten free all-purpose flour which uses coconut flour as the base, it works great in baking. Instead of a 9 inch pan I used a cake pan to bake the coffee cake. I prefer the shape of coffee cake done in a cake pan, I think it looks prettier on the plate. In order to ensure that the coffee cake didn't stick I cut a piece of parchment paper and then sprayed it with cooking spray. This method is a no fail and I use it with any type of cake or torte. Finally, I found that I had to tent my cake with foil to prevent over browning and added an additional 5 minutes to the baking time. I followed the remainder of the recipe as written.

My two boys devoured this coffee cake. It was very light and airy and was perfect with a cup of coffee in the afternoon. Since I used gluten free flour it was a little rich, I think in the future I would cut down on the butter to compensate. The streusel topping was the best part of this recipe and made for a delicious crunchy crust.

For the recipe go to Cinnamon Streusel Coffee Cake. (registration required)

December 20, 2012

Black Bean Soup

IMG_0145-2_zps69d3b701-1_zps60cf6ade

Today was the last day of school for my oldest before winter break. My younger son spent the day unhappy that his brother was having a party at school and believing that our new puppy was getting more attention than him. I have a feeling it is going to be a long break. Due to last minute changes I will be hosting Christmas this year so tomorrow is going to be spent cleaning and prepping. I am planning on keeping things low key, so it should be an easy holiday. I hope. As I seem always be since having kids I will be spending the weekend getting last minute gifts that I fully intended to buy weeks ago and time just got away from me. And wrapping. My mother was a beautiful gift wrapper. She would buy fabric and make handmade bows. They really were works of art. I seem to have inherited none of this gift. When I was younger I worked in the executive office of a dept store and had to fill in at the gift wrapping counter during the holiday rush. I was horrible at it and was told to help costumers, not to wrap. That was when I decided that I was destined to be someone that is great at picking out the perfect bag, no wrapping involved. So wish me luck with my gift wrapping this weekend. This week's meal have been mostly stews and soups, since it has been cold and rainy. I have really not been in the mood for much else with the end of my cold still sticking around. Last night I tried a new recipe for Black Bean Soup from the December issue of All You magazine, which with 3 grams of fat and 12 grams of protein looked like a great pre-holiday meal.

This recipe has 8 ingredients. It takes 1 hour 45 minutes of cooking time, 10 minutes of prep and makes 4 servings. I had no problems finding any of the ingredients at my local grocery store. Instead of quick cooking the beans, I soaked the black beans overnight. I find this method much easier and requires less effort. I let the beans cook for longer than the hour and a half suggested, probably closer to two full hours. Adding the citrus juice at the end of the cooking time really does add to the dish and I definitely suggest adding the step. I did not add sour cream to my serving, but I did to my boys. I followed the remainder of the recipe as written.

With only 217 calories and 3 grams of fat per serving this recipe is a great healthy meal option. It is especially great given that next week is Christmas and I will inevitably be overeating, so something light and filling this week is essential. My two boys were skeptical until they ate their servings and then loved it. My husband's only complaint was that he would have preferred not to have the tomato chunks, but he never likes chunks of tomatoes in recipes.

For the recipe go to Black Bean Soup.

December 19, 2012

Chipotle Pork and Sweet Potato Stew with Cornbread


Photobucket

Tomorrow is my oldest son's last day of school before winter break. Of course I completely forgot to buy a teachers gift or something for his bus driver until tonight. Thank you gift cards, you are so easy and convenient for last minute gifts. Normally I am ahead of schedule and have all my gifts bought ahead of time. This year however I seem to be behind; just today I finally got the last of Christmas cards addressed. Of course they will arrive to my family back in Washington probably after Christmas day, but it's the thought that counts. Now I have to actually think of what to make for Christmas eve and day. You would think that since I am a food blogger I would have everything figured out, but things had to change last minute thanks to car issues and now I am going to spend part of the next couple of days trying to figure out meal plans. That's okay though since that is something I enjoy along with the actual cooking. I'm still getting over a nasty cold so I have been making stews and soups all week. Earlier in the week I tried a new recipe for Chipotle Pork and Sweet Potato Stew with Cornbread from the January 2013 issue of Family Circle magazine.

This recipe has 18 ingredients. It takes 6 hours of cooking time, 15 minutes of prep and makes 6 servings. I did make a few modifications to the recipe. Since I don't eat gluten I made gluten-free cornbread. It worked just as well as it would have with wheat and the texture was perfect. For the flour I used gluten free all-purpose flour. I made my own chicken stock as I normally do, which I make un-salted so I had to add more salt than the recipe suggested. Instead of spraying the bowl with cooking spray I used a slow cooker liner. Finally, I added only one tablespoon of cilantro instead of two since my kids were eating this dish. I followed the remainder of the recipe as written.

The pork in this recipe turned out very tender. My husband and two boys fell in love with this dish and ate their entire servings and most of the leftovers.  I like that per serving the recipe has 34 grams of protein and 472 calories. Plus it was a great, warm meal as the weather turned cooler.

For the recipe go to Chipotle Pork and Sweet Potato Stew. (registration required)


December 18, 2012

Chicken Brunswick Stew

IMG_0110-2_zps5fef214d

Cold season has hit my house hard this week. Of course, like always I have gotten sicker than everyone else. It probably has a lot to do with the fact that the bus stop for my oldest son is over a block away and I have to wait 10 minutes in the freezing cold every morning and afternoon. If you are wondering why I wait 10 minutes, I tried leaving later a few times and of course the bus was early. So I have a 10 minute span of when the bus 'might' come. Last winter as some of you probably know I was lucky (not) enough to come down with pneumonia and ended up in the hospital. Apparently being very small with a not so fabulous immune system isn't so great as you get older. And by older I mean 30. Ever since I turned 30 it seems my health has taken a nose dive. Low potassium, low iron, gluten intolerance, migraines you name it. So this week I am suffering through a nasty cold with a hyper four-year-old at home and making lots of stew, soup and chili. There is something so comforting about warm foods when you feel not at your best. This week I tried a new recipe for Chicken Brunswick Stew from the January 2013 issue of Family Circle, which looked like perfect comfort food.

This recipe has 11 ingredients. It takes 6 hours on high in the Crock-pot, 10 minutes of prep and makes 6 servings. I actually had a hard time finding canned butter beans in my area. I had to go to multiple stores to find the beans since they seem to be scarce in my city. As I always do I used a crock-pot liner instead of spraying cooking spray in the slow cooker bowl. I find the liners to be much easier to use and make a lot less dishes to wash. Make sure to add additional salt before serving. Since the recipe utilizes potatoes it needs a decent amount of salt to have flavor. I followed the remainder of the recipe as written.

My husband was very impressed with this recipe. It turned out very tender and the chicken literally fell off the bone before being shredded. I really don't serve okra often, since it can become slimy when cooked. However, the okra in this recipe was cooked perfectly and delicious.  Brunswick stew is one of my husband's favorite dishes and this recipe was definitely a hit.

For the recipe go to Chicken Brunswick Stew.


December 17, 2012

Lentil Sloppy Joes

Photobucket

I can't believe that Christmas is next week. This month/year have gone by so quick! I am taking a laid back approach to the holidays this year. As I have gotten older I have realized that all the craziness of the holidays that I put myself through when I was younger just isn't worth all the stress. My boys are now 4 and 6 and I fully expect to enjoy Christmas instead of obsessing about everything being perfect. Things will still be great, even if the presents aren't perfectly wrapped and dinner is simple, yet still delicious. This year I am determined to enjoy my kids and the time that I have with them. I am old enough now to realize that these moments are fleeting and I would rather enjoy the time than run around making myself tired and cranky. Since next week will be so busy I have been making meals that are easy to put together, while still being nutritious and flavorful. Last week I tried a new recipe for Lentil Sloppy Joes from the December issue of the Food Network Magazine, which looked like a great way to add fiber and iron into my family's diet, while still being low in calories.

This recipe has 15 ingredients. It takes a total of 1 hour 10 minutes, 30 minutes of which is active and makes 6 servings. I did decide to make a few changes to the recipe. First I was not motivated to make ground beef, so I substituted ground lamb instead. Secondly, since I eat gluten free I used gluten free hamburger buns. I would normally make them from scratch, but this time I bought store bought. I chose to use sliced pickles, but not the pickled jalapeno peppers. The recipe suggests that you may need to add up to an additional cup of water in order to cook the lentils, but I did not need to make this addition. I did find that the lamb was a little rich, but a mixture of lamb and beef would be perfect. I followed the remainder of the recipe as written.

I was surprised how great these sloppy joes turned out. I wasn't sure how the lentils would taste, but they worked great with the meat and were a good way to save fat and calories. My husband added jalapenos to his serving and he thought that they were a great addition. If you like spicy foods this would be a great way to add some heat. 

For the recipe go to Lentil Sloppy Joes.

December 16, 2012

Stewed Beans

Photobucket

As I have talked about before we eat a lot of beans in our house. I love that beans can be used in so many different ways and that they are a great source of protein. It doesn't hurt that they are also inexpensive and make for numerous leftovers. When I first met my husband he had really only eaten pinto and black beans. Pinto beans are very popular in West Virginia and almost any home cook has a recipe. Having grown-up in Seattle I had never really made anything other than chickpeas and kidney beans in vegetarian chili. Luckily after we got married I learned that there are a vast array of beans that can be used in so many different recipes. One of my favorite ways to prepare beans is stewed, it is easy and delicious. Last week I tried a new recipe for Stewed Beans from issue Number 152 of Saveur magazine, which looked like a great vegetarian meal option.

This recipe has 17 ingredients. It takes 2 hours of total time, 30 minutes of which is active and makes 10-12 servings. I had no problems finding any of the ingredients at my local grocery store. I did adjust some of the cooking times on the recipe. I cooked the onion mixture for a full twenty minutes to ensure that the onions fully caramelized before adding the spices. Additionally, my total cooking time was 1/2 hour longer than suggested. I tasted the beans as the recipe was written and I felt that the chickpeas needed a longer cooking time so I put them back on the stove for an additional 30 minutes. Finally, this recipe will need a lot of salt added once it is completed. The flavor is delicious, but it definitely needs salt to bring out the flavors fully. I followed the remainder of the recipe as written.

While this recipe takes a bit of planning and cooking time the results were worth the time spent. The beans were very flavorful and my whole family, including my two boys enjoyed them. My husband added hot sauce to his serving and it really did make the beans taste even better. I would suggest this addition if you like spicier foods as it really did bring out the taste of the beans. Overall a great vegan recipe full of protein and makes enough for multiple meals. 

For the recipe go to Stewed Beans.

Flourless Chocolate-Coconut Drops

Photobucket

I love chocolate. Not just a little bit, but I literally eat a dark chocolate candy bar every weekend when I go grocery shopping. Since I have such a large sweet tooth I also workout on the treadmill for an hour a day and rarely sit down until the evening rolls around. I don't believe in denying myself the foods that I love, but instead I eat everything in moderation and make reasonable substitutions when available. It helps that I also am now gluten free so I snack a great deal less. The pre-packaged gluten free options are very expensive and honestly most of them are not delicious. I would love to say that I am always motivated to cook and bake from scratch, but I am human and oftentimes lack the desire to go in the kitchen and make myself something to eat. I try to stick with recipes that are easy to make and take little prep and cooking time. Last week I tried a new recipe for Flourless Chocolate-Coconut Drops from Everyday Food magazine, which looked like an incredibly easy gluten free snack recipe.

This recipe has 7 ingredients. It takes 30 minutes of total time, 15 minutes of which is active and makes 2 dozen cookies. For whatever reason every store in my area is currently out or no longer stocks dutch process cocoa powder. Due to this fact I used regular cocoa powder. I had no problems finding any of the other ingredients and made no substitutions. It took a bit of mixing to combine the ingredients and my cookies came out perfect so don't worry if you have to stir numerous times to ensure that all the cookies are fully mixed. Finally, watch the cookies in the oven. Mine took exactly 15 minutes to bake and would have burned left in any longer. I followed the remainder of the recipe as written.

These cookies turned out delicious. I like that they don't use flour so they are gluten free without having any aftertaste from using gluten free flour. The texture is crispy on the outside and soft on the inside which is both adult and kid friendly. These cookies would be great for a holiday cookie plate for a friend or family member eating gluten free while still yummy enough to serve at a party for all types of guests.

For the recipe go to Flourless Chocolate-Coconut Drops.

December 13, 2012

Chicken Teriyaki Plate

Photobucket

Our house has been crazy the last couple of days. My husband and I are huge animal people and have had dogs since before we got married. Last year our older female dog passed away and we are now down to two senior dogs. With our male dog having thyroid issue we thought it might be nice to have a smaller dog which would keep his spirits up. So yesterday we picked-up and brought home a Pomeranian-chihuahua mix. He is tiny, fluffy and adorable. Luckily for my sanity he has already taken quickly to crate training and my kids have gotten along with him splendidly. This is the first animal that my kids have been around when it was brought home so they are very excited about their new pet. Since my family has been very busy I have been trying to keep my meals this week simple, but still flavorful. Earlier in the week I tried a new recipe for Chicken Teriyaki Plate from the December issue of Food and Wine magazine which looked like a great sweet chicken recipe.

This recipe has 11 ingredients. It takes a total time of 1 hour and 45 minutes, 45 minutes of which is active and makes 4 servings. I had no problems finding any of the ingredients at my local grocery store. I did make a number of changes. Instead of keeping my chicken thighs whole, I chose to use skinless-boneless thighs which I cut into one inch pieces. This made my total cooking time much shorter, while still having the same great taste from the homemade teriyaki sauce. For the lemon-lime soda I used soda made with real sugar which I prefer over brands made with high fructose corn syrup. I would have normally served this recipe over brown rice, but I ran out so I served it over white rice instead. I followed the remainder of the recipe as written.

My family loved this recipe. The chicken was tender and the teriyaki sauce was the perfect blend of sweetness. I think the modification came out great and I would make it the same way again. It looked and tasted like something that would come out of a great restaurant while taking little time and effort. My husband was the most impressed, he was totally won over with this dish. Definitely a keeper!

For the recipe go to Chicken Teriyaki Plate.

December 12, 2012

Gluten Free Pecan Apple Pancakes

IMG_0012-2

My husband thinks that there is something wrong with me because I love mornings. I pop out of bed and am ready to start my day. While most people take a while to wake-up, as soon as I open my eyes I am awake. My oldest son is just like me. He wakes up early and reads books until the rest of the house starts their day. My youngest son on the other hand is just like my husband. He takes hours to fully be awake and is grumpy most of the morning. Since our mornings are so vastly different I try to make breakfast foods that everyone will love. The one food that everyone in my house can agree on is pancakes. My boys love them and so do I. Since going gluten free it has been hit or miss with finding suitable gluten free pancake recipes. Some have turned out great, while others have been flat and lacking any flavor. This week I tried a new recipe for Pecan Apple Pancakes from the December issue of Taste of Home magazine, which looked like a great breakfast recipe to make gluten free.

This recipe has 14 ingredients. It takes 10 minutes of cooking per batch, 15 minutes of prep and makes 18 pancakes. I had no problems finding any of the ingredients at my local grocery store. I did make a few changes. First off since I don't use mace often and don't like buying spices that I will not use I left it out of this recipe. I fully intended to make these pancakes with apples and even bought them at the grocery store. However, by the time I made the recipe my two boys had eaten all the apples so I left them out. Finally, since I eat gluten free I used gluten free all-purpose flour. I found that since I made these gluten free and left out the apples I had to increase the amount of flour by 1/2 cup. The pancakes were still runny, but worked well when made on the griddle. I followed the remainder of the recipe as written.

My youngest son and I loved these pancakes. They turned out sweet and almost crisp. With maple syrup and toasted pecans as a topping they were delicious. I was happy that they were easy to convert to gluten free and my kids didn't even notice that I had changed anything. I would definitely make these again.

For the recipe go to Gluten Free Pecan Apple Pancakes.

December 11, 2012

Stir-Fried Sweet-and-Sour Chicken

b3244fca43a511e282e122000a1f9aae_7

I miss living in an area with a vast number of restaurants. Growing-up there were restaurants on almost every block and pretty much every type of food you can think of was available. Now I live in a college town with tons of pizza and fast food. I am happy that one of the local pizza places now has gluten free pizza, so at least I can eat at one of the places in town. Since our dining out options are limited I have learned to make most dishes from scratch. The great thing is that many dishes are easy to replicate at home and taste just as good if not better than those available at restaurants. One of my favorite dishes to make at home is sweet and sour chicken. It is so much cheaper and you can modify the amount of fat. Last night I tried a new recipe for Stir-Fried Sweet-and-Sour Chicken from Everyday Food magazine, which with only 20 minutes of total time looked perfect for a busy weeknight meal.

This recipe has 10 ingredients. It takes 20 minutes of total time, all of which is active and makes 4 servings. I had no problems finding any of the ingredients at my local grocery store. Instead of cutting the ginger into matchsticks I chose to finely grate it. My two boys aren't fans of ginger when it is made into matchsticks so this modification insured that they would actually eat the dish. I did make a few more changes. I chose to use a whole Serrano instead of a half and I used closer to a half of a pineapple instead of a 1/4. Finally, I served the dish over brown rice instead of white since we rarely eat white rice. I followed the remainder of the recipe as written.

My oldest son really enjoyed the pineapple in this dish. I was happy that pineapple is inexpensive currently and the recipe took very little time to prepare. My husband thought the recipe was fine, but was very simple in taste. He would have preferred if the dish had more flavors other than ginger and apricot. At the table my husband and I added crushed red pepper to our servings and this helped to add more dimension to the recipe.

For the recipe go to Stir-Fried Sweet-and-Sour Chicken.

December 10, 2012

Sweet Potato Soup

cc36898842e711e29e6f22000a9e2992_7

This is soup and stew season in my house. During the fall and winter I make some sort of soup at least once a week. I love soup since it keeps you warm even when the weather is chilly outside. On the other hand I hate the cold. I am not one of those people that loves cold weather. While I find snow beautiful, I enjoy it inside with the heat cranked up. I am also always in huge wool socks and a sweatshirt all fall and winter. My husband always complains that our house is way too hot, to me it's still a little on the cold side. I think I must run on a different body temp than most people since I always seem to be the coldest person in a room. In order to combat my constant cold streak I love making hot meals. Soup is one of my favorite meals since it has so many variations and is so warm and filling. Last night I made a new recipe for Sweet Potato Soup from the December issue of Southern Living magazine, which looked simple and flavorful.

This recipe has 11 ingredients. It takes 1 hour of total time, 35 minutes of which is active and makes 8 cups. I had no problems finding any of the ingredients at my local grocery store. Instead of buying store-bought stock I used homemade stock made from the leftover Cornish game hen bones from Thanksgiving. I never salt my stock, but instead salt the recipe. This way I can control the amount of sodium that my family consumes. My local grocery store didn't have straight apple cider, so I bought apple cider and spice juice instead. I used my immersion blender to liquify the soup. I find this method much easier than pouring the soup into a blender and hoping not to get burned. I allowed the soup to cook for an additional 10 minutes after the soup was blended, instead of the 5 minutes suggested by the recipe. I followed the remainder of the recipe as written.

I was surprised by how well this recipe turned out. It is always hard to tell how sweet potato soup recipes will taste. Oftentimes they are bland or lack any type of flavor other than sweet potato. This soup was the exception. The chipotle pepper provided a great deal of flavor and the use of apple cider for the base was delicious. Even my two boys thought this soup was great and they can be hit or miss with soup.

For the recipe go to Sweet Potato Soup.

Oatmeal Brulee with Ginger Cream

333fc0c0420411e2837022000a1fa4bb_7

As I have discussed many times before, breakfast is the meal I struggle with the most. My natural tendency in the morning is to grab a cup of coffee and nothing else until the middle of the afternoon. The men in my house on the other hand wake-up very hungry. My two boys pop out of bed in the morning and want food right away. If I take more than 5 minutes, they start following me around asking why I haven't started their breakfast. Since my husband leaves for work at 6 in the morning I try to make sure that the meals I make for breakfast are quick and easy. I really don't have the energy to go full out at 6:30. However, on weekends I like to take the time to make a more labor and time intensive breakfast. Weekend breakfasts allow my family to talk about what has happened during the week and be together. This weekend I tried a new recipe for Oatmeal Brulee with Ginger Cream from the December/January issue of Taste of Home magazine, which looked delicious and perfect for fall.

This recipe has 15 ingredients. It takes 40 minutes of total time, 30 minutes of which is active, and makes 4 servings. I had no problems finding any of the ingredients at my local grocery store. Since I eat gluten-free I used gluten-free oats, however, regular oats would work just as well for people who can eat gluten. I haven't seen fresh raspberries in months so I bought frozen. The broiler on my oven has been broken for years so I used the broiler on my toaster oven. My total broiling time was longer since I used this method, about 15 minutes total. Instead of using butter to grease my ramekins, I used non-stick spray. I followed the remainder of the recipe as written.

I loved this recipe. The ginger cream was delicious and the crusty sugar topping was very popular with my two kids. Plus, the time was reasonable for a weekend meal and the oatmeal was perfect with hard boiled eggs for breakfast. This is definitely a recipe I would make again.

For the recipe go to Oatmeal Brulee with Ginger Cream.

December 9, 2012

Caramelized Garlic and Dry Sherry Chicken

def274243fd111e2a95722000a9f09e9_7

I can't believe that Christmas is so close. I thought that I was doing well with holiday prep until I realized that I haven't even started to think about sending out my Christmas cards. It seems other people are more on top of their game since I have already received a number of cards from people that got their cards out early. I am determined that I will have mine sent out by the end of the week. My kids are in full on Santa mode. Everything is about Santa, they live and breath everything to do with Christmas. Today we talked about what I was going to make for Christmas, which to me seemed important, but to my two kids it just distracted from the presents. Food is an after thought. Regardless of what my children think I will make a great meal and we will enjoy it thoroughly. Until Christmas rolls around I am trying to keep our meals simple and light. Last week I tried a new recipe for Dolore's Brokenhearted Chicken from Saveur magazine, which looked perfect for a weeknight meal.

This recipe has 9 ingredients. It takes an hour and 10 minutes of total time, 30 minutes of which is active and makes 4 servings. I had no problems finding any of the ingredients at my local grocery store. Instead of buying a whole chicken, I bought chicken thighs. Honestly, I hate cutting-up chickens and I prefer thighs to most other cuts. As I always do I used a stainless steel skillet. They work much better at browning chicken than non-stick pans. Since I don't eat gluten I used gluten-free all-purpose flour instead of regular wheat flour. Make sure to baste the chicken during the time in the oven. This really does help keep the chicken moist and flavorful. I followed the remainder of the recipe as written.

My two boys were big fans of this recipe. The chicken came out tender and the caramelized garlic was delicious. The recipe was simple, but the sherry and garlic made for a flavorful dish. This chicken would work well with a simple side such as green beans or rice pilaf. Overall, an easy roasted chicken recipe that is very child friendly.

For the recipe go to Caramelized Garlic and Dry Sherry Chicken.

Thanksgiving Recipes - Crustless Pumpkin Pie, Gluten Free Cushaw Pie and Individual Mashed Sweet Potato Casseroles

I love cooking for the holidays. Growing-up our house was always busy during the holidays with my mother cooking, cleaning and hosting. I never really understood how big my mother's family was until I went to other people's houses. My mother was the oldest of 12 kids and I have so many cousins that I would have to sit down and count it out to figure out the exact number. Needless to say, our house was always busy and even though I was technically an only child that was more in theory that actual practice. Every weekend there was either family at our house or we were visiting someone. Growing-up this led to a lot of jealousy on my part. I never really understood why I had to share my mother with so many other people. Now that my mother is gone and I have gotten a lot older I realize that some of my best memories involved growing-up in the constant chaos of a very large extended family. There was never a question of what to do, just who to do it with. You were never alone, which now that I have a family of my own and live far away from home I miss more than I would ever think possible growing-up. Baking and cooking is one way that I keep the spirit of my mother alive and well with my own family and this Thanksgiving I tried new recipes, mixed in with recipes I make every year. Here is a break-down of how Thanksgiving at my house looked.

I hate turkey. I know that sounds horrible, but I think I may be one of the few Americans alive that hates turkey. I have tried to grow to love the poultry over the years, but I just can't do it. It's doesn't help that the leftovers last for days and I have never been a fan of turkey pot pie (I know I seem to not like any quintessiantal American food). So this year I decided to go outside the box. I made individual cornish game hens and my kids absolutely loved them! Here is a pic of the finished product:
bbe8c794363a11e28e5d22000a1f979a_7

The game hens went over very well and my youngest child ate a whole game hen all by himself. Plus the leftovers made for two great pots of homemade stock the next day.

For side dishes I made garlic buttermilk mashed potatoes, seen here:
6b0c404636fb11e2ab9022000a9f18e0_7

And Sauteed Brussels Sprouts with Bacon and Apples (link to recipe in text).
74b42950374711e2a9dd22000a9e29a7_7

And last minute I had extra sweet potato puree so I made individual sweet potato casseroles:
5cd10e1238d611e2ae7122000a9f0a14_7

I modified a recipe found here. I added extra marshmallows since my kids love them and slightly reduced the amount of orange juice to approximately 1 tablespoon.

For dessert I made two pies the day before Thanksgiving. I was kind enough to be given over 20 pounds of sweet potatoes and cushaw squash from a friend of my husbands. Thanks to this generosity I was able to make two pies and a side dish without spending any money, which I love! For the first pie I made crust-less pumpkin pie. I can no longer eat gluten so this was an easy way to make the pie gluten free. I followed this recipe and here is the photo:
9b7df470399b11e2bb3e22000a1fb8a8_7

I did let the pie cook longer than the suggestion, I would say closer to an hour. Part of the longer cooking time was due to the fact that I made one deep dish pie and a series of mini pies in small souffle pans.

The second pie I made was a gluten free cushaw pie. I combined two recipes to make this pie. The first recipe was for a gluten free pie crust. Here is the link. Be very careful when working with this crust. It takes time in the freezer to fully set, do not try to over knead it or it will be tough. Additionally, make sure to follow the directions where the crust is set between two pieces of parchment this is an important step and the only way that you will be able to move your crust from the counter to the pan. For the actual pie filling I followed this recipe.

That was my Thanksgiving. I was happy that all my recipes and dishes turned out delicious and I was surrounded by my family. I hope all my readers had a great Thanksgiving! 

December 8, 2012

Slow-Cooker Caribbean Beef Stew

e15326bc3ef211e2b19622000a1f9d89_7
The weather in my area has been unseasonably warm. It was almost 70 degrees on Tuesday and it has been making my kids a little bit wild. With the warm days it feels more like spring than almost Christmas. Even though the weather has been all over the place, I refuse to let it change my food plans. This is the time of the year when I make pumpkin cookies, eggnog baked good and most importantly stews. I love stews. They are delicious and comforting. I make them at least twice a month and they are a fall stable in my house. Since I now am eating gluten free I have had to find new stew recipes that work well with gluten free flours. This week I tried a new recipe for Slow-Cooker Caribbean Beef Stew from the December issue of the Food Network Magazine, which looked full of classic Caribbean flavor from the allspice and white pepper and perfect for a busy weeknight.

This reicpe 13 ingredients. It takes a total time of 7 hours and 15 minutes, 15 minutes of which is active and makes 4 servings. I had no problems finding any of the ingredients at my local grocery store. Since I don't use wheat flour I substituted the all-purpose flour for gluten free all-purpose flour. Crock-pots can be very hard to clean so I always use slow-cooker liners to reduce the mess. I let my stew cook on high for 7 hours. When I only put my potatoes in the crock-pot on low for 7 hours they never seem soft enough to me, so I normally cook my stews on high. Finally, I decided to top the servings with scallions for taste and presentation. I followed the remainder of the recipe as written.

Make sure to adequately salt this stew once it is done in the crock-pot. The recipe requires more salt than the recipe states. My husband and I really liked this stew. The flavor was great and the spiciness from the green chiles was delicious. My two boys thought it was a little too spicy for their tastes, but I added sour cream to their servings and then they ate it happily.

For the recipe go to Slow-Cooker Caribbean Beef Stew.

December 7, 2012

Spicy Turkey and Green Bean Stir-Fry

263013f83d9a11e28c3c22000a1fb85a_7

This time of the year is always crazy in our house. My youngest son turned 4 last week and between school, cooking and gift buying my time is very limited. I seem to always be running out of time and money. Since I bake a lot during the holidays I also try to make sure that my dinners stay at least somewhat healthy. Plus then I can let myself have more holidays cookies, right? I make a lot of chicken throughout the year. It is a great lower fat option and can be delicious in so many recipes. However, chicken can also get a little boring. I try to add in turkey and other poultry to keep my family's taste buds interested. This week I tried a new recipe for Spicy Turkey and Green Bean Stir-Fry from the December issue of the Food Network Magazine, which looked quick, low in fat, and filling.

This recipe has 12 ingredients. It takes 30 minutes of total time, all of which is active and makes 4 servings. I did make a number of changes. First, I have never seen 99 percent lean ground turkey in my area. The only types normally available are 85, 95 and 97 percent. So I bought the 85 percent lean ground turkey. Since my turkey was higher in fat I did not fry it in as much vegetable oil. Plus I drained my ground turkey after it was done browning. I eat gluten free so I used gluten free soy sauce. Always read your labels, since wheat is a top ingredient in many low priced soy sauces. After tasting the recipe as written, I changed a few things. First I doubled the amount of chile paste, soy sauce and added three garlic cloves instead of one. I also served it over brown rice instead of white rice. I stopped serving white rice about 6 months ago and now my two boys prefer brown rice. I followed the remainder of the recipe as written.

After all the changes this recipe worked much better. As the recipe was written it lacked flavor, but after an increase of the chile paste, soy sauce and garlic the taste worked. Finely grated fresh ginger would be another great addition to the flavor in this recipe. I always use magazine recipes as a starting point to making a better recipe. This is an example of a recipe that with a few changes works out well.

For the recipe go to Spicy Turkey and Green Bean Stir-Fry.

Gluten Free Eggnog Pancakes


Breakfast is the one meal that I always struggle with. I am horrible about grabbing a cup of coffee in the morning and then nothing else until the middle of the afternoon. After getting sick with pneumonia last winter I have changed my breakfast routine and attempt to eat breakfast every morning. Granted it's still a struggle. Some days I do great and others I glance up and it's 2 pm and all I've eaten is a brownie. Not so great. My two boys on the other are great breakfast eaters. They love pancakes, waffles and anything breakfast related. The only problem I have with them is that they get bored easily. If given the choice they would eat only sugar in the morning, pop-tarts, cookies you name it. I on the other hand want them to eat at least a little bit healthy, so I try to find a compromise. This week I tried a new recipe for Eggnog Pancakes from the December issue of Better Homes and Gardens magazine, which looked perfect for my family's breakfast needs.

This recipe has 7 ingredients. It takes 20 minutes of prep, 4 minutes of cooking per patch and makes 16 pancakes. I did make a few changes to the recipe since I eat gluten free. Instead of all-purpose flour I used gluten free all-purpose flour. The gluten free all-purpose flour that I use has coconut flour as the main flour and is great for cooking and baking. I love eggnog, but I hate all the fat, so I used low-fat eggnog which only has 3 grams of fat per cup. For the cooking I used a griddle, which I love for making pancakes. A griddle makes all the difference for getting golden beautiful pancakes. I followed the remainder of the recipe as written.

My two boys really loved this recipe. The pancakes baked up beautiful and neither of my kids noticed that I made them gluten free. I served their servings with butter and my serving with pure maple syrup. They were great either way and would be just as great with wheat flour. A great breakfast option for the holiday season.

For the recipe go to Gluten Free Eggnog Pancakes.

December 6, 2012

Beef and Apricot Stew


You are probably tired of me talking about stews. In the fall and winter months I make soups and stews at least once a week and I must say they are one of my favorite foods. If you read my blog regularly you know that both by how much I talk about my love of soups/stews and how many recipes I post. I promise that come spring I will be back to lighter fair, but until then stews will be a staple. It helps that both of my sons are huge stew eaters. So much so that my son's birthday was this past weekend and that was what he requested for his birthday dinner. Love that kid. Beef stew is probably my favorite type of stew. It is comforting and re-heats well for lunches. Last weekend I tried a new recipe for Beef and Apricot Stew from Everyday Food (the last issue-boo!), which looked simple and perfect for fall.

This recipe has 11 ingredients. It takes a total of 1 hour 55 minutes, 25 minutes of which is active and makes 6 servings. I had no problems finding any of the ingredients at my local grocery store with the exception of the lamb which was supposed to be the main ingredient. I have a horrible time finding lamb in my area. I am hoping that since we now have a new International market that I might have more luck. Since lamb was non-existent I substituted beef. Two things that I would change about this recipe. The ginger sticks weren't popular in my house. Instead of making sticks I would suggest grating the ginger on a micro plane. This would allow the flavor, but not make large sticks of ginger which my kids pretty much hated. Additionally, I would cut down on the amount of apricots to 1/2 cup. Using 3/4 of a cup of apricots was just too many. I followed the remainder of the recipe as written.

With an hour and a 1/2 in the oven this recipe takes a little bit of pre-planning. However, any good stew is worth the wait. If you implement the changes that I made above  I think this stew could be a great fall and winter staple recipe. Plus it's gluten free which works great for my dietary needs.

For the recipe go to Beef and Apricot Stew.

December 5, 2012

Gluten Free Chocolate Chip Banana Bread


My two sons are both in major growth spurts. It was inevitable that I would have two kids that ate a ton. I remember my mother complaining when I came home every day after school and raided the fridge before dinner. Granted I would still eat my whole dinner, but I also normally ate half of the ingredients for the rest of the weeks meals. I was lucky that I was very active and took after my dad who is 6'3 and very thin. My two boys are exact replicas of me with food. They snack the entire day, and I do mean the entire day. If being a grazer was an Olympic sport my sons and I would take all three medals. It is one of the things that has always annoyed my husband. When we were dating I would order the worst for me thing on the menu, follow it up with dessert and still only weigh 115 pounds when I got pregnant with my first son. Now time has taken a slight toll, but my metabolism is still very high (with help from my tread-mill which I use while watching TV). Since my kids and I eat so frequently I am always cooking or baking snacks. I try to make my snacks as healthy as possible, but I also do allow in the occasional treat. Now that I eat gluten free I have been trying out a large number of new baking recipes. A couple of months back I tried a new recipe for Gluten Free Chocolate Chip Banana Bread, which looked like the perfect recipe to use the blackened bananas sitting on my counter.

This recipe has 10 ingredients. It takes 1 hour 15 minutes of total time, 15 minutes of which is active and makes one loaf (approximately 16 servings). At the time that I made this recipe I had never seen coconut sugar at my local store, so I used regular granulated sugar. I am happy to report that since that time I have seen and purchased coconut sugar and have used it in many baking recipes and it works great. Since my two boys and I are not fans of walnuts in baked goods I left them out of this recipe. I did add chocolate chips. The recipe only uses 1/3 of a cup of dark chocolate chips, but that was just too little for my chocolate addiction so I used 3/4 of a cup. My total baking time was slightly longer than the hour suggested and I tented my bread the last 30 minutes of baking to prevent burning. I followed the remainder of the recipe as written.

My two boys absolutely loved this recipe. Often times gluten free recipes can be too crumbly or taste nothing like their gluten counterparts. However, this recipe was perfect and came out very similar to regular banana bread. It stayed moist and was perfect with a cup of tea for an afternoon snack.

For the recipe go to Gluten Free Chocolate Chip Banana Bread.

Butternut Squash and Tomato Posole


My blog readers are probably getting tired of me expressing my love of butternut squash, but I am going to do it again. I love butternut squash and fall cooking in general. As I have stated before the flavors of fall are comforting and delicious when the weather gets cold. Butternut squash to me is one of the staples of fall cooking. It is extremely versatile and can be used in pastas, soups, stews, chili and baked goods. It is also a great way to hide vegetables for kids in muffins and breads. Stew is a staple in my house during the fall and winter. I am always cold once the weather gets cooler so I make a lot of hot stews and soups in order to stay warm. When I first started cooking stews for my family we all fell in love with posole. It is a satisfying and delicious dinner and I make it frequently. Last week I tried a new recipe for Butternut Squash and Tomato Posole from Eating Well magazine, which looked like a great new vegetarian posole recipe.

This recipe has 11 ingredients. It takes a total of 45 minutes, 20 minutes of which is active and makes 5 servings. I had no problems finding any of the ingredients at my local grocery store. I normally buy whole butternut squash, but my store was out so I bought already cut butternut squash. The recipe suggests breaking up the tomatoes by hand, I find this messy. The method I always use is to place the tomatoes in a Ziploc bag, squeeze out the air and then crush the tomatoes by hand in the bag. Much less messy and an easy clean-up. I let my posole cook slightly longer than the recipe suggested. At 30 minutes the squash was more firm than I like. Make sure to fully rinse your canned beans. If the beans are under rinsed they will have a metallic taste, which is unappetizing. I followed the remainder of the recipe as written.

With 10 grams of fat and 9 grams of protein this is a satisfying meal without being high in fat. The fresh avocado and cilantro on top gives the posole a nice well-rounded flavor. I will say that this recipe isn't overly spicy so if you like spicier posole I would suggest adding a small amount of cayenne. This recipe in addition to being healthy is also inexpensive, costing less than two dollars a serving.

For the recipe go to Butternut Squash and Tomato Posole.

December 4, 2012

Creamy Turnip Soup


I love soup. There is something very comforting about sitting down with a nice hot bowl of great homemade soup. Growing-up my mother made a ton of soup. As I have talked about before we never had a lot of money so my mother did the most with what we had. We were always getting garden vegetables from friends and my mother would make delicious soup from them. While most kids would turn up their noises at turnips and parsnips, I feel in love with these root vegetables. My mother could turn a hated vegetable into something spectacular. A basic great soup is something to be savored. I am lucky that my two boys will pretty much try any type of food I put in front of them. I started giving them all the foods that my husband and I eat when they were still toddlers so they have never had a fear of new foods. I think this is an important way to teach your kids not to be afraid of trying new foods and new experiences in general. Recently I tried a new recipe for Creamy Turnip Soup from the December issue of Eating Well magazine, which looked like a great winter soup.

This recipe has 11 ingredients. It takes a total time of 45 minutes, 30 minutes of which is active and makes 6 servings. I had no problems finding any of the ingredients at my local grocery store. The turnips sold at my grocery store don't have the greens attached so I followed the suggestion in the recipe and used spinach. I found that when I tried to use my immersion blender on this soup the turnips were not soft enough. They needed to either by sliced much thinner or cooked longer than the time suggested. I let my turnips cook ten minutes more and then used my blender to puree the soup fully. This methods worked much better. I followed the remainder of the recipe as written.

I loved how creamy this soup turned out. The salad topping was the best part of the recipe. It allowed the soup to be less bitter and bring out the flavor of the turnips. Make sure to fully salt the soup at the end. It needed a good amount of salt to taste correct. If you want to make this soup vegetarian you could substitute the chicken stock for vegetable stock. I frequently substitute broths in recipes especially if I am cooking for vegetarian/vegan friends and family.

For the recipe go to Creamy Turnip Soup.

December 3, 2012

Roasted Chicken with Basil and Snap Peas


My oldest son is in love with roasted chicken. He is in a very picky food stage and has decided that he pretty much doesn't eat anything. It seems that every week he changes what foods he hates. Last month he loved soup, then this week he informed me that he will no longer eat any type of soup. I know a large part of it has to do with being in school. He is strongly influenced by what his friends like and dislike. I just wish that his friends were a little less finicky. Luckily I still have a couple years until my youngest starts school and the real food struggles begin. Roasted chicken has become a weekly staple in our house since my son loves it. While he might turn his nose up at everything else, roasted chicken still holds a place in his heart. Last week I made a new recipe for Chicken and Snap Peas from Everyday Food magazine, which looked perfect for my picky oldest son.

This recipe has 10 ingredients. It takes a total time of 30 minutes, 15 minutes of which is active and makes 4 servings. I had no problems finding any of the ingredients at my local grocery store. I did make a few changes. Instead of cutting-up a whole chicken (which I hate) I bought half thighs and half drumsticks. My boys prefer the drumsticks while my husband and I are bigger fans of thighs. The recipe uses 1/2 pound of snap peas, but I chose to use closer to a pound since my boys love them so much. Finally, the recipe states that it takes 8-10 minutes to brown the chicken. I used a stainless steal pan and it normally takes around 15-20 minutes to get a nice crispy skin. If you use a non-stick pan to brown your chicken I would suggest changing this method. In order to get beautiful crisp chicken skin you must use a regular pan. Non-stick pans are great for some things, but browning chicken is non one of them. I followed the remainder of the recipe as written.

My two boys really enjoyed this recipe. I wouldn't say that it has an intense flavor. The flavor from the basil in subtle, but when combined with the vinegar it works well. The chicken came out moist and not overdone. If you like more kick I would suggest adding additional red-pepper flakes up to a full teaspoon.

For the recipe go to Chicken and Snap Peas.

December 2, 2012

Gluten Free Berry-Orange Coffee Cakes


I have a soft spot in my heart for coffee cake. When I was first learning to bake my mom gave me one of her old cookbooks and I discovered coffee cake. I think I must have made at least one coffee cake a month for about six months. I was in love. As I became more confident in my baking skills I tried harder coffee cake recipes and once I was in college I discovered the great flavor that rum can add. There is something so great about sitting down with a great cup of coffee and homemade coffee cake. Regardless of the time of the day it just feels right. Now when I first went gluten free I thought I would have to give up my beloved coffee cake. Then I decided I would just learn to bake differently. I tried approximately 4 coffee cake recipes that were horrible. I almost gave up. Then I decided to try one more recipe and it came out perfect. So now I am back to regularly baking coffee cake again. On Thanksgiving morning I tried a new recipe for Berry-Orange Coffee Cakes from the November issue of Better Homes and Gardens magazine, which looked delicious and perfect for converting to gluten free.

This recipe has 15 ingredients. It takes 25 minutes of baking time, 10 minutes of prep and makes 15 cakes. I had no problems finding any of the ingredients at my local grocery store. When baking gluten free I always use muffin tin liners. Gluten free muffins tend to stick to the pan easier than their gluten counterparts. My favorite gluten free all-purpose flour uses coconut flour as a base and that it what I used in this recipe. I decided to use slightly less ginger than the recipe suggested, probably approximately one tablespoon instead of two. My two kids aren't big fans of walnuts so I left them off of the top of the cakes as well as the orange peel. Finally, since I made these cakes gluten free I found the baking time to be 5 minutes longer than the recipe suggest. I followed the remainder of the recipe as written.

These cakes were very popular on Thanksgiving morning. I left off the glaze on my servings, but put them on my boys cakes. They were flakier than regular wheat muffins, but had a great soft taste. My two in-laws were in town for the week and both thought that these cakes were delicious. If you like ginger you could use the full amount suggested by the recipe or you can reduce the amount like I did. Overall, a great gluten free baking recipe.

For the recipe go to Berry-Orange Coffee Cakes. (registration required)

December 1, 2012

Gluten Free Confetti Cornbread


Baking is one of my favorite past times. Even when everything else in my life is in chaos, baking is my outlet. I have talked before about how I deal with my stress by going into the kitchen and baking or cooking something for my family. It seems the older that I get the more that this trait seems to be appearing. My kids are both at stages where they fight all the time. Literally today it really did seem that the entire day they were fighting. I would love to say that I am one of those perfect mothers that never seems to be phased by their children's behavior. I'm not. When my kids get into these moods, I deal with the situation, give time-outs etc. and then turn to the kitchen and I bake. My kids have even begun to realize how mad I am based on the type of thing that I'm baking. Cookies means that I will only be angry for a little while. However, if mommy starts making a complicated pie or new recipe than they had better let me breath for a while. The hardest thing since going gluten free has been to re-adjust all my baking to no longer using wheat flour as a base. I have had a number of misses, but slowly I have become more confident in my gluten free baking skills. Recently, I tried a new recipe for Confetti Cornbread from All You magazine, which looked like a perfect baking recipe to make gluten free.

This recipe has 12 ingredients. It takes 35 minutes of baking, 25 minutes of prep and makes 24 pieces. I had no problems finding any of the ingredients at my local grocery store. Obviously since I made this recipe gluten free I made some significant changes. First instead of using all-purpose wheat flour I used a combination of brown rice and sorghum flours. I am happy to report that my local super store now has a large selection of gluten free flours and I am very thankful that even in my city I am able to find everything without having to pay a ton. I decided to keep part of the seeds from the jalapeno and add them to the cornbread. The extra bit of spice helped to enhance the flavor. In order to prevent my cornbread from burning I tented the pan the last 10 minutes of cooking. I followed the remainder of the recipe as written.

I have tried a lot of gluten free recipes in the last couple of months. Some have turned out spectacular. Other recipes have had to literally be thrown in the trash. This recipe modified well to being gluten free. Since there was fat from the butter and 3 eggs the cornbread didn't end up dry. I would recommend adding a small amount of milk to the batter if it is too dry due to the gluten free flour. A lot of recipes require additional liquid when being converted to gluten free.

For the recipe go to Gluten Free Confetti Cornbread.
Related Posts Plugin for WordPress, Blogger...