Showing posts with label paprika. Show all posts

August 12, 2013

Turkey Burgers with Orange Mustard Glaze

Turkey Burgers with Orange Mustard Glaze


I have a horrible attention span. When I was younger it was much better. As I've gotten older it seems to have gone downhill. It's particularly bad with regards to books and television. I have a bad habit of watching part of a season of a tv show and then stopping. Since my husband and I rarely watch live television I am able to look up the ending to most of the past seasons of shows that I catch up on online. I tend to do the same with books. I will read 3/4 of a book and then skim the rest. Part of the problem is that I have very high expectations. I will read pretty much any book, but I get bored with bad writing very easily. Honestly, there have been only a handful of books, television shows and movies within the last 10 years that have been able to hold my attention for long. I'm not sure if it has to do with me getting older or plots getting worse. Either way my attention seems to be going rapidly downhill. Luckily cooking still holds my interest for hours at a time. That's part of the reason that I love it, it changes every time I make a recipe. Today I tried a new recipe for Turkey Burgers with Orange Mustard Glaze from the Food Network Magazine.
Marble Arch Huntington, WV

This recipe has 14 ingredients. It takes 40 minutes of total time, all of which is active and makes 6 servings. I did make a number of changes to the original recipe. First I did not make 6 - 1/2 pound burgers. That is a lot of meat and my two kids are in finicky eating stages currently. Instead I made 4 burgers and they were about 1/3 pound each. For the grilling I used my indoor electric grill, I am still waiting for my husband to fix our outdoor electric grill. I made my own hamburger buns and used heirloom tomatoes for topping. The only type of paprika I had in my cupboard was smoked paprika, so that is what I used.
Marble Arch Huntington, WV

The glaze for these burgers was delicious. It was a perfect combination of sweet and spicy. If you like your food on the mild side I would suggest seeding the jalapenos. You could also decrease or leave out the chili powder. My kids chose to eat their burgers with the pickles on the burgers instead of the glaze. It was a nice way to make the recipe kid friendly.

For the recipe go to Turkey Burgers with Orange Mustard Glaze.

Turkey Burgers with Orange Mustard Glaze


Recipe Type: Main
Summary:
A simple turkey burger recipe with orange jalapeno mustard glaze. A nice combination of sweet and spicy, plus lower in fat than beef burgers.
Preparation Time: 0h, 25m
Total Time: 0h, 40m
Yield: Serves 6

July 27, 2013

Smoky Pork Tenderloin with Pineapple Mango Salsa

Smoky Pork Tenderloin with Pineapple Mango Salsa


Everyone else in my city seemed to be at our local Hot dog Festival today. I was not. I have been twice, but since I can't eat gluten the thought of throwing away a ton of hot dog buns isn't appealing. In addition the last time we went I was pregnant with my youngest and they wanted to charge me 10 dollars for a lemonade. We live in one of the poorest areas of the US, 10 dollars seems like a lot of money given that minimum wage is under 8 dollars an hour. Instead I took my boys to the library to enter their raffle tickets for the summer reading program and then when second hand store shopping. I love going thrifting. I grew up with a super frugal mother that made everything from scratch and stretched money better than anyone that I know. I try to be the same way. Right now we need a new desk for our dining room/home office area. I refuse to buy a desk that comes in a box, that I will have to put together and then will commence to fall apart in two years. Instead I am going to look for a desk that needs a little TLC and then redo it. I love redoing old furniture. I stained our dining room table this summer and it looks so much better. Today was a bust, but I might try the flea market tomorrow. Last week was a laid back food week. I haven't been motivated to be in the kitchen for a long amount of time so I have been trying recipes that takes less than an hour start to finish. I tried a new recipe for Smoky Pork Tenderloin with Pineapple Mango Salsa from Family Circle magazine.

Heirloom Mortgage Lifter Tomatoes


This recipe has 13 ingredients. It takes 45 minutes of total time, 15 minutes of which is active and makes 4 servings. I made a number of changes to the original recipe. First I made two tenderloins since with three males in my house one just wouldn't be enough. I tried cooking the two tenderloins in the oven and they just didn't want to completely temp in the oven, so I pulled them out and finished in a pan on the stove. Honestly for tenderloin I prefer grilling or pan cooking. Over cooked pork can be tough and the oven method is hard to get to temp evenly. The recipes states to let the pork cook until 145 degrees. With a 10 minute rest this is over done. Meat does not stop cooking once it's pulled out of the oven. It will continue to cook when it is resting, normally 5-10 degrees. I pull my pork out at 135 and it always hits temp after the rest period. Obviously it is up to you with what you feel comfortable feeding your family, but I prefer my pork to still be tender.

Garden Strawberries
Garden Strawberries


The pork in this recipe was delicious. The salsa was great also, but I was unimpressed with the mashed sweet potatoes suggested for a side. It was just too sweet and I didn't like the orange flavor. A regular baked potato would be a better side dish or a baked sweet potato if you prefer. As a side note I have decided to start including more photos in my post so there isn't 3 paragraphs with no visual break. I know that I can get bored with too many words, so I am going to make an attempt to show a little bit of my life outside of the kitchen. Today it's photos of my garden, but in the future it will be a variety of scenes from my city and life. Hopefully that will be a little easier to read and give my readers a glimpse into West Virginia life.

For the recipe go to Smoky Pork Tenderloin with Pineapple Mango Salsa. (registration required)

May 29, 2013

Bring the BBQ Flavor Indoors: Cajun Slow-Cooker Pulled Pork

Click for Recipe for Cajun Slow-Cooker Pulled Pork
Cajun Slow-Cooker Pulled Pork


I ate popcorn for dinner tonight. The weather has been hot and sticky, making me not in the mood for most food. I did make a chicken recipe for my husband and youngest son, but nothing heavy for me. Every summer it's the same. It takes a couple of weeks after the weather gets warm for my body to adjust to eating normally. Even after I adjust I still eat far less than during the cooler months. I do eat a lot of salad and ice cream, not the greatest food options, but cool and refreshing none the less. The males in my family never seem to be affected by the weather, they eat a ton year round. BBQ is one of their favorite foods, they literally love it in the dead of winter through the summer heat. This week I tried a new recipe for Cajun Slow Cooker Pulled Pork from the June 2013 issue of the Food Network Magazine.

This recipe has 12 ingredients. It takes 30 minutes of total time (plus 8 hours in the slow cooker), 20 minutes of which is active and makes 8 servings. I did make a few changes to the original recipe. First, I made my hamburger buns from scratch. I gave up buying hamburger buns a few years back, it is so much cheaper to make them at home. Whenever I make meat in the slow cooker I always brown my meat first. Sear it quickly in a pan on the stove, browning it on all sides in a little bit of olive oil. This step allows the meat to seal in its juices and keep it moist during cooking. Make sure to add the meat fat side up, this will also allow the meat to not become tough.

My husband really enjoyed this recipe. He is a big fan of andouille sausage and this recipe does a great job of combining the sausage with the pork shoulder. The flavors blend well together and it is a nice change of pace from traditional BBQ recipes. Best of all it is all done indoors and the clean up work is very simple.

For the recipe go to Cajun Slow Cooker Pulled Pork.

March 24, 2013

Recipe For Chicken Salad with Capers

Click for Recipe for Chicken Salad with Capers on Rye Bread
Chicken Salad with Capers on Rye Bread

When my husband and I were first married I struggled with leftovers. We would forget to eat them or I just re-heated everything in the microwave. I never really thought past the actual food as it was. Then after having kids I realized that I needed to start using leftovers in a more efficient way. With two boys if I serve the exact same dish two days in a row they groan or refuse to eat it. However, if I reinvent it into a new dish they embrace it wholeheartedly. So I have learned to make multiple meals from one recipe. Today I made chicken salad with capers from the leftovers of the Roasted Chicken with Parsley Caper Pesto from last week.

I made two versions of the chicken salad. For the first sandwich pictured above I made rye bread sandwiches. Here are the ingredients I used:
  • 3 cups leftover chicken
  • 2 tablespoons capers
  • 2 dill half spears, chopped
  • a small pinch of cayenne pepper
  • 1/4 teaspoon pepper
  • a pinch of paprika
  • enough mayo to make desired consistency
  • 1/2 of a small gala apple, chopped
  • small squirt of dijon mustard
Click for Recipe for Chicken Salad with Capers on Gluten Free Bread
Chicken Salad with Capers on Gluten Free Bread

For the gluten free sandwich shown above I followed the same recipe with the addition of dill seeds. The dill seeds really did help to bring out the flavor of the salad.

My husband and oldest son enjoyed their sandwiches with arugula. I had mine with just the chicken salad. Overall this was a great way to use a recipe to make two separate meals.

Here is the link to the post for the Roasted Chicken

January 19, 2013

Shish Taouk (Spiced Chicken Kebabs with Garlic Yogurt Sauce)

IMG_0324_zpsefdfe7fd photo IMG_0324_zpsefdfe7fd-1_zps121a86d8.jpg

As I sit here writing this I am debating whether or not I am motivated to bake cookies. It has been a long day and I'm exhausted, but I also have a horrible sweet tooth. I would love it if I could eat all the snacks at the grocery store, but since I can't eat gluten it severely limits my snacking options. There are many days like today when I would love a snack, but lack the motivation to actually make anything. It doesn't help that my 6-year-old informed me today that he was tired of gluten free snacks. I agree with him that many gluten free snacks just taste like a not exactly right counterpart to the more delicious gluten equivalent. However, in order to combat the difficulties that gluten free living can bring about (one of the worst is eating out, I love steak, but when it is always the only thing I can eat it gets a little old), I make sure that the meals that I cook are satisfying and filling. Last week I tried a new recipe for Spiced Chicken Kebabs with Garlic Yogurt Sauce from issue Number 153 of Saveur magazine.

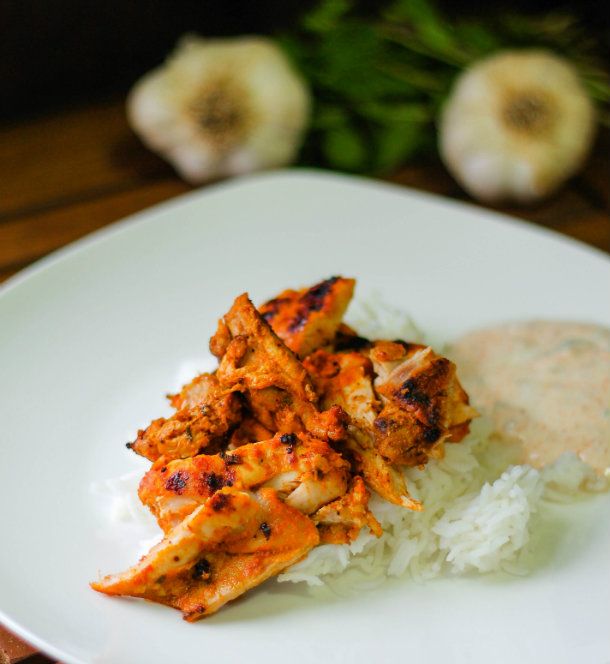
This recipe has 12 ingredients. It takes 2 and a half hours of total time, 30 minutes of which is active and makes 4 servings. As you can see from the photo I made a number of modifications to this recipe. First I didn't want to buy new skewers to grill the kebabs. I know that sounds odd, but I try to save money wherever I can and so I chose to change the recipe. Instead of cutting the chicken thighs I kept them whole and then when they were finished grilling I sliced them into pieces. Additionally, I used an indoor grill on the sear cycle to mimic a charcoal grill without freezing outside during the winter. I made one other major modification. I strongly believe in using the ingredients that I can find locally. I'm not against ordering things on the Internet, but I also try to be as frugal as possible. With this in mind instead of searching online and paying a large amount to purchase Aleppo Pepper I searched and found that I could substitute 4 parts paprika to one part cayenne. I did the math to make the proper adjustments and used the substituted spices. I followed the remainder of the recipe as written.

Even with all my modifications this recipe turned out very well. The flavor of the chicken was delicious and the yogurt sauce was slightly spicy with a great cooling flavor from the mint. I wasn't sure if it would work out since I didn't make the chicken as kebabs, but I was very happy with the end result. The yogurt sauce was also delicious with the leftover roasted chicken I had from another recipe and it is something that I will play around with as a sauce in future recipes.

For the recipe go to Shish Taouk.

January 17, 2013

Crispy Chicken Thighs with Pasta and Pesto


My youngest son has decided that he no longer eats cheese. This is the same son that last year would eat an entire box of macaroni and cheese. It really is hard to keep up with the food preferences of everyone in my house (my husband included). It has gotten to the point that it can change on a daily basis, especially with my oldest. If a friend of his decides that they don't like cheese, than he no longer likes it either. I can handle my own children, but it is almost an impossible battle once they start school and begin being influenced by outside forces. However, I am also stubborn and hold my ground, so I still serve cheese. I am a firm believer that my children eat the same meal that we do, if they don't eat they aren't allowed any of the homemade snacks that I make almost daily. That being said I also don't require them to finish their plate. They have to try at least everything that they are served. 99 percent of the time they eat the rest of their serving. The other 1 percent of the time they hate the dish and that is fine also. The one dish that my whole family loves is roasted chicken. Over the years my children have loved and hated almost every food except chicken. This week I tried a new recipe for Crispy Chicken Thighs with Pasta and Pesto from the January 2013 issue of Southern Living magazine.

This recipe has 8 ingredients. It takes 45 minutes of total time, 15 minutes of which is active and makes 6 servings. I had no problems finding any of the ingredients at my local grocery store. Since I eat gluten free I did substitute gluten free rigatoni for the cellentini called for in the recipe. Additionally I used smoked paprika, I love the taste and it is great with chicken. I always use a stainless steel pan to make roasted chicken. It is great to put in the oven and you know when the chicken is browned since it will release (it will stay stuck to the pan until it is browned). It is the best way to get great crispy chicken, just make sure not to flip the chicken before it releases, you can always turn down the heat if you believe that the chicken is starting to brown too quickly. I followed the remainder of the recipe as written.

The pasta under the chicken in this recipe was delicious. The pasta and pesto were my favorite part. The chicken was your average pan roasted chicken, which was very kid friendly and my children loved. The real star of the recipe was definitely the pesto, just make sure to adequately salt, it really will need it I promise. The pesto would also be delicious with chicken (either with or without skin).

For the recipe go to Crispy Chicken Thighs with Pasta and Pesto.

January 5, 2013

Rajma - Northern Indian Kidney Bean Masala Stew


I am feeling blah. For whatever reason January is never a great month for me. I don't know why, but I have horrible luck with appliances breaking and things going generally not in the right direction during this month. People also seem to be less than pleasant right now also. Today at the grocery store I was in the frozen food aisle. I was looking at some vegetables and the aisle was very narrow thanks to a display the store had set-up. When I was walking away I noticed there was a woman behind me that I hadn't noticed. Honestly, after two kids when I'm at the grocery store without them I tend to get in my 'me' zone. It is literally the only couple of hours during the week that I have to myself. I immediately apologized to the women and asked if I was in her way. Her response took me a little off guard. This woman was well into later life and used a profanity at me followed by the line 'of course you were.' Okay. I can understand if I was in her way. However, she could have said excuse me or brought it to my attention since I in no way say her since the door was open to the frozen food case. Second, why pull out the s word. Not necessary at all. I hope that my kids will grow up knowing that politeness is always the best response. Overall, I think so far I am already ready for the month of January to be over and it has just started. So I am feeling a little blah. Given my current winter mood I have been making a lot of soups and bean dishes. Last night I made a new recipe for Rajma (Northern Indian Kidney Bean Masala Stew) from a recent issue of Saveur magazine.

This recipe has 17 ingredients. It takes an hour and a half of total time, 45 minutes of which is active and makes 4 servings. I did make a number of modifications. First I doubled the recipe. Four servings is not enough for my family, which includes two growing boys. Second I try to follow a recipe as much as I can but sometimes I am unable to find a particular ingredient. So with this recipe I left one out. I have used chiles de arbol when I lived in a much larger city. Finding them in my city just isn't a possibility, so I chose to not use them. Finally, since I was making this for my kids I seeded and diced my serranos. It would have been too spicy for my kids to eat otherwise. I also chose to cook my beans on the stove. I have a pressure cooker which I use for canning, but I find it a pain to take down and use for everyday cooking. I let my beans cook for two hours in order to be fully softened. I followed the remainder of the recipe as written.

By leaving out the chiles de arbol and seeding the serranos this dish had a slight kick, without being too spicy for my kids. I let my beans cook down slightly so they were thicker than a traditional stew, but still worked well served over brown rice. My husband really loved this dish and was happy that it tasted different than the normal Indian curries that I make frequently.

For the recipe go to Rajma.

January 4, 2013

Salmon Tacos with Guacamole and Cilantro-Lime Yogurt Sauce


A couple of weeks back we got a new puppy. We have always had two large dogs that are now about 9 years old and we thought a puppy would help them feel a little younger. What I didn't anticipate was the fact that my youngest son is very jealous of anyone or anything that takes away mommy's attention. He has been having a number of temper tantrums and thinks that the puppy doesn't love him enough if it pays attention to anyone besides him. It has gotten better slowly, but it is a work in progress. I do think that it is helping my youngest to have more responsibility and understand that there are things besides mommy in the world. I'm hoping that kindergarten will be an easier transition in a couple of years. In order to make my youngest son feel better I have been making some of my kids favorite foods this week. Both of my kids love salmon. There are a number of foods that they turn up their noses at, but salmon has never been one of them. Last week I made a new recipe for Salmon Tacos with Guacamole from the January 2013 issue of Family Circle magazine.

This recipe has 14 ingredients. It takes 15 minutes of cooking time, 15 minutes of prep and makes 4 servings. I had no problems finding any of the ingredient at my local grocery store. I chose not to make the rice part of the recipe. Since it was pre-packaged and seemed unnecessary I omitted it. Normally I would have bought quality salmon. However, my husband had bought skin-on wild caught frozen salmon a few months back. I am trying to use foods that we already have in the pantry or freezer so that is the salmon I used in this recipe. My salmon took slightly less than the 15 minutes of cooking suggested by the recipe, closer to 12 minutes. I followed the remainder of the recipe as written.

These tacos were very popular with my family. My two boys loved the salmon and ate it without the tortillas. The cilantro lime yogurt was a nice addition and it was my favorite part of the recipe. It made a nice sauce with or without making the salmon as a taco.

For the recipe go to Salmon Tacos with Guacamole.

December 16, 2012

Stewed Beans

Photobucket

As I have talked about before we eat a lot of beans in our house. I love that beans can be used in so many different ways and that they are a great source of protein. It doesn't hurt that they are also inexpensive and make for numerous leftovers. When I first met my husband he had really only eaten pinto and black beans. Pinto beans are very popular in West Virginia and almost any home cook has a recipe. Having grown-up in Seattle I had never really made anything other than chickpeas and kidney beans in vegetarian chili. Luckily after we got married I learned that there are a vast array of beans that can be used in so many different recipes. One of my favorite ways to prepare beans is stewed, it is easy and delicious. Last week I tried a new recipe for Stewed Beans from issue Number 152 of Saveur magazine, which looked like a great vegetarian meal option.

This recipe has 17 ingredients. It takes 2 hours of total time, 30 minutes of which is active and makes 10-12 servings. I had no problems finding any of the ingredients at my local grocery store. I did adjust some of the cooking times on the recipe. I cooked the onion mixture for a full twenty minutes to ensure that the onions fully caramelized before adding the spices. Additionally, my total cooking time was 1/2 hour longer than suggested. I tasted the beans as the recipe was written and I felt that the chickpeas needed a longer cooking time so I put them back on the stove for an additional 30 minutes. Finally, this recipe will need a lot of salt added once it is completed. The flavor is delicious, but it definitely needs salt to bring out the flavors fully. I followed the remainder of the recipe as written.

While this recipe takes a bit of planning and cooking time the results were worth the time spent. The beans were very flavorful and my whole family, including my two boys enjoyed them. My husband added hot sauce to his serving and it really did make the beans taste even better. I would suggest this addition if you like spicier foods as it really did bring out the taste of the beans. Overall a great vegan recipe full of protein and makes enough for multiple meals. 

For the recipe go to Stewed Beans.

September 23, 2012

Moroccan Snack Mix


I snack all the time. I have never been one of those people that can eat three meals a day and feel full. Instead I eat small meals throughout the day. Part of this need to eat all the time goes hand-in-hand with my inability to sit still. My kids help this problem by creating messes as soon as I clean them up. They seem to have an ability to see me sit down and have a disaster that needs mommy's attention. Since I have given up gluten I have tried to find new high protein snacks to keep me full. One of my favorite snacks is nuts. They are delicious and great at keeping me full during my busy days. Last week I tried a new recipe for Moroccan Snack Mix from the September issue of Family Circle magazine, which with 6 grams of protein looked perfect for daytime snacks.

This recipe has 15 ingredients. It takes 10 minutes of prep and 1 hour and 5 minutes of baking time and makes 20 servings. I had no problems finding any of the ingredients and made no ingredient modifications. Make sure to fully dry the chickpeas before baking. If the chickpeas aren't dried adequately they won't become crispy. Instead they will be slightly soggy and not have a roasted texture. Additionally, the mixture needs to be stirred every 15 minutes to ensure even browning. I didn't let the mixture cool before adding the apricots and dates. I wanted the spices to incorporate with the fruit and adding them when still hot I figured would help with this process. I followed the remainder of the recipe as written.

With 6 grams of protein this snack mix is a great option for daytime snacking. However, my husband thought that the nuts weren't spicy enough and my two boys weren't fans of the mixture in general. The chickpeas weren't as crunchy as I would have liked. If I made this recipe again, I would let the chickpeas dry longer than the recipe states. Additionally, I would add chili powder in order to up the spiciness and add more flavor. With these changes I think this mix would be even better.

For the recipe go to Moroccan Snack Mix.

September 6, 2012

Chuck Eye Roast


This hasn't been the best year for beef in my area. I don't know if it's nationwide or just my area, but every single roast that I have bought has been relatively horrible. They have been tough, or too small or lacking great beef flavor. The local super store in my area doesn't feel the need to have any beef roasts over two pounds. I think they might have a different idea of an actual roast. They cut them the thickness of a steak and try to label them as a roast. The other stores in my area haven't seemed to do much better. Normally I have no problems finding great beef, but this year I have almost given up on buying any more beef.  This week I decided to try one more time and prepared a recipe for a Chuck Eye Roast from the May issue of Food and Wine magazine.

This recipe has 10 ingredients. As I stated in the introduction I had to go to multiple stores to find a beef roast over 2 pounds. The one I found wasn't completely marbleized, but I settled on what I could find. I had an even worse time finding ground bay leaves. I'm sure in larger cities it is easy to find a variety of spices. When I lived in Seattle there were whole stores specializing in hard to find spices. However, here I am limited a handful of stores and ground bay leaves were one of the spices that is not available at all in my area. So I left it out. Instead I substituted 1 teaspoon of ground sage. My beef roast took exactly 1 hour to cook. Make sure to tie off your roast with twine to ensure your meat stays moist. I followed the remainder of the recipe as written.

I love beef roast and I have been disappointed with the last 3 roasts I have made this summer. This roast was the exception. The middle of the roast was very moist and tender and the spices worked very well together. The cooking time was perfect and I loved the sweet paprika. This recipe made me remember what I love about oven roasts and I will definitely make this again.

For the recipe go to Chuck Eye Roast.

September 5, 2012

Grilled Chicken Shawarma


Growing up my father was a huge red meat eater. He absolutely loved steak, burgers and stews. I on the other hand would chose fish and chicken if given the choice. To this day I still love grilled chicken over steak and sausage. However, my husband and two boys love red meat. When I say love, I mean really love red meat. In particular bacon is a favorite of theirs. If they could eat bacon at every meal they would do so happily and see nothing wrong with doing so. While I do love bacon, I have been encouraging my family to eat more chicken and fish. Luckily my two boys have discovered they love any type of grilled chicken. They get very excited when I take out the indoor grill and start grilling chicken. Last month I tried a new recipe for Chicken Shawarma from the August issue of Family Circle magazine, which with 35 grams of protein looked perfect for my active family.

This recipe has 13 ingredients. It takes 20 minutes of prep and 10 minutes of broiling time and makes 6 servings. I had no problems finding any of the ingredients at my local grocery store and made no ingredient modifications. I chose to use naan instead of lavash bread. I love naan and use it frequently. Instead of broiling my chicken I used an indoor grill. The broiler on my oven has been broken for months, so obviously I am unable to use it. Using the grill was perfect for this recipe and I think it would work better than the broiler in the first place. It took approximately 10 minutes for the chicken thighs to cook on the indoor grill. I followed the remainder of the recipe as written.

The chicken in this recipe turned out delicious. I think modifying the recipe to use the grill instead of the broiler was perfect. I would use this method again if I made this recipe a second time. My two kids really liked these sandwiches. The fact that they can be held was something that my kids really liked and the flavor of the chicken was delicious. Now that I'm not eating gluten if I was to make this recipe again I would eat it as a salad. The chicken would be great as a salad and would only need a very light vinegar dressing. Overall, a very easy and child friendly recipe.

For the recipe go to Chicken Shawarma.

June 12, 2012

Chile-Rubbed Grilled Chicken with Salsa

I absolutely love grilled meat. Growing up my father could literally cook only two dishes, fried potatoes and boxed macaroni. However, he was great at grilling. He could make delicious chicken, ribs, steaks and my favorite corn. He was also very picky about the type of grill that he owned. We were a charcoal grill household and my father refused to even consider, much less use a gas grill. He also refused help or pretty much anyone to help him man the grill. My mom would prep the meat and veggies and then her job was done. When I grew up and got married I quickly learned that my husband had the same grill obsession as my father. My husband is a die hard charcoal grill fan and won't even hear about a gas grill coming anywhere near our house. In the summer we use both our outdoor grill and my indoor grill plate frequently so I was very interested when I noticed a recipe for Chile-Rubbed Grilled Chicken with Salsa in the June issue of the Food Network Magazine.
This recipe has 13 ingredients. It takes 30 minutes of total time, all of which is active and makes 4 servings. I had no problems finding any of the ingredients at my local grocery store and made no ingredient modifications. I did end up using packaged lime juice due to my lime going bad before I made this recipe. The recipe has the spice mixture made in a bowl and then the chicken turned to coat. I did things a little differently. Instead of a bowl I made the spice mixture and then rubbed it into the chicken and placed it in a plastic bag to marinade. Without rubbing the spice mixture into the chicken the rub wouldn't have fully coated the chicken. Finally, my chicken took much longer than the 4 to 6 minutes suggested by the recipe. I used my indoor grill plate and my chicken breasts were very large so my time was almost twice as long to fully cook. I followed the remainder of the recipe as written.
This recipe worked very well the next day cut into strips and served in a tortilla with beans, cheese and salsa. I actually liked this method better than the recipe. The recipe needs a few tweeks. First, the salsa needs more lime and a jalapeno for more flavor. You could either seed the jalapeno or leave the seeds in for a spicier salsa. I would increase the lime to 2 tablespoons and make sure to add salt to taste. For the chicken I would suggest pounding it flat instead of butterflying. I had a horrible time getting my breasts to butterfly since they were half breasts and the thickness varied from side to side. Finally, make sure to get nice grill marks on the chicken to ensure that the spices are evenly distributed. With these changes I think this recipe could be great, especially when served with tortillas, yum!

For the recipe go to Chile-Rubbed Grilled Chicken with Salsa.

April 25, 2012

Carolina Pulled-Pork Sandwiches

My family loves pulled-pork. Currently, my two boys are in picky eating stages, but have no problems eating multiple pulled-pork sandwiches whenever I make them. When I first married my husband I had literally had eaten pulled-pork less times than I can count on one hand. Having grown up in Seattle, pulled-pork was never something that my mom prepared and most restaurants were ethnic or seafood. I especially had no idea until I met my husband that there are completely different types of bbq based on region. He prefers vinegar based bbq sauces, while my boys prefer sweeter varieties. I will pretty much eat it all, it's delicious! Since I didn't grow up knowing how to prepare pulled-pork the first year my husband bought a shiny new charcoal grill with a side smoker (he won't touch gas grills, he can go on a 15 minute rant about why, but no one wants to hear it I promise) I was lost. Thankfully now that we have been married almost ten years I have become quite adept at both the grill and preparing pulled-pork. I love using the grill in the summer, but for most of us using a grill year round isn't an option and the oven is way too hot to turn on all day during the warmer months,  that's where the crockpot comes in handy. You can make great pulled-pork using the crockpot and it is very easy! Recently, the May issue of Family Circle Magazine had a recipe for Carolina Pulled-Pork Sandwiches, which promised to be an easy and crowd-pleasing crockpot recipe.


This recipe has 10 ingredients in the recipe (the sandwich buns and pork aren't shown in the photo) and 6 in the coleslaw (the photo was nicely deleted off my phone by my three-year-old trying to find angry birds). It takes 15 minutes of prep, 22 minutes of cooking time (to brown the pork) and 8 hours on low in the crockpot and makes 8 servings. For the pork shoulder the recipe states to remove the skin and trim the fat, I agree with this to a point. If you remove all the fat from a pork roast it leaves the meat dry during cooking time. I prefer to cook the meat with some fat and place it fat side up in the crockpot. This allows the fat to keep the meat moist and the fat can easily be removed before pulling the pork at the end. For the seasoning salt I used my husband's favorite salt, Bacon Salt. If you haven't tried bacon salt, it really does create a nice almost smoky flavor in recipes. I use it very frequently, since as you know if you read my blog, my house is pretty obsessed with bacon. I followed the remainder of the recipe as written.

As I stated at the beginning we eat a lot of pulled pork. That also makes my family pretty picky pulled-pork consumers. Both my husband and I thought that the bbq sauce was a little too mild. I make a lot of pulled-pork in the crockpot and almost every recipe places the sauce in at the end. Since this bbq sauce is vinegar based putting the sauce in at the beginning of the cooking time made the sauce taste too unflavorful after eight hours. Instead of following the directions as stated I would suggest putting in a small amount of the sauce, maybe a 1/4 of a cup with a little bit of water (maybe 1/2 cup) to keep the pork moist during cooking. Then after the pork is pulled add the additional sauce to the crockpot and allow it to cook for an another 15 minutes or so. I think the problem was that the fat from the pork runs into the sauce making it too watered down. Removing the fat would make the pork tough, so the modifications would be a better alternative. On the other hand if your family prefers a mild bbq sauce this would be perfect as is. My father-in-law likes milder sauces and he would have thoroughly enjoyed this as written. Finally, I did think that the leftovers worked well when re-heated with additional bbq sauce, it was much better the next day. So if you like mild sauce this is perfect, if you like bolder flavored bbq sauce I recommend adding the additional sauce at the end.

For the recipe go to Carolina Pulled-Pork Sandwiches.

April 11, 2012

Parents Magazine BBQ Pulled Pork

Every year for Easter I make a big spread. There is always ham, multiple vegetables, rolls, desserts, you get the point. I cook a lot for the holidays. This year I decided to think outside of the box and make things easier on myself. One of the recipes from my menu plan for the week before Easter didn't get made so I was left with all the ingredients for BBQ pulled pork. So I decided that instead of the big spread this year I would just make pulled pork. My mother-in-law stepped up with her fabulous rolls and macaroni salad, and I made deviled eggs and a delicious carrot cake (recipe to come). All-in-all it was a great non-traditional Easter. The main course of the meal was the recipe for BBQ Pulled Pork from the April issue of Parents magazine, which takes a while in the oven, but worth the wait.

This recipe has 14 ingredients. It takes a total time of 7 to 12 hours, 20 of which is active and makes 8 servings. I had no problems finding any of the ingredients at my local grocery store. I let the mixture chill overnight for the flavors to fully saturate the meat. For the sauce I made a few modifications. My husband prefers a tangy Carolina type BBQ sauce, so I made a few changes to the sauce ingredients. I added an additional tablespoon of apple-cider vinegar and approximately a 1/2 teaspoon of liquid smoke. For the rolls instead of whole-grain I used Sunny Buns, my family loves these and won't eat BBQ any other way. The sides of my baking dish burnt, so instead of tossing the pork once it was pulled with the cooking juices, I topped it with the sauce. I followed the remainder of the recipe as written.

As a main dish for Easter this was perfect. Everyone loved it and it made a great impression on a platter on the center of the table. It made more than enough for four adults and two kids with plenty of leftovers. I normally make pulled pork in the crockpot, which I love, but I liked how great this turned out in the oven with a lot less time than the crockpot requires. A very easy oven pulled pork recipe.

For the recipe go to BBQ Pulled Pork. (registration required)

January 28, 2012

Saveur Frito Pie

As I've stated numerous times before my husband loves meat. He will agree to one or two vegetarian meals a week, but also insists on beef or pork on at least one of the other days. One of my family's favorite types of meat dishes is chili. My husband and boys love chili and look forward to the annual chili fest in our region every year in September. Before I got married I had only made vegetarian chili, so after meeting my husband I had to teach myself to adequately make meat based chili. The most important part of any chili dish is the recipe, so I was excited when I saw a recipe for Frito Pie in a recent issue of Saveur magazine, which looked kid friendly and full of flavor.

This recipe has 15 ingredient, plus toppings. It takes an hour and twenty minutes of prep and cooking time and makes 6 servings. I already had all the spices in my cupboard and the remainder of the ingredients were easy to find locally. As with all recipes that call for ground meat, I ground my own. My kitchen aid attachment makes grinding meat very easy and the texture and taste is superior to store bought. Make sure to fully caramelize the onion for the full flavor to come out in the chili. I weighed out my meat to get the exact 2 1/2 pounds, which I highly recommend. Having the exact amount of an ingredient can make or break a recipe. I chose to serve the frito pie will all the toppings suggested which I placed in bowls and allowed my family to add to taste. I followed the remainder of the recipe as written.

The flavor on this frito pie was delicious. The spices worked well together and provided a full flavor to the dish. Make sure to place the fritos under the chili right before serving in order that they do not become soggy. My husband placed his fritos on top of the chili which kept them crunchy, which I think would work well if I made this dish again in the future. My favorite thing about this recipe is that it is a nice compromise between people that love meat and potatoes and those that want more involving meals. My whole family enjoyed this recipe and it was very family friendly.

For the recipe go to Frito Pie.

November 24, 2011

Womans Day Open-Faced Orange and Cumin-Spiced Pork Sandwiches

With two growing and rambunctious boys, I oftentimes find myself short on time around dinner. I will start something to serve and within a couple of minutes my two boys will have total pre-dinner meltdowns. Thus, dinner turns into disarray as I scramble to find something that we can possibly eat. To the rescue comes my slowcooker. I love how easy it is to start something in the crockpot in the morning and by dinner everything is done. This way even if my two boys start melting down it doesn't matter since the food is already ready to serve. The October issue of Woman's Day magazine had a recipe for Open-Faced Orange and Cumin-Pork Sandwiches, which looked delicious and full of great spices.

This recipe has 12 ingredients. It takes a total of 8 hours and 15 minutes, 15 minutes of which is active, and makes 4 servings. All the ingredients were easy to find at my local grocery store. I did make some major modifications to the original recipe. First, I prefer for pulled pork to keep my pork butt whole during the crockpot time. I salt and pepper the butt, pan sear on all sides, and then add fat side up to the crockpot. The flavor from the bone makes for a rich, delicious flavor. I chose to add the whole cloves, just make sure to take them out before serving. Finally, I forgot to make fresh country bread, so I served the sandwiches on Naan, since I already had it on hand. I followed the remainder of the recipe as written.

This recipe is very easy to prepare and has a great flavor from all the spices. The modification to the bread, made a delicious compliment to the flavors. My two boys loved this recipe and ate their whole servings, plus leftovers the next day. During the fall and winter months, crockpot recipes can be a great way to prepare dinner without much effort, and this recipe is no exception. Overall a great blend of spices in a quick, pork recipe.

For the recipe got to Open-Faced Orange and Cumin-Spiced Pork Sandwiches.

September 27, 2011

Martha Stewart Living Three-Cheese Macaroni

Most days I eat very healthy. However, I still love comfort food and make it relatively frequently. Growing up my mother made the best homemade macaroni and cheese. She had a hand written recipe for my grandmother's macaroni and cheese that I still keep in my recipe file. It was simple and delicious. My two sons will eat any type of macaroni and cheese that I give them, boxed or homemade, so I am always looking for a recipe that my husband and I will also enjoy. The October issue of Martha Stewart Living magazine had a recipe for Three-Cheese Macaroni, which loved like a delicious grown-up comfort food.

This recipe has 13 ingredients and takes 1 hour and 10 minutes, 40 minutes of which is active. I had no problems finding any of the ingredients at my local grocery store and had the majority already in my pantry cupboard. The three cheeses used in the recipe are sharp cheddar, Gruyere and Fontina. I used a 9-by-13-inch baking dish, rather than mini pie plates. The total cooking time, I found to be longer than the suggested 15 minutes due to the larger pan. My total cooking time was probably closer to 20-25 minutes. I followed the remainder of the recipe as written.

The cayenne in this recipe gave a nice kick to the macaroni, making it not bland like many macaroni and cheese recipes can be. This makes a large pan of macaroni, so it would be perfect for a potluck or dinner party. I actually thought that the dish tasted even better after it had sat in the fridge overnight and then was re-heated in the oven. It gave the macaroni a nice thick consistency, so I recommend letting the recipe sit in the refrigerator. This dish was a hit with my two-year-old, he absolutely loved it, a very family friendly recipe.

As with most of the October 2011 Martha Stewart Living magazine recipes, this recipe is currently unavailable on-line. It can be found in the October 2011 issue or there is another recipe for Macaroni and Three Cheeses on the Martha Stewart website.

Related Posts Plugin for WordPress, Blogger...