Showing posts with label baked goods.. Show all posts

July 4, 2014

Milk Stout Chocolate Cupcakes with Cream Cheese Frosting


I may have eaten a bowl of icing out of the fridge this morning. Last night I made a basil chocolate cake (which was actually very good!) and made a big batch of homemade buttercream frosting. This  morning it was calling for me to eat a bite, and then another, and before I knew it the bowl of leftover frosting seemed to have disappeared. This afternoon I made a batch of cream cheese frosting and had the same problem. There is something about frosting that makes me have to eat it, I can go without cake, but frosting is a completely different story.


So now that I have babbled on about frosting, it's time for a cupcake (and frosting) recipe. My husband loves trying new kinds of beer and our fridge normally has a variety of brands and types. For the last six months my husband has been nagging me to try a cupcake recipe that he found using Milk Stout online. So I finally gave in and made them today for my mother-in-law's birthday. The recipe is as follows.

Adapted from Left Hand Brewing.


Milk Stout Chocolate Cupcakes with Cream Cheese Frosting

Milk Stout Chocolate Cupcakes with Cream Cheese Frosting


Recipe Type: Dessert
Summary:
A delicious combination of chocolate and beer (yes beer). Great for parties!
Preparation Time: 0h, 15m
Cooking Time: 0h, 25m
Total Time: 0h, 40m
Yield: Serves 24

Ingredients
  • 3/4 cup unsweetened cocoa powder
  • 2 cups granulated sugar
  • 1 teaspoon baking soda
  • 2 cups all-purpose flour
  • 1/4 teaspoon salt
  • 1 bottle Milk Stout
  • 1 stick melted unsalted butter
  • 1 tablespoon pure vanilla extract
  • 3 eggs
  • 3/4 cup sour cream
  • 8 ounces softened cream cheese
  • 1 pound confectioners sugar
Cooking Directions
  1. Preheat oven to 350 degrees.
  2. In a small bowl mix together dry ingredients (sugar, flour, baking soda, cocoa, and salt).
  3. In another bowl combine the stout, melted butter, and vanilla.
  4. One at a time add eggs.
  5. Add sour cream and mix until combined.
  6. Add dry ingredients and stir until mixture come together (do not over mix or your cake will be less fluffy).
  7. Pour batter into 24 muffin cups (greased or with liners).
  8. Bake for 12 minutes, rotate pan and then bake for another 8-12 minutes.
  9. Combine the cream cheese and confectioners sugar to make the frosting.
  10. After the cupcakes have cooled frost with the frosting.
  11. Store in the refrigerator.
I hope everyone had a great 4th of July today! These cupcakes were a great dessert for the steak, mashed potatoes, and salad that we had for dinner tonight. For a party they would be a nice way to have a dessert that both beer and chocolate lovers would like. Plus according to my family they are pretty yummy! 

June 23, 2014

Oat and Nutella Cookies

Nutella and Oat Cookies, recipe
Gluten Free Oat and Nutella Cookies


I am jealous of adorable well behaved kids. My house seems to play by another set of rules, or at least my two boys seem to think it does. While I love my kids to no end, they can be the kids that other parents dread. You know the kids, the ones that fight at the store, touch everything they see, talk non-stop (really I don't think they breath in-between sentences), and think that having a MMA fight in the middle of the store is something that should happen. I have those kids. They are adorable, but since they travel in a pack it's like trying to tame wild hyenas. Then every once in a  while I run into another parent with multiple boys, and we share a moment. In a glance, a smile, or a joke we have instantly bonded over having all boys. The world seems a little less crazy, and then I realize my boys are currently on the floor trying to tackle each other. My word realigns back to normal and I realize I don't have perfect kids, but I love them just the same. Hopefully they will one day turn into the adorable well behaved kids that other parents seem to have, in the meantime they are still my off center version of perfect and that's just fine with me.

I have a slight Nutella obsession. I can't keep full jars in the house or I will eat them (normally with a spoon straight out of the jar - is there any other way..). So in order to avoid my waistline from becoming non-existent I only buy Nutella for recipes or as a very seldom treat. My Nutella obsession happens to work perfectly with my cookies obsession, they are a match made in heaven. Today I tried a new recipe for Oat and Nutella Cookies from the May 2014 issue of Food and Wine Magazine. Here is the recipe with changes.

Adapted from Food and Wine Magazine


Oat and Nutella Cookies


Recipe Type: Dessert
Summary:
A delicious combination of Nutella and oats that makes for a great snack or dessert.
Cooking Time: 0h, 10m
Total Time: 1h, 0m
Yield: 60 Cookies

Oat and Nutella Cookies

Ingredients
  • 1 3/4 cups all-purpose flour
  • 1 teaspoon salt
  • 1/4 teaspoon baking soda
  • 1/2 teaspoon cinnamon
  • 1 cup vegetable shortening
  • 1 cup granulated sugar
  • 3/4 cup packed brown sugar
  • 2 eggs
  • 13 ounces Nutella (one jar)
  • 2 cups quick cook oats
Cooking Directions
  1. Preheat oven to 375 degrees.
  2. Combine first 4 ingredients in a bowl and mix.
  3. Using a mixer, cream the shortening and sugars until creamy (2-3 minutes on medium).
  4. Add the eggs one a time and then add Nutella.
  5. Beat the mixture until smooth (another 1-2 minutes on medium).
  6. Line baking sheets with parchment paper.
  7. Roll the cookies into balls (1 tablespoon for each ball).
  8. Place the cookies on the baking sheets and bake for 8-10 minutes. Do not over bake these cookies. They should be just barely set, if you bake them too long they will be way too crunchy. 
The original recipe has a 1/2 teaspoon of cinnamon. I made the cookies as written in the magazine and I found that the cinnamon flavor was a little much. Now, that may just be my tastes, if you love cinnamon go for it. My husband thought that the cinnamon was the best part of the cookie, so you might love the cinnamon like he did. I also reduced the amount of salt. I found a full teaspoon to be too much for my tastes, so I reduced it to 3/4 of a teaspoon. However, I under salt everything so I'm a little strange. If you aren't a fan of vegetable shortening I would assume that coconut oil (you might need to reduce the total amount), butter, or another fat would work just as well. The version I made I used gluten free all purpose flour that had xanthan gum already added. If you use another type of gluten free flour I would suggest adding xanthan gum to the mixture (about a tablespoon).

February 8, 2014

Black Bean Brownies

Black Bean Brownies
Black Bean Brownies 


My youngest signed up for kindergarten on Friday. He was excited for weeks leading up to the day, went into the school and then panicked. My normally talkative and outgoing child turned mute. He did write his letters and play with blocks while I filled out the paper work, but refused to actually talk. Normally this wouldn't be a big deal, but since I home school him for pre-k I am always very self conscious. It doesn't help that when you walk in the door they ask you if they are in pre-k and I was the only mommy that said he was learning at home. Now I have a master's degree, in our state I am allowed to home school through high-school. However, everyone else sends their kid to pre-k. It hasn't held my kids back in school. My oldest went into kindergarten and was already a grade ahead in reading and is now two years ahead in math. I believe strongly in teaching at home and having school being a reinforcement of things already taught through workbooks and everyday life lessons. However, I still feel judged since everyone else makes different decisions. I have had to defend my decisions so many times to other women that have made different choices and feel the need to explain to me why their decisions were better. Luckily since he starts kindergarten next year I won't have to explain my home-school pre-k choices any longer which will be a nice change. 

I have been experimenting with dessert recipes using beans in the last couple of weeks. Last week I tried a new recipe for Black Bean Brownies from the Taste of Home website. 
Black Bean Brownies
Black Bean Brownies 

This recipe has 9 ingredients. It takes 35 minutes of total time, 15 minutes of which is active and makes 12 servings. I followed the original recipe with only a few changes. I did not have chocolate chips in the house and I didn't want to run to the store so I made the recipe without the chocolate chips. It made the brownies less sweet, but my kids ate them happily with the reduced sugar. I found that my total cooking time was a little longer than the recipe, my total baking time was approximately 30 minutes. 
Black Bean Brownies
Black Bean Brownies 

Without the chocolate chips added these black bean brownies are rich, but not overly sweet. My two boys prefer chocolate that isn't overly sweet, so they loved them. I have tried the recipe with the chocolate chips added and it's also good, just sweeter. Either way works depending on what you have in your cupboard. I love that the brownies have black beans instead of butter, it really cuts down on the fat. The total recipe only has 3 tablespoons of canola oil, which could also be substituted for virgin coconut oil or even applesauce depending on your dietary needs. 

For the recipe go to Black Bean Brownies. 

October 22, 2013

Salted Caramel Chocolate Chip Bar Cookies

Click for recipe for Salted Caramel Chocolate Chip Bar Cookies
Salted Caramel Chocolate Chip Bar Cookies


My husband hates cake and most sweets. I love any type of chocolate, and have eaten an entire cake by myself on more than one occasion. He likes salt, I can barely stand it in most dishes. We are opposites snack and food wise. When we got married he could care less about the cake. He nodded his head and pretended to be listening, but in the end I chose everything myself. He did have a ton of opinions on the meat try at the buffet at our reception, I could have cared less. Sometimes I have to laugh at how different our food tastes our. When we went to Columbus for a job interview when we were in our mid twenties we went to a restaurant. I ordered mini beer battered corn dogs, he ordered a sashimi lettuce wrap plate. The waitress gave me his and him mine. Nope, I love fried fattening foods and he likes salad. He likes savory, I like sweet. One of my husband's new favorite flavors is salted caramel. He has found caramel sauce, ice cream, candy, you name it, if it comes in a salted caramel flavor he will eat it. So to indulge my family's love of salted caramel I decided to use the last of the packaged caramels I had from my sponsored parties a couple of weeks back and make Salted Caramel Chocolate Chip Bar Cookies.
Image of Ruben Pizza from Backyard Pizza Huntington, WV
Ruben Pizza from Backyard Pizza Huntington, WV

This recipe has 13 ingredients. It takes 45 minutes of total time, 15 minutes of which is active and makes 16 cookie bars. I did make numerous changes to the original recipe. First I used 2 1/4 cups of flour. I have never owned a 1/8 cup measure and didn't want to deal with a half of a 1/4. Most of the time I weigh my cookie ingredients, I did not for this recipe. I did not use heavy cream with the caramels. Instead I used 2 percent milk. I rarely have cream in the house and see no reason to buy a container for only 3 tablespoons. I heated the baking caramels and milk on the stove until they were fully melted and then followed the remainder of the recipe. When the cookies were done I let them cool for 30 minutes, then for an hour in the fridge. They were still hard to work with so I cut them, took them out of the pan and placed them in the freezer. This allowed the bars to be less gooey.
Last Heirloom Tomato of the Season (It freezes tomorrow night!)

I would make a few changes to this recipe. First, do not make it in a 9 inch pan. The cookies came out too high and had to be cut very small so the taste wasn't over whelming. I would suggest using a 13 by 9 inch pan. This way the cookies would be nice and thin, while still having the great salted caramel taste. I would also suggest that if you use baking caramel like I did to let them set in the freezer, the cookies were great after they had set in the freezer for about an hour. Overall, these cookies had a nice sweet/salty combination according to my kids and husband. I think with the few changes I suggested the cookies would be perfect and nice for a party since salted caramel is very in in the foodie community right now. Great for Thanksgiving or Christmas!

For the recipe go to Salted Caramel Chocolate Chip Bar Cookies.

Salted Caramel Chocolate Chip Bar Cookies


Recipe Type: Dessert
Summary:
A nice combination of salty and sweet, these Salted Caramel Chocolate Chip Bar Cookies would be perfect for a party or to enjoy all by yourself!
Preparation Time: 0h, 15m
Cooking Time: 0h, 30m
Total Time: 0h, 45m
Yield: Serves 16

December 21, 2012

Cinnamon Streusel Coffee Cake

IMG_0127-2_zpsd541aa5a

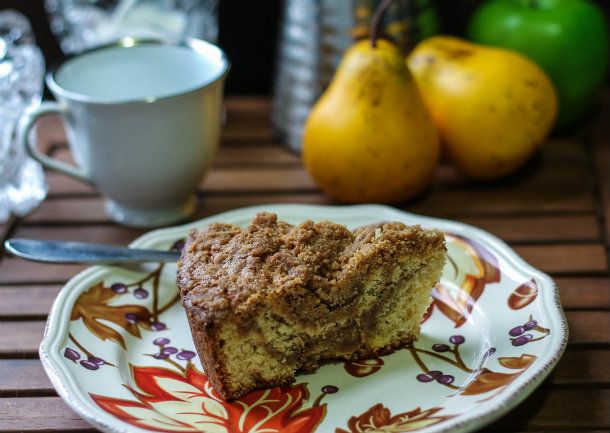
Today was my oldest son's first day of winter break. My two boys spent the day fighting over who could play with which action figure, while watching the same episode of their favorite cartoon for the 50th time. They have watched the show so many times that my oldest can recite the words, honestly, I probably could too. I made pancakes for lunch since the weather has turned nasty today. I love snow, just not the biting cold wind that has gone along with it for the entire day. It just felt like a breakfast for lunch kind of afternoon. This seems to be a pattern that I have been in for the last couple of weeks. Whenever I am stressed or I am not feeling up to par, I bake/make breakfast foods. There is something very home-like and comforting about baking a coffee cake or pancakes. It instantly makes you feel better about whatever is bothering you. This week I made a new recipe for Cinnamon Streusel Coffee Cake from the January 2013 issue of Family Circle magazine, which looked perfect for a cold winter morning.

This recipe has 14 ingredients. It takes 65 minutes of baking, 20 minutes of prep and makes 16 servings. I made a number of changes to this recipe. First, I made it gluten free since I can't eat gluten. For the flour I used a brand of gluten free all-purpose flour which uses coconut flour as the base, it works great in baking. Instead of a 9 inch pan I used a cake pan to bake the coffee cake. I prefer the shape of coffee cake done in a cake pan, I think it looks prettier on the plate. In order to ensure that the coffee cake didn't stick I cut a piece of parchment paper and then sprayed it with cooking spray. This method is a no fail and I use it with any type of cake or torte. Finally, I found that I had to tent my cake with foil to prevent over browning and added an additional 5 minutes to the baking time. I followed the remainder of the recipe as written.

My two boys devoured this coffee cake. It was very light and airy and was perfect with a cup of coffee in the afternoon. Since I used gluten free flour it was a little rich, I think in the future I would cut down on the butter to compensate. The streusel topping was the best part of this recipe and made for a delicious crunchy crust.

For the recipe go to Cinnamon Streusel Coffee Cake. (registration required)

November 13, 2012

Gluten Free Jalapeno and Cheddar Cornbread


I really love bread and baked goods. As far back as I can remember I have wanted donuts over potato chips, bread over Cheetos. My mother on the hand had a rather large potato chip and popcorn obsession. She could take or leave bread, but anything salty she would go to town on. When I had my doctor confirm my fears that gluten was the reason I was having a vast array of problems I had my food life flash before me. No more bread or baked goods, I was devastated. However, I then got determined. There was no reason I couldn't still eat the foods I love with a few changes. So I set about re-working recipes to be gluten free. I have been lucky that I have had far more successes than failures. Next week is Thanksgiving and then Christmas will be here before you know it. I am a little nervous about dealing with being gluten free during the holidays. I have a major sweet tooth and I know that almost all the food will be things I can't have. So I have been making all my favorites at home modified. Last week I made pumpkin bread and muffins and they were delicious. Next week I am going to attempt a gluten free pumpkin pie. One of my favorite baked goods is cornbread. Cornbread with butter and honey is so good! Last month I tried a new recipe for Gluten Free Jalapeno and Cheddar Cornbread from the November issue of the Food Network Magazine, which looked easy and flavorful.

This recipe has 13 ingredients. It takes a total of 1 hour, 25 minutes of which is active and makes 6 to 8 servings. I had no problems finding any of the ingredients at my local grocery store and I made no ingredient modifications. I found a great gluten free flour that uses coconut flour. It is perfect for gluten free baked goods, my two boys can't tell that they are eating gluten free. I have a horrible time with cast-iron skillets. Growing up in the Northwest I never owned one until I moved to West Virginia. The first year my husband and I were married my mother-in-law gave me a cast iron skillet. I washed it and it rusted. That was a lesson I learned quickly. I also decided that I am horrible about keeping cast iron seasoned. So I rarely use cast-iron skillets, I just can't seem to get the hang of them. For this recipe I made muffins instead. The recipe made a total of 12 muffins, which I cooked at 400 degrees for 20-25 minutes. Make sure not to overly stir the batter. Stir just until combined, it will make your cornbread rise more effectively. I followed the remainder of the recipe as written.

For gluten free cornbread this turned out pretty well. I would suggest a few changes though. First, I would not seed the jalapenos. The cornbread needed more flavor and keeping the seeds would definitely provide this. Second, I would add more fat into the batter. I always use bacon grease melted into the bottom of the pan or muffin tin. This method would definitely help this recipe. Most cornbread recipes have at least 1/4 cup of butter, so the fat in this recipe needs to be increased. Finally, instead of cheddar cheese I would use Monterey Jack. The cheddar cheese just ends up tasting a little on the bland side. With these changes I think this recipe could be a great gluten free option.

For the recipe go to Gluten Free Jalapeno and Cheddar Cornbread.

September 14, 2012

Gluten Free Carrot and Walnut Muffins

I have a small weakness for muffins. I love just about any type of muffin and bake them frequently. There is something so comforting about sitting down with a great cup of coffee and a delicious fresh baked muffin. Growing-up my mother baked great muffins and cookies. I would wake-up to the smell of fresh baked goods, it was a great way to start the day. I have followed on this tradition with my two boys and bake with them at least once a week. Recently, after struggling with migraines and stomach issues I gave up gluten. It has had a tremendous effect on my health and I feel so much better than I did when I was eating wheat. I have been experimenting with various recipes, some of which have turned out great, while others not so much. Last week I tried a new recipe for Gluten Free Carrot and Walnut Muffins, which was delicious and very popular in my house. Here is modified recipe:
  • 3/4 cup quinoa flour or brown rice flour (I have tried it both ways and they turn out great either way)
  • 3/4 cup oat bran
  • 1/2 cup brown sugar or brown rice syrup
  • 1 tsp baking powder
  • 1/2 tsp baking soda
  • 1 tsp cinnamon
  • 1/3 cup mashed banana (about 1)
  • 1/2 cup plain yogurt (I normally use non-fat Greek yogurt)
  • 1 egg (or egg substitute)
  • 2 Tbsp Cooking Oil (I have left this out and the taste is still great. It would also work with coconut oil)
  • 1/2 tsp vanilla
  • 1/2 cup shredded carrot
  • 1/2 cup chopped dates
  • 1/2 cup chopped walnuts. 
In separate bowls combine wet and dry ingredients. Combine the two mixtures and then fold in carrots, dates, and walnuts. Fill muffins cups 2/3 of the way full. Bake at 400 degrees for 18-20 minutes. Makes 12 muffins.

If you have gluten intolerance make sure to buy oat bran and quinoa flour that is gluten free. There are many types of oat bran that while they don't contain actual wheat, they are processed in facilities that also process wheat and are therefore not gluten free.


These muffins are really delicious. I have experimented a lot with this recipe and used both brown rice flour and quinoa flour and they have worked well. My two boys love these muffins and haven't noticed that they don't have wheat flour. This is definitely a recipe that I will keep making.

Recipe adapted from Bob's Red Mill package.

August 22, 2012

Overnight Pull Apart Cinnamon Loaf

Cinnamon is one of my favorite tastes and scents. There is something so relaxing to me about the smell of cinnamon and when I use it in baking it makes me feel warm and comforted. I am so happy that it's almost fall, I love all the colors, scents and tastes associated with it and cinnamon is one spice I think of in relation to the season. Cinnamon is great in cookies, chili, roasted squash, roasted nuts, there are so many delicious options. One of my favorite ways to use cinnamon year round is in bread. Growing up I was in love with cinnamon and sugar on my toast. My favorite breakfast was wheat toast with peanut butter and then topped with cinnamon sugar, yum! Honestly, to this day if I am having a bad day, cinnamon toast can be an instant pick-me-up. It reminds me of being a kid and being happy with simple things like cinnamon toast. Last week I decided that I was in a baking mood and tried a new recipe for Overnight Pull-Apart Cinnamon Loaf from the April issue of Better Homes and Gardens magazine.

This recipe has 11 ingredients. It takes a total of one hour (plus rise time), 30 minutes of which is active and makes 12 servings. I ended up making this recipe two times. The first time I tried the overnight fridge rise and it did not work. My ball was still pretty much the same size in the morning and it didn't heat up to rise on the counter the next day. So I threw away my first attempt and started over. Instead of doing an overnight rise on the second batch I let the dough rise for an hour on the counter. It worked perfectly and the dough rose beautifully. I think one of the key things that went wrong with the first batch is that I overworked the dough. The dough will not go into a nice neat ball. I mixed my dough until it formed together and then let it rise. The first time I followed the directions to make it into a ball and then put it in the fridge. That method did not work at all for me. I chose not to top the bread with pistachios, my boys can be hit or miss with nuts and since they are so expensive I chose to leave them off. Finally, I think that my layering technique might be slightly different. My bread turned out great, but it came off as slices from the top that peeled like monkey bread, not like the picture in the magazine. I followed the remainder of the recipe as written.

I think in total this bread lasted less than four hours in my house. It was so good that I ate a piece and then went back for three more. My two boys were hesitant at first, but after they tried it they absolutely loved it. The powdered sugar glaze was definitely a selling point with my children and it made for a very pretty presentation on the table. I did add slightly more vanilla to the glaze than recommended. I like my powdered sugar glazes to have a strong vanilla flavor. A great bread for breakfast or for a treat any time of the day.

For the recipe go to Overnight Pull Apart Cinnamon Loaf.

August 21, 2012

Lemon Raspberry Coffeecake

Don't you love how school starts and then everyone in the house gets sick? Well, that has been my week so far. My oldest started school last Monday and this morning we all woke-up sick. Love how that works. In order to make myself feel better I baked blueberry biscuits for dinner. They did make me feel better, so I say my cooking medicine must work. Growing up whenever I got sick my mom would cook and bake whatever I wanted. This was especially great when I started to feel better and I was allowed to eat brownies for breakfast to get me to eat. Granted most of the time I hadn't eaten for days and my mom was just trying to get me to eat something regardless of if it was healthy. I just remember lots of ice cream breakfasts, which were pretty great. Today my son ate nothing all day until I baked blueberry biscuits. I sat there watching him eat and thought of my mom and ice cream for breakfast. I love how food can evoke such powerful memories. Before I got sick last week I made another recipe which I think of in relation to my mom, coffeecake. She loved baking and eating pretty much any variety of coffeecake, so I was interested when Better Homes and Gardens had a recipe for Lemon-Raspberry Coffeecake in the April issue.

This recipe has 13 ingredients. It takes 60 minutes of total time (plus cooling), 15 minutes of which is active and makes 10 servings. I had no problems finding any of the ingredients, most of them I already had in my pantry cupboard. For the raspberries I used fresh since they were easy to find and I prefer them to frozen when they are in season. I am horrible about remembering to set out my cream cheese to soften so I take the easy way out and zap it in the microwave for a couple of seconds. I did not put parchment on the bottom of my pan like the recipe suggested. I know every baker but me swears by this method. I prefer to just use baking spray and I have never had a problem with any baked goods not coming out of the pan. My total baking time was slightly longer than the 30 minutes suggested by the recipe. I also turned my pan halfway through the baking time. Finally, I chose not to top the cake with powdered sugar, I thought it was great the way that it was. I followed the remainder of the recipe as written.

I was very pleased by how great this coffeecake came out looking. It was beautiful and it tasted just as great. Even my husband who doesn't like cake had a slice, which is saying a lot. I really like that the coffeecake has a nice taste from the cream cheese without being too rich or sweet. The raspberries are sweet and provide a nice taste and texture to the recipe. Overall, a recipe that I would definitely make again.

For the recipe go to Lemon-Raspberry Coffeecake.

August 18, 2012

Black-Pepper Biscuits with Sorghum


I didn't grow up eating biscuits. My mother never really made them and the restaurants in Seattle served great waffles and pancakes, but horrible biscuits. When I moved to West Virginia I quickly learned that biscuits are a big deal around here. There is a whole chain of fast food restaurants centered around them. The first time I attempted to make biscuits after I moved here was a total disaster. The biscuits barely rose and the taste was less than great. The next couple of times were so-so. They weren't great, but not disgusting. Finally, after numerous tries and approximately five years I learned to make great biscuits. Now I love them and make a batch at least once a month. Today I tried a new recipe for Black-Pepper Biscuits with Sorghum from the June issue of Martha Stewart Living.

This recipe has 9 ingredients. It takes a total of 35 minutes, 10 of which is active and makes 10 servings. I was unable to find sorghum at any of my local grocery stores so I ended up special ordering it. I love that the small ethnic grocery store by my house will order me things and that it only takes a couple of days to arrive. I had no problems with any of the other ingredients and I made no modifications. Make sure to not overly touch the dough. The more you touch the dough the tougher your biscuits will be and the less they will rise. After adding the buttermilk you need to mix the dough just until it comes together, if you mix longer than that it will make the biscuits tough and flat. I ended up with 14 total biscuits, not the 10 suggested by the recipe. My biscuits took exactly 14 minutes to cook and no more. I did rotate my baking sheets halfway through the cooking time. I followed the remainder of the recipe as written.

These biscuits were delicious. I was worried that they would taste overly peppery, but they only have a mild taste of pepper. My two boys loved the sorghum on top of the biscuits and ate their whole servings. I was happy because I was worried that they might be too adult tasting. These biscuits rose very well and browned beautifully on top. This is a recipe I would definitely make again.

For the recipe go to Black-Pepper Biscuits.


August 4, 2012

Apricot Wheat Germ Muffins

This week I have been visiting family in the mountains. My two boys have been busy playing and adventuring while my mother-in-law and I are cleaning up my in-laws house. It has also allowed me to catch up on all my blog posts, which often get placed on the back burner and get forgotten. As you may have noticed in my recent posts I am working on my breakfast routine. My two boys are doing great and have cut down dramatically on their sugar and white flour consumption. They have also been drinking more water and  complaining less about the change in their diet. So how am I doing? I have been eating breakfast everyday for the last couple of weeks. When I first started I thought that it would be horrible, but I am feeling better and drinking more water, feeling more energetic and my weight is down to what it was before I had my first son. It may only be a few pounds, but I am very happy. A couple of weeks back I tried a new recipe for Apricot-Wheat Germ Muffins from Eating Well magazine, which looked perfect for a healthy breakfast.

This recipe has 14 ingredients. It takes 1 hour of total time, a half hour of which is active and makes 12 muffins. For the orange juice I squeezed my own. Oranges are cheap right now, much cheaper than the price of orange juice and fresh tastes so much better in recipes. Instead of using brown sugar I used splenda brown sugar for baking. The finished product does have a slight splenda taste, but it was mild enough that my two boys did not notice. I did chose to leave out the grated orange zest. I had grated the orange peel to use and put it in the fridge. However, my youngest child decided to dump it on the floor, so I left them out of the recipe entirely. I followed the remainder of the recipe as written.

These muffins were very popular with my two boys. They liked that they had apricots and didn't notice that they also were packed with wheat germ and whole-wheat flour. I ate a number of these muffins as soon as they came out of the oven. They are filling, without being heavy and are a great combination of taste and nutrition. Overall, another great breakfast muffin recipe.

For the recipe go to Apricot-Wheat Germ Muffins.

July 9, 2012

Chocolate Zucchini Bread

This has been a very busy week for my kitchen. I have canned, baked, cooked and prepped just about every fruit and veggie that can be grown in our region. It has been a good year for gardens and my counter was literally overflowing with squash at the end of last week. It was a tad bit overwhelming, but I dove in and canned 15 pounds of squash and pickles and baked chocolate zucchini muffins. However, even after all this work I was still left with a number of zucchini. Never one to let food go to waste, I decided to make a loaf of zucchini bread, a family favorite. After searching through recipes online I came across a recipe for Chocolate Zucchini Bread from Allrecipes.com which looked delicious and easy to make.

This recipe has 13 ingredients. It takes an hour and 15 minutes to prep and cook and makes 20 servings. I made a number of modifications to this recipe. I am not a fan of using a cup of oil in baking, so I substituted the oil with unsweetened apple sauce. Growing up my mother was diabetic so I became used to substituting unsweetened applesauce in recipes from an early age. It is a great substitute for sugar and oil and keeps baked goods very moist. I left out the walnuts, I am not a walnut fan and my boys won't eat any baked goods with walnuts or pecans. Finally, instead of using two loaf pans I baked the bread in a bundt pan. I love using a bundt pan in sweet bread recipes, it makes a great shape and is easy to slice into servings. I followed the remainder of the recipe as written.

I was very pleased with how pretty this bread came out. I topped the servings with frozen berries and sprinkled the top with powdered sugar. Substituting the oil made for a moist bread that wasn't overly heavy. I used bittersweet chocolate for the chocolate chips, which was nice since it didn't make the bread overly sweet. This recipe is a great way to use zucchini and will be a recipe that I will use again next year when I am swimming in garden vegetables.

For the recipe Chocolate Zucchini Bread.

Here is a pic of the squash and pickles I was busy making. My boys love pickles and ate all 20 jars I canned last summer!

July 7, 2012

Chocolate Zucchini Muffins

My husband likes to tease me that I eat a lot of carbs. He's right, I would be a horrible person on a low-carb diet, I just can't live without bread, muffins, pretty much baked goods in general. I know that I have my dad to blame for this love of all things bread related. Growing up when my mom was out doing her tupperware parties my dad would take me to the donut shop down the street and we would literally eat a dozen donuts between the two of us. I was also so thin that the doctors put me on ensure to gain weight, which did nothing except make me hate the taste of vanilla drinks for the rest of my life. Needless to say I have been lucky most of my life that eating a large amount of carbs has never had the effect that my husband claims they have had on his waistline. However, now that I am in my thirties I have been trying to find ways to modify my favorite carb snacks into healthier versions. This week I had an abundance of garden veggies and thought that the Chocolate Zucchini Muffin recipe on Allrecipes.com would be a good starting point for a healthier muffin.


This recipe has 14 ingredients. It takes 35 minutes of prep and cook time and makes 2 dozen muffins. I made a number of ingredient modifications to this recipe. First I never have cardamon in my house, it's not a spice that I use frequently. Given that I didn't have the spice and I had no desire to run to the store in 100 degree heat I left it out completely. Second, the thought of using 1 whole cup of oil made me cringe. Instead I substituted 1 cup of unsweetened applesauce. The original recipe only uses cocoa powder. I also added 1/2 package of mixed bittersweet and milk chocolate all natural chocolate chips. Finally I ended up with 18 muffins total since I like my muffins on the larger size. I followed the remainder of the recipe as written.

My two boys ate the majority of this batch of muffins and had no idea that they were eating zucchini or that I substituted the fat with applesauce. I was very happy with how moist the muffins were with the applesauce and the taste was delicious. It was definitely a great way to use an overabundance of garden vegetables and is a recipe that I would use again in the future.

For the recipe go to Chocolate Zucchini Muffins.

July 3, 2012

Banana Chocolate Chip Muffins

Ever since my potassium became dangerously low in January I have made an effort to eat foods rich in potassium. I drink a lot of low-sodium v-8 and I attempt to eat bananas. The emphasis here should be on the word attempt. My husband and two boys love bananas, I can't stand them. In baked good bananas are delicious, but there is something about the texture of uncooked bananas that I can't stomach. So I have the problem of buying bananas and not eating them for a week. During the colder months this isn't really a problem since it takes the bananas a while to turn brown. However, with the 100 degree days that we have been experiencing, my bananas have been going almost black in a matter of days. So what I have I been doing with all these over-ripe bananas, I have been baking. Last week I tried a new recipe for Banana Chocolate Chip Muffins from Taste of Home Magazine which looked perfect since my whole family loves the taste of chocolate and banana together.
This recipe has 10 ingredients. It takes 25 minutes of prep and 15 minutes of baking and makes 24 muffins. I did make a few modifications to the ingredients. I decided to make these muffins at the last minute and I didn't have any chocolate chips. The store across the street from my house only had dark chocolate candy bars, so I substituted 6 ounces of chopped chocolate bars for the chocolate chips. Secondly, I only had two bananas, instead of the three suggested by the recipe and I left out the walnuts completely since I don't like nuts in cookies and muffins. Finally, I made 18 large muffins instead of the 24 suggested in the recipe. I like large muffins and 24 small muffins wouldn't work for my family. Rotate the muffin pan halfway through the baking time to ensure even browning. I followed the remainder of the recipe as written.

My boys ate 10 of these muffins within the first day that I made this recipe. The dark chocolate and banana work well together, without either being overpowering. I liked that the muffins were moist and using the dark chocolate candy bar made for delicious bursts of chocolate flavor. Definitely a recipe I would make again!

For the recipe go to Banana Chocolate Chip Muffins.

June 26, 2012

Favorite Bread Recipes


Every couple of months I enact my leftovers rule. For approximately two weeks my family eats all the leftovers from the freezer  and pantry cupboard. I try to make leftovers once a week, but they still accumulate in my freezer and I end up with various leftover ingredients in my cupboards. So this is week one of my two week leftover session, so I thought it would be a great time to do some favorite recipe round-ups. Today's topic is bread. I absolutely love to make bread and make it normally once or twice a week. I actually taught myself to bake bread, baking was never one of my mom's strong suits and I learned to bake from cookbooks. Now that I have been baking bread for a while I have become quite adept at knowing which ingredients need to be modified and which recipes will work. Here are my favorite bread recipes that I have reviewed for my blog. Enjoy!


Cilantro-Scallion Bread


Soda Bread Biscuits


Garlic-Olive Loaf


Lemon-Thyme Bread

There are my favorite bread recipes. Looking back through my blog I can't believe how far my blog has come the last year. I actually look like I might know what I'm doing now, maybe...
Do you have a favorite bread recipe?  

April 27, 2012

Soft Pretzels

Some of my fondest memories with my dad growing-up involved soft pretzels and baseball games. Since we lived in Seattle, the Mariners were always horrible and the Kingdome was literally (as in ceiling tiles coming off) falling apart, but the soft pretzels were always delicious. Even badly made soft pretzels hold a special place in my heart. They remind me of the afternoons with my dad at baseball games. My mom sold Tupperware to make ends meet growing-up so most evenings and weekends she was gone hosting parties. Now I love my mom, but she had a narcotic system of color coding the food dishes that she left for my dad and I to eat. My dad was good about eating my moms color coded food most of the time, but about once a month we would sneak out and have 'real' food. By 'real' food I mean fast food and soft pretzels. We never spent a lot, and somehow my dad always was able to get us seats at the game without paying. To this day that is one of the best things about my dad, he knows someone that works everywhere. I never knew we didn't have a lot of money because my dad could befriend anyone and get us into any event that I wanted. Pretty much my dad was awesome. So long story short, I love soft pretzels! Given these fond memories, I was excited when I saw a recipe in the February issue of Woman's Day for Soft Pretzels.


This recipe has 6 ingredients. It takes 2 hours of total time, 50 minutes of which is active and makes 8 servings. I had all of the ingredients already in my cupboard and made no ingredient modifications. I would suggest to make sure that your pretzels are much bigger than you think they should be. As you can see by the picture at the top of the post, my pretzels ended up rising more while I was rolling out the rest of the batch and ended up looking more like a fancy bagel. They still tasted great, but visually they didn't look like a typical pretzel. The one thing that I would change with the recipe would be to double the amount of water and baking soda that the pretzels are boiled in. By the time the last batch of pretzels went in the water there was barely enough left for them to be fully boiled. I think doubling amount would remedy the situation. I followed the remainder of the recipe as written.
These pretzels turned out delicious! My husband and two boys ate the entire batch in less than two hours. A great thing that my husband discovered was that they made a great bun for a veggie burger. They created a salty bun that would work well with a variety of burger types. I tried a bit of the burger he made using this method and it was yummy! I will definitely try this idea when I make this recipe again. I experimented with the toppings, I did two with kosher salt, one with bacon salt, one with buffalo pretzel salt, one with an Asian spice rub and one with sugar. I love that I could make the toppings however I wanted. Overall, a very easy soft pretzel recipe that's much cheaper than stadium pretzels and can be tailor made to your topping tastes.

For the recipe go to Soft Pretzels.

March 16, 2012

Food Network Homemade Bagels

When I was in college I spent most of my mornings at the bagel shop before school and work. There were some great bagel shops around campus and I tried every one of them. On weekends when I was too tired and unmotivated to go out for bagels I had a stash at home that I would toast and slather real butter on. After having kids I started trying to cook as many things as I could from scratch. One of the first things on my list was bagels. I figured that they couldn't be much harder than making homemade bread which I had already successfully tackled. I tried a number of recipes that didn't work out as well as I expected and almost gave up on trying to make the perfect homemade bagel. Then about a year ago I finally found a few recipes that worked and tasted great. One of my favorite Homemade Bagels recipe is by the Food Network and has the prefect balance of soft chewy inside and thick outside.

This recipe has seven ingredients plus toppings. It takes approximately 2 and a half hours to rise and bake and makes 12 bagels. All the ingredients are basic and I had no problems finding any of the ingredients. For whatever reason the recipe states that it only takes an hour and a half, but if you add up all the time it takes around 2 1/2 hours. Additionally, I don't flip my bagels over during baking, I leave them right side up so that they keep a nice rounded top. For the topping for this batch of bagels I used sesame seeds. Sesame seeds are my favorite bagel topping since they work well with sweet or savory bagel toppings. Finally, I form my bagels slightly differently than the recipe. I roll my dough into a bowl, then stick my thumb through and pull making a nice round hole. I followed the remainder of the recipe as stated.

Homemade bagels are a great and easy way to have fresh baked goods in the morning. This recipe has a great outside since it is boiled before going in the oven. The result is a great chewy bagel that is perfect with a variety of toppings. These work great with cream cheese, smoked salmon, real butter or whatever your preferred topping. Overall, a great and easy bagel recipe that will make you never want to buy store bought again.

For the recipe go to Homemade Bagels.
Related Posts Plugin for WordPress, Blogger...