Showing posts with label Lemon. Show all posts

June 5, 2014

Homemade Mint Iced Tea


I am a horrible food stylist. It seems to be a talent that many food bloggers have. They spend lots of time shopping for the perfect plates, utensils, and tableware in order to take gorgeous photos. I have to admit I hate shopping for photo props. While I love the second hand store, I don't like shopping for vintage tableware, or linens just to make my photos pop. Plus, with overly propped photos I never know if I am supposed to be looking at the food. I get distracted by the beautiful colors, tableware, plates etc. and more often than not the food becomes the prop instead of the focal point of the recipe that it is supposed to be representing. Honestly I am also a little bit jealous. I wish that I had the patience, time, and follow through to be able to spend hours putting together my photos. Most days I am lucky if the food gets on the plate and the photo taken. One thing I do love is angles. I spend more time finding the right angle for my photos than the worrying about the props. After preping, cooking, and plating my food I just want the angle of the photo to represent my food in the best light and hope that maybe no one will notice that I didn't spend hours finding the perfect vintage table linen for my shot.

Today's recipe is an example of my less than stellar food styling abilities. When I had time to take the photo the mint had all been used and I had no leaves left for photo props. So I am sad to admit that my mint iced tea photos have no actual mint in the picture. Oh well, without further ado here is the breakdown of the recipe I tried today from the Food Network for Mint Iced Tea.


This recipe has 6 ingredients. It takes 2 hours and 20 minutes of total time, 10 minutes of which is active, and makes 4 servings. I only made a few small changes to the original recipe. First, I doubled the recipe to use the large amount of fresh mint that has exploded in my garden the last couple of day. Second, I used half sugar and half stevia. Whenever possible I try to reduce the amount of sugar in drink recipes since my kids are hyper enough without a ton of extra sugar added to their diet.


My youngest son fell in love with this recipe. He drank half of the pitcher this afternoon and insisted on drinking it with a sliced lemon on his glass, it was pretty cute. If you aren't a huge fan of mint you can take out the mint after a couple of hours and the tea will be more lemony than mint tasting. On the flip side if you are like my family and love mint, let the mint steep in the fridge for most of the day and the tea will have a nice crisp flavor.

For the recipe go to Mint Iced Tea.


May 10, 2014

Mediterranean Tuna and Bean Salad


Lying by omission. This has been the hard life lesson I have been trying to teach my oldest son the last couple of weeks. I think that as adults we do it all the time. Some lies we do to spare other people's feelings, but some lies by omission we do to make our selves feel better or avoid feeling uncomfortable. Instead of lying I have been trying to teach my son ways to be constructive with his criticism. If you don't like something don't lie about it, but don't make the other person feel bad about the situation. It's okay if you don't like dinner, just don't say it was horrible. Instead tell me what you liked about the dish and add a compliment at the end, "I liked the peppers in the meal even though the dish was spicy, it reminds me of that great recipe with peppers you made last week." You don't have to like everything and you shouldn't have to lie about it, just don't tell the truth in a way that hurts someone else. I would rather that someone told me something constructive than tell me that everything that I ever did was wonderful and great, nothing is learned or gained from never having anything negative told to you. It's all about balance in the end, both positive and negative comments help us to be well rounded individuals.

Since it has been hot for the last week in my area I have been trying to make cooler foods for dinner. It doesn't help that my oven broke and it wasn't until today that I finally got a new one. So cold salads have been on the menu in my house a lot lately. Last week I tried a new recipe for Mediterranean Tuna and Bean Salad from the Kroger home mailer. 


Now 99 percent of the time I don't copy recipes outright. The exception I have always made are recipes that are sent in coupon circulars and recipes on packages. I still change the steps to avoid copyright, but I view these recipes as advertisement for the product and company and not in the same category as other printed recipes. So here is the recipe from Kroger: 
  • 2 (5 ounce) cans solid white tuna in water, drained
  • 2 (15 ounce) cans cannellini beans, drained and rinsed
  • 12 radishes, cleaned, trimmed and chopped
  • 2 lemons, zested and juiced
  • 2/3 cup chopped parsley
  • 9 tablespoons extra virgin olive oil
  • salt and pepper to taste
Combine all ingredients and mix. Serve over spinach or salad of your choice. Also great with crackers. 

That's it. I would suggest adding a small amount of fresh dill if you have it. I love fresh dill with tuna it gives it a nice fresh taste and during the summer dill is very easy to grow in a pot or in your garden. My dill is doing great right now and I look forward to many recipes using dill soon. 

October 28, 2013

Lemon Poppy Seed Buttermilk Pancakes

Gluten Free Lemon Poppy Seed Buttermilk Pancakes
Gluten Free Lemon Poppy Seed Buttermilk Pancakes 


My youngest was at my in-law's house for the last week. He loves going up and spending time with his grandparents and they love having him. What I don't love is how long it takes him to re-adjust. Today he has been whiny, had tantrums and repeated how nannan and papa let him do anything he wants. Mommy is the bad guy because he isn't allowed to have the 5th piece of candy he wants. Growing up my mother always joked that she couldn't wait until she was a grandmother because then she could spoil me without having to deal with the day to day discipline. When I started to act up she could just send me home. I never really understood what she was talking about until I had my own kids. Now my mother-in-law and I laugh about how we are good cop/bad cop. He knows exactly what he can get away with at both houses.  I'm hoping that he goes to sleep early and is back to normal soon. He has always been dependent on having a schedule, I think it might be because he is the baby of the family. We already had a routine in place when he was born and he fell right into it. It's funny how birth order can affect personality. In order to brighten up my son's mood today I tried a new recipe for Lemon-Poppy Seed Buttermilk Pancakes from the November 2013 issue of Food and Wine Magazine.

This recipe has 13 ingredients. It takes 30 minutes of total time, all of which is active and makes 15 3-inch pancakes. I did make a few changes to the original recipe. First I already had gluten free all-purpose flour in my cupboard. I had made a huge batch a couple of months back and I didn't see the point in making a new batch with the recipe in the magazine. I used my indoor electric griddle. A griddle is the best way to have your pancakes come out perfectly cooked with a nice brown color. I did end up making my pancakes a little bigger than the recipe. My pancakes spread out a little more than the magazine photo, so I ended up with pancakes larger than the recipe states.

My youngest loved the poppy seeds in this recipe. I wasn't sure if he would try the pancakes since he had only had poppy seeds a few times previously. It turns out he thought they looked liked Angry Birds pancakes (I have no idea why) so he ate almost half the batch throughout the course of the day. They were definitely a hit. I had my batch with maple syrup, but my youngest insisted on his just having butter. Either way, they were a nice and different way to start the day. If you do not eat gluten free this recipe would work with any type of baking mix (such as Bisquick) or regular all-purpose flour. You might need to adjust the amount of baking soda and baking powder since gluten free recipes rely on them more than wheat flour recipes.

I don't have any Huntington pictures in my post today. I finally ran out of all the ones I took this summer. I'm hoping to have some fall pics up on the blog later this week!

For the recipe go to Lemon Poppy Seed Buttermilk Pancakes.

Lemon Poppyseed Buttermilk Pancakes

Recipe Type: Breakfast
Summary:
A light gluten free Lemon poppy seed pancake recipe. Uses both lemon zest and fresh lemon juice and has a nice crunch from the poppy seeds.
Preparation Time: 0h, 30m
Total Time: 0h, 30m
Yield: Serves 8

October 20, 2013

Fish with Tahini Sauce

Click for recipe for fish with tahini
Fish with Tahini


My high-school calculus teachers bribed us with candy bars. Every time we passed a test we were rewarded with a Butterfinger. I took calculus when I was a junior in high-school and was the youngest person in the class. Additionally my school didn't offer the class so I had to walk across the street to the much bigger high-school where I knew no one and had to have the principal walk me to class for the first two weeks. There are many things that I don't remember from high-school, but I remember those candy bars. They made a less than ideal experience a little less stressful.

Fast forward to this week. My oldest son had his first report card for second grade. He is very smart, but hates doing all the worksheets. So his grades for organization and completing tasks weren't so great. He seems to have the same problems that my husband and I had in school, we tested off the charts, but didn't work as hard as our teachers expected. In high-school I graduated first in my class, but got c's for effort. Apparently I was supposed to be working twice as hard for the same grade, a theory that never made sense to me. So I'm using bribes for my son. Yep, I'm that parent. It worked with me all the way through high-school and I ended up doing very well in college and graduate school. We have a new chart with rewards and last week was a complete change around. He took his reading tests, he turned in his work and he sat and did his work book without complaints. So the bribes will continue until he is able to use his own incentives to complete his work (which is how I did very well in college and to this day to finish the dishes etc.).

Today's recipe came about from having way too much tahini in my cupboard. My husband's godmother is Lebanese and buys us huge vats of tahini. I use it a lot, but the huge container was begging for something other than my usual recipe rotation. So I tried a new recipe for Fish with Tahini Sauce.
Rotary Park Huntington, WV

This recipe has 7 ingredients. It takes 45 minutes of total time, 5 minutes of which is active and makes 6 servings. I did make a few changes to the original recipe. First, since I could only find farm raised Tilapia I substituted wild caught Mahi Mahi. Having worked in the fisheries dept as an undergrad you really want to buy wild caught fish (and know the country of origin where the fish is caught). Plus I love Mahi Mahi, it's one of my favorite types of fish. The only other change I made was to double the sauce since my fillets were on the small side and I had a number of pieces to cover. I followed the remainder of the recipe as written.
My kids at Rotary Park Huntington, WV
Rotary Park Huntington, WV

My husband and I loved this recipe. The fish cooked perfectly and the tahini sauce was delicious. If you aren't a fan of Mahi Mahi or Talipia the recipe would also work well with cod or any other flaky white fish. You could also caramelize the onions first and then add them to the top of the fish. This would work especially well if you aren't a fan of crispy onions.

For the recipe go to Fish with Tahini Sauce.

Fish with Tahini

Recipe Type: Main
Summary:
An easy recipe for oven cooked fish with a delicious tahini sauce. Simple and a great way to add fish to your diet!
Preparation Time: 0h, 5m
Cooking Time: 0h, 40m
Total Time: 0h, 45m
Yield: Serves 6

August 4, 2013

Homemade Lemonade


Homemade Lemonade
Homemade Lemonade


I'm back from my blogging vacation! It was nice having time to spend with my kids and I feel relaxed and ready to get back to cooking and sharing my recipe results. School starts for my oldest on Thursday. Today was spend looking for a new backpack. My oldest was at my in-laws house so I was left shopping for clothes and school supplies with my smart phone, texting pictures to my son to make sure everything was okay. Luckily I am super aware of what both of my kids like and my oldest was very excited with everything I chose. I love when my kids actually think that I did something great. My youngest is very jealous that my oldest is starting school so he ended up with new shirts and a toy. I'm hoping that on Thursday he doesn't have a complete meltdown when the bus pulls away without him. He will be more than ready next year when he is able to get on the bus with his older brother for his first day of school. Since this was a laid back weekend I used up a lot of items that I had leftover in my fridge and pantry. Yesterday I tried a new recipe for Homemade Lemonade from the Food Network.

Huntington, WV from across the Ohio River


This recipe has 6 ingredients. It takes 10 minutes of total time, all of which is active and makes 6 to 8 servings. Honestly this recipe is so straight forward that I didn't make many changes. The main deviation I made from the original recipe was to cook the sugar and water on the stove until the sugar fully dissolved. Then I added the syrup to the pitcher and added the remaining ingredients. After the lemonade was done I allowed it to cool in the fridge for 4 hours. I served the lemonade over ice with lemon slices.

Frank Gatski Memorial Bridge


My two kids were big fans of this lemonade. It came out pretty sweet. If you aren't a fan of very sweet lemonade you can cut down the amount of sugar. If the lemonade is too tart or strong for your taste you can add additional cold water. This is definitely a recipe I would make again and it literally costs cents to make.

The second picture is of Huntington, WV from across the Ohio River in Chesapeake. The third picture is of the Frank Gatski Memorial Bridge.

For the recipe go to Homemade Lemonade.


Homemade Lemonade


Recipe Type: Drink
Summary:
A simple 6 ingredient recipe for Homemade Lemonade. A great way to use old lemons.
Preparation Time: 0h, 10m
Total Time: 0h, 10m
Yield: 6 to 8 servings

July 5, 2013

Melting in the Summer Heat? Try Lemon Balm Iced Tea

Click for Recipe for Lemon Balm Iced Tea
Lemon Balm Iced Tea


It has been raining for what seems like months. When it's not raining the temperature has been in the 90's and humid. I think we have had enough rain for the entire year just since May. While this would normally be a minor annoyance, my plants are really less than happy. I found mushrooms growing in my basil pot and the lower leaves are turning yellow. There has just been way too much rain, even with great drainage etc they just aren't happy right now. Since the rain is wrecking havoc on my potted plants I have been making an attempt to use as many of my herbs as I can while they are still doing decent. This week I came up with a new recipe for Lemon Balm Iced Tea.
  • 2 cups lemon balm leaves
  • 4 black tea bags
  • 1 sliced lemon
Wash and hand crush the lemon balm leaves. Add the lemon balm to 8 cups of water. Bring to a boil and let simmer for 5 minutes. Take off of heat, add the tea bags and sliced lemon. Place a lid on the pot and let sit for 10 minutes. Strain the tea and add to a gallon pitcher. Add cold water to fill and let sit in the fridge until cool. Serve over ice.

That's it, a very easy recipe that is refreshing on a hot summer day. My two boys really loved the lemon flavor of this tea and drank the majority of the pitcher. It really is a great way to use lemon balm!

June 12, 2013

Olive Oil for Dessert? A Recipe for Olive Oil Cake with Cherry Topping

Click for Reciep for Olive Oil Cake with Cherry Topping
Gluten Free Olive Oil Cake with Cherry Topping


 Growing up my mother used a lot of olive oil. Pesto was one of her favorite dishes and I loved the smell and taste of the basil and olive oil together. She did use vegetable oil for some of her baking and recipes, but olive oil was always her favorite. As I got older I thought it was funny that suddenly olive oil became all the rage with foodies. I never realized that it wasn't popular since my mother loved shopping the Italian grocery stores back home and it was always a staple on our table. Now that I bake and cook for my family I have come to realize that not everyone buys the giant size of olive oil at the big box stores and uses it quicker than I am willing to admit. There are few things that compare to a simple dish with the right amount of extra virgin olive oil. Especially in the summer, it just seems natural. While many people know about cooking with olive oil, my mother introduced me to the idea of baking with it as well. It is a great substitute for butter or vegetable oil in many recipes and adds a nice buttery taste to cakes. Today I tried a new recipe for Olive Oil Cake from the July 2013 issue of Food and Wine magazine.

This recipe has 9 ingredients. It takes 50 minutes of total time, 20 minutes of which is active and makes 12 servings. I did make a number of significant changes to the original recipe. First since I eat gluten free I used a combination of almond meal (flour) and potato starch. I used 3/4 of a cup of potato starch and 1 cup of almond flour. I didn't have whole milk, so I substituted half and half. For the zest I used 1 lemon since I wasn't sure if my kids would be fans of a strong lemon flavor. Finally, I made a topping that the original recipe did not include. I have had frozen cherries in my freezer for a couple of months and I figured that they would be a great accompaniment to the cake. Instead of adding vanilla like the recipe I followed stated I substituted almond extract. There is something about cherries that screams almond extract to me.

Baking gluten free can oftentimes be very hit or miss, so I wasn't sure what to expect with this recipe. I was happy when it came out and it had actually risen like a regular wheat flour cake and the crust was nicely browned. My two boys really loved the cake and have already eaten half of it by the time I am writing this. This cake would be great either as written or gluten free and is a nice way to bake with olive oil.

For the recipes go to Olive Oil Cake and Cherry Topping.

May 13, 2013

Wild Salmon, Asparagus, and Shiitakes in Parchment Recipe

Click for Recipe Wild Salmon, Asparagus, and Shiitakes
Wild Salmon, Asparagus, and Shiitakes

Apparently my son thinks I'm awesome because I make him bacon. That's right bacon. It all traces back to last week and the homemade Mother's Day gift that my son made at school. He came home so excited from school on Friday and immediately gave me the gift that he had made. It featured a picture of me frying bacon and a story about what makes me so great. The story emphasized that I do crafts and fry bacon. Of all the things that I do, bacon has the biggest impact on my kids. I don't know if I should be flattered or worried. According to my son all the other kids put things like their mother was pretty, funny etc. He was very proud that I make great bacon. Maybe I should stop trying to dress up and look nice for my husband as well. Bacon seems to have magical qualities for the males in my family. Since having bacon everyday is not healthy I make other foods that the males in my family love. Two of their favorites are salmon and mushrooms. Tonight I tried a new recipe for Wild Salmon, Asparagus and Shiitakes in Parchment from Martha Stewart Living magazine.

This recipe has 9 ingredients. It takes 35 minutes of total time, 25 minutes of which is active and makes 4 servings. I only made a few changes to the original recipe. First since the shiitakes at the store I shop at only come in 5 ounce containers, I bought two and used 10 ounces total in the recipe. Secondly, I realized that I had forgotten to toss the vegetables with olive oil, so instead I drizzled the top of the salmon and vegetables. This method ended up working very well since it kept the salmon moist while cooking. I found that my cooking time was much longer than the 9 minutes suggested by the recipe. This was probably due to the fact that my fillets were much larger and had skin.

Since everything is baked in parchment this is a very easy dish to prep and cook. The clean-up just involves throwing away the used parchment, which is great for a weeknight meal. Both of my sons love salmon and this dish was popular. The sliced lemon wedges are an important component, it helps to bring out the flavor of the vegetables and enhance the flavor of the salmon.

For the recipe go to Wild Salmon, Asparagus, and Shiitakes in Parchment.

April 22, 2013

Recipe for Buffalo Style Salmon with Blue Cheese Arugula Salad

Click for Recipe for Buffalo Style Salmon with Blue Cheese Arugula Salad
Buffalo Style Salmon with Blue Cheese Arugula Salad

My oldest son is obsessed with seafood. From the time he turned 2 and had his first bite of fish he has loved any type of seafood. He is always begging me to buy him salmon or shrimp to eat. My youngest son shares his older brothers love of seafood and it is one of the few foods that he will eat without complaints. Since quality seafood is expensive we only eat it about twice a month. Also my children can eat 2 servings of salmon a piece, so it can cost a small fortune to feed them. I do believe that seafood is an important part of a healthy diet and we eat salmon and shrimp the most frequently. Yesterday I tried a new recipe for Buffalo Style Salmon from the May 2013 issue of the Food Network Magazine.

This recipe has 14 ingredients. It takes a total time of 35 minutes, all of which is active and makes 4 servings. I made a few changes to the original recipe. First the easiest type of salmon to find in my area (that isn't farm raised) has skin, finding skinless can be a challenge. Therefore I used skin-on salmon and a slightly thicker fillet than the recipe called for. This increased my grill time by 3-4 minutes. I always use Frank's for my hot sauce and this recipe was no exception. The recipe calls for low-fat yogurt, but I already had full fat yogurt for another recipe so that is what I used. As I have described before I use an indoor electric grill for most of my grilling and it always works well.

I was worried that the buffalo sauce would be too spicy for my kids, but they loved it. They ate their entire servings and tried to eat some of mine. My husband and I really liked the whole dish. The salad made a great side to the salmon and the grill created a nice flavor for the fish. This would definitely be a recipe I would make again.

For the recipe go to Buffalo Style Salmon.

April 8, 2013

Recipe for Burgers with Mozzarella and Spinach-Arugula Pesto

Click for Recipe for Burgers with Mozzarella and Spinach-Arugula Pesto
Burgers with Mozzarella and Spinach-Arugula Pesto and Homemade Buns


The weather was beautiful here today. It finally feels like spring with 80 degree weather and the ability to wear shorts without freezing. The smell of BBQ has been all over my neighborhood as well. I absolutely love the smell of BBQ. There are few smells better than walking outside and smelling someone smoking ribs on a big charcoal side smoker. The weather and the rise of grilling inspired me to make burgers this week. There is something about warm weather and burgers that go hand in hand. My husband bought a huge charcoal grill about 5 years ago. However, this year it needs the rust to be sanded from sitting in our basement and my motivation has been lacking. Therefore I settled for making burgers on my indoor grill this week. Today I tried a new recipe for Burgers with Mozzarella and Spinach-Arugula Pesto from Bon Appetit.

Click for Recipe for Gluten Free Burgers with Mozzarella and Spinach-Arugula Pesto
Gluten Free Burgers with Mozzarella and Spinach-Arugula Pesto

This recipe has 15 ingredients. It takes 30 minutes of total time, all of which is active and makes 6 servings. I did make a few changes to the original recipe. First I did two versions, one with homemade hamburger buns and the other with gluten free buns. I had one pound of beef that I had ground with chuck a few months back. I combined the ground beef with 3/4 pound of ground lamb. Since I was short on time I did not wilt the spinach. I often make pesto with spinach and never wilt it, I just puree it in the food processor in batches. For the burgers I ended up with a total of 8 burgers. I like to keep my burgers on the small side, especially since they were blended with ground lamb which can be rich.

For this recipe I used heirloom tomatoes. I love heirloom tomatoes, they are great with burgers. Make sure to salt the pesto and the tomatoes. The salt really helps to bring out the flavor of the tomato and the pesto. Blending the lamb and beef gave the burgers great flavor and my family really enjoyed these burgers. There was also enough pesto leftover to use on turkey burgers later in the week.

For the recipe go to Burgers with Mozzarella and Spinach-Arugula Pesto.

April 2, 2013

Recipe for Pesto Pork with Polenta

Click for recipe for Scallion-Basil Pesto with Pork Tenderloin, Spinach and Polenta
Scallion-Basil Pesto with Pork Tenderloin, Spinach and Polenta

I can't believe how quickly this year is already going by. My oldest is done with school next month and will be in second grade next year. There are days when I fell overwhelmed and under appreciated staying at home and then I realize how quickly my kids are growing-up and how much I love spending so much time with them as they grow. As my kids are getting older they are also beginning to eat a lot more. Since both of my kids are boys I don't even want to think about how much food they will be consuming as teenagers. Plus they are close enough in age that they will both be eating my entire refrigerator at about the same time. Keeping snacks readily available and doubling recipes has become a must in my household. One meal that is always a favorite in my house is pork. It doesn't matter how I prepare it, my two boys absolutely love it. Last week I tried a new recipe for Pesto Pork with Polenta from the April 2012 issue of the Food Network Magazine.

This recipe has 12 ingredients. It takes 40 minutes of total time, all of which is active and makes 4 servings. I only made a few changes to this recipe. First to prepare the polenta I sliced it into 1/2 inch thick slices, brushed both sides with olive oil and seared the slices on my indoor electric grill until they had nice grill marks. As I've stated many times before you really need to temp pork. The recipe is 100 percent correct about pulling out the pork at 145 degrees. While resting the pork will cook another 5 degrees. Not letting pork rest or cooking it past 145 degrees will result in tough and overcooked meat. I found that I had to add very little salt to the pesto since Worcestershire sauce is high in salt.

I really like that this recipe is a complete meal. The polenta and spinach make great sides to the pork and the polenta ended up being the most popular part of the dish with my two sons. The pesto has a really nice flavor with an umami undertone from the Worcestershire sauce. In addition to the pork the pesto would also work nicely with fish dish due to its citrus taste.

For the recipe go to Pesto Pork with Polenta.

March 23, 2013

Recipe for Chicken Breasts with Parsley Caper Pesto and Ramp Oven Roasted Potatoes

Click for recipe for Chicken Breasts with Parsley Caper Pesto and Ramp Oven Roasted Potatoes
Chicken Breasts with Parsley Caper Pesto and Ramp Oven Roasted Potatoes

Easter is next weekend and I haven't even begun to plan anything. The last month has been all over the place with me having strep and now both of my boys have a stomach virus. Easter planning has taken a back seat. More than likely we are going to keep things low key and have Easter at our house with just my family. It will be nice since I host a lot of holidays and I tend to stress myself out. My boys are insisting on ham (I voted for lamb) and I will more than likely make roasted potatoes with ramp pesto, my mother-in-laws homemade roll recipe and some sort of vegetable. That is as far as I got this morning and more than likely it will stay pretty much the same. I do intend to dye Easter eggs sometime this week with food dyes (red cabbage, turmeric, onions, beets). Using food is really easy and I prefer it to store bought dyes. Luckily the Easter bunny has been ahead of schedule and already purchased everything for my boy's baskets. With Easter coming up and spring break being last week I have been making easy meals with minimal prep. Last week I tried a new recipe for Chicken Breasts with Parsley-Caper Pesto from the Everyday Food insert of Martha Stewart Living magazine.

This recipe has 9 ingredients. I takes 55 minutes of total time, 20 minutes of which is active and makes 4 servings. I only made a few changes to this recipe. First I used fingerling potatoes instead of small reds. I also added whole young ramps to the olive oil and potatoes before roasting. Additionally I added a small amount of ramps to the pesto to add flavor. The recipe states to rinse the capers, I chose to skip this step. My husband and I enjoy the salty taste of capers so I left the capers unrinsed for flavor. Finally since my breasts were so large it cook a lot longer than the 35 minutes stated in the recipe. I took the potatoes out at that time stated in the recipe and let the breast cook for an additional 30 minutes until they hit temp.

My husband and I were skeptical of this recipe. Neither of us are big fans of chicken breasts, we both prefer thighs. Previous recipes I have tried using chicken breasts have been dry, but this recipe turned out tender and juicy. The pesto really helped to keep the moisture in the kitchen and adding the ramps created a nice flavor. Since the breasts I used were so large I also had enough leftovers for chicken salad the next day.

For the recipe go to Chicken Breasts with Parsley-Caper Pesto.

March 18, 2013

Gluten Free Asparagus Pesto

click for recipe for gluten free asparagus pesto
Gluten Free Asparagus Pesto

Pork is king in my household. As I've discussed before the males in my house are huge pork fans. Especially bacon, lots and lots of bacon. Growing-up I was a little different. I was a vegetarian beginning freshman year of high-school. Luckily my parents were very supportive and I lived in the Pacific NW so there were numerous places to purchase great vegetarian food. I stayed a vegetarian until I moved to West Virginia. Between graduate school and anemia I decided that adding meat back in would be a  good idea. Then I met my husband who thought vegetables were a garnish for meat. Over the years I have slowly reformed him into eating meat as an ingredient and we eat one to two vegetarian dinners a week. This week we tried a new recipe for Asparagus Pesto from the April 2013 issue of Food and Wine magazine.

This recipe has 8 ingredients. It takes 20 minutes, all of which is active and makes enough for a pound of pasta. I did make a few changes. Since I eat gluten free I substituted gluten free ziti for spaghetti. I found that the pesto need a significant amount of salt for the flavor not to be bland, don't be afraid to add salt.

The basil flavor in this recipe comes through more than the asparagus. This recipe would be great for someone that wasn't a fan of asparagus, but still wanted the health benefits. Crumbled bacon would be a great addition to this dish as a topping. Overall, a great way to add spring flavor and even my youngest son loved it.

For the recipe go to Asparagus Pesto.

March 4, 2013

Mediterranean Rigatoni

click for a delicious Mediterranean chicken pasta with olives, tomatoes and feta

My two boys have decided that they are chefs lately. They enjoy taking things from around the house and my fridge and making a dish. Most of the time they claim that they are experimenting. I think they might watch too many cooking shows with me since they are always creating something with food that they find. They have made some things that I have to admit were pretty good. Yogurt seems to be their specialty lately, they have discovered some combination that have actually turned out pretty well. I love that they like to cook and they don't see it as a pursuit that only girls should do, which I think is great. I try to reinforce with my two boys that they should learn how to do everything around the house since it's always a good idea to be self sufficient. Teaching my kids to cook is something that is very important to me and my oldest helps me with dinner at least three times a week. Tonight for dinner my son helped me make Mediterranean Rigatoni from the March 2013 issue of Family Circle magazine.

This recipe has 9 ingredients. It takes 26 minutes of total time, 15 minutes of which is active and makes 6 servings. Since I eat gluten free I used gluten free ziti. I have never seen cubed feta in my area so I bought whole feta and crumbled it instead. After the pasta was done I added it to the sauce and allowed it to cook with the tomatoes until they started to break up. My husband isn't a fan of firm fresh tomatoes so I always allow them to cook slightly longer than recipes call for.

If you have a family that likes a lot of protein in their food I would suggest adding more chicken to this dish. Since their is only a pound of meat for six servings, there isn't a lot of chicken per bite. I would double the chicken and the amount of tomatoes. The flavors are nice and I liked the taste of the olives and fresh oregano. A balsamic vinegar reduction would also be delicious with this dish and the flavors would make the dish even better.

Currently this recipe isn't available online (Family Circle's decision not mine :). Here is the link to the photo on their site or you can find the recipe in the March 2013 issue of the magazine. 

February 25, 2013

Cilantro Lentils and Lemon-Cumin Rice


My posts have been slim this week. Normally I post once a day, but between family obligations and sick kids I have had no time for my blog. Right now my youngest is miserable on my lap while I attempt to write something that is at least semi intelligible. Whenever I am sick with a cold I love spicy food, the spicier the better. Especially when I have a stuffy nose I love things that have lots of flavor and kick. One of my favorite types of food to make spicy is Indian cuisine. The flavors can be made mild or intense and many recipes are easy to make at home. Last week I tried a new recipe for Cilantro Lentils with Lemon-Cumin Rice from the March 2013 issue of the Food Network Magazine.

This recipe has 10 ingredients in the lentils and 6 in the rice. The lentils take 1 hour of total time, 15 minutes of which is active and makes 6 servings. The rice takes 45 minutes, 5 minutes of which is active and makes 6 servings. I had no problems finding any of the ingredients. I did make a few changes. Instead of butter in the lentils I used canola oil and I increased the cayenne pepper to 1/2 teaspoon. Additionally, I let my lentils cook longer than the recipe suggested. I increased the total time by approximately 1/2 hour. This increased cooking time allowed the lentils to fully thicken. Make sure to salt again before serving, I needed to add an additional 1/2 tsp of salt.

The lemon juice added at the end of the lentil recipe makes all the difference. It really does add a great flavor that finishes the dish. The lentils and the savory rice are delicious together. The tastes play off of each other and are perfect. The rice would also work well with other recipes and could be modified to be more or less savory.

For the recipes go to Cilantro Lentils and Lemon-Cumin Rice.

January 30, 2013

Flavorful Low Fat Moroccan Lentil Soup


My youngest son went the dentist today and for the first time he had a cavity free appointment. While this is routine for my oldest son, my poor youngest son has had serious problems with his teeth since they came in. He never drank cows milk and still had to have two dental surgeries before his third birthday. Since then he has had fillings every six months. My dentist was determined that it was the food that he was drinking, but has finally been convinced that is has to mostly be genetics. My youngest eats healthier than any other child his age that I know and drinks a ton of water, very little carbs and a high protein diet. Luckily our pediatrician agrees with me and thinks it's 100 percent genetic and not my fault. I still hate the mommy guilt when he has to have another filling. I decided to make one of my son's favorite meals this week in order to calm him down before the dentist. My youngest absolutely loves soup, chicken noodle, vegetable you name it. This week I tried a new recipe for Moroccan Lentil Soup from the February 2013 issue of Eating Well magazine.

This recipe has 18 ingredients. It takes 1 1/2 hours of total time, 30 minutes of which is active and makes 12 servings. Since vegetable stock is so expensive pre-made I made my own. It costs a lot less money and tastes so much better. I used fresh spinach since the taste of frozen spinach always seems off to me. Thanks to my forgetfulness I failed to add the lemon and cilantro to the finished soup. I did add it to the leftovers and the flavor was delicious. I added a little more time to my overall cooking time to ensure that the lentils were fully soft. For soup I prefer my beans very soft, I find the texture more pleasing when eaten. I followed the remainder of the recipe as written.

I love that this soup is only 152 calories and 1 gram of fat per serving. Since it is full of vegetables and lentils it is filling and can either be used as a side or a main dish. I served it as a main dish and it was a perfect option for our vegetarian meal night. My youngest loved the cauliflower and ate all the pieces out first. This soup also makes a large batch so their are plenty of leftovers.

For the recipe go to Moroccan Lentil Soup.

January 19, 2013

Shish Taouk (Spiced Chicken Kebabs with Garlic Yogurt Sauce)

IMG_0324_zpsefdfe7fd photo IMG_0324_zpsefdfe7fd-1_zps121a86d8.jpg

As I sit here writing this I am debating whether or not I am motivated to bake cookies. It has been a long day and I'm exhausted, but I also have a horrible sweet tooth. I would love it if I could eat all the snacks at the grocery store, but since I can't eat gluten it severely limits my snacking options. There are many days like today when I would love a snack, but lack the motivation to actually make anything. It doesn't help that my 6-year-old informed me today that he was tired of gluten free snacks. I agree with him that many gluten free snacks just taste like a not exactly right counterpart to the more delicious gluten equivalent. However, in order to combat the difficulties that gluten free living can bring about (one of the worst is eating out, I love steak, but when it is always the only thing I can eat it gets a little old), I make sure that the meals that I cook are satisfying and filling. Last week I tried a new recipe for Spiced Chicken Kebabs with Garlic Yogurt Sauce from issue Number 153 of Saveur magazine.

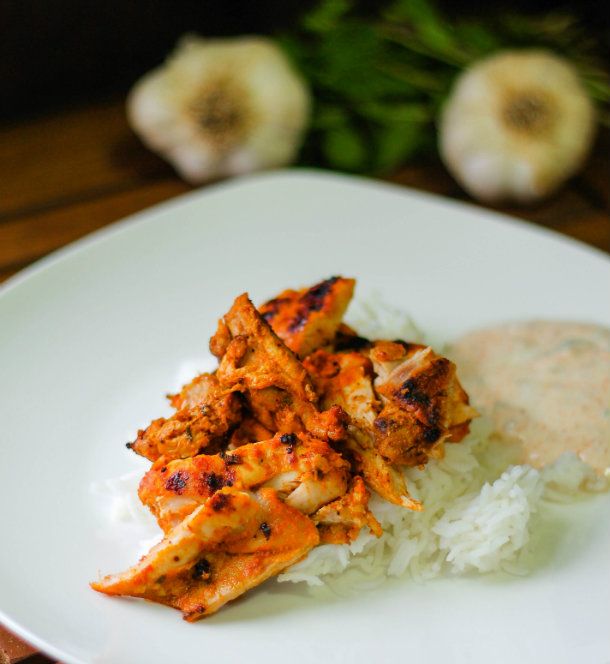
This recipe has 12 ingredients. It takes 2 and a half hours of total time, 30 minutes of which is active and makes 4 servings. As you can see from the photo I made a number of modifications to this recipe. First I didn't want to buy new skewers to grill the kebabs. I know that sounds odd, but I try to save money wherever I can and so I chose to change the recipe. Instead of cutting the chicken thighs I kept them whole and then when they were finished grilling I sliced them into pieces. Additionally, I used an indoor grill on the sear cycle to mimic a charcoal grill without freezing outside during the winter. I made one other major modification. I strongly believe in using the ingredients that I can find locally. I'm not against ordering things on the Internet, but I also try to be as frugal as possible. With this in mind instead of searching online and paying a large amount to purchase Aleppo Pepper I searched and found that I could substitute 4 parts paprika to one part cayenne. I did the math to make the proper adjustments and used the substituted spices. I followed the remainder of the recipe as written.

Even with all my modifications this recipe turned out very well. The flavor of the chicken was delicious and the yogurt sauce was slightly spicy with a great cooling flavor from the mint. I wasn't sure if it would work out since I didn't make the chicken as kebabs, but I was very happy with the end result. The yogurt sauce was also delicious with the leftover roasted chicken I had from another recipe and it is something that I will play around with as a sauce in future recipes.

For the recipe go to Shish Taouk.

January 18, 2013

Lemon Thins

IMG_0325_zps0fb5bebb photo IMG_0325_zps0fb5bebb-1_zps6b8b4120.jpg

As most of you know I have a major snacking habit. The thought of eating only three meals a day puts me into a panic. I need my snacks and bake almost everyday. However, I am also realistic about my snacking and try to make sure that I have a balance between healthy and indulgent. If I make a batch of brownies one day the rest of the snacks that I prepare for the week are nuts and healthy granola bars. I believe food and health in general is all about balance. I have a tread mill that I use for an hour each day. This hour of exercise makes it possible for me to sit and watch my favorite TV shows in the evening and enjoy the time just sitting and relaxing. Cookies are one of my favorite snacks. I could literally eat cookies for every meal, they are delicious. Since I love cookies so much I try to make cookies occasionally that are lower in fat and calories. Yesterday I tried a new recipe for Lemon Thins from the February 2013 issue of Eating Well magazine.

This recipe has 11 ingredients. It takes 45 minutes of total time, 30 minutes of which is active and makes 2 1/2 dozen cookies. I made a few changes to the recipe. First since I eat gluten free I used gluten free all-purpose flour instead of wheat flour. I also found that you need to make sure that the cookies are completely flat. If you don't roll out the cookies very thin they will not taste good. I actually used the side of the cup to roll the cookies after rolling the cup in granulated sugar. This method worked very well and I would recommend it. Additionally I allowed my cookies to bake for the full ten minutes to fully brown. I followed the remainder of the recipe as written.

With only 60 calories and 2 grams of fat this cookie is a snack that is healthier than many other cookie recipes. Plus they were a nice snack with a cup of coffee as a morning pick-me-up. The taste was not overly lemony, which was nice. I would say that they were a little dry. To me they tasted like they needed more fat. This could be partly due to the fact that I made them gluten free. Either way I would suggest increasing the amount of butter or using all butter instead of canola oil, which would be higher in saturated fat, but would vastly improve the texture and taste. The batter definitely needs more liquid, either with lemon juice or an increase in butter.

For the recipe go to Lemon Thins.

January 5, 2013

Rajma - Northern Indian Kidney Bean Masala Stew


I am feeling blah. For whatever reason January is never a great month for me. I don't know why, but I have horrible luck with appliances breaking and things going generally not in the right direction during this month. People also seem to be less than pleasant right now also. Today at the grocery store I was in the frozen food aisle. I was looking at some vegetables and the aisle was very narrow thanks to a display the store had set-up. When I was walking away I noticed there was a woman behind me that I hadn't noticed. Honestly, after two kids when I'm at the grocery store without them I tend to get in my 'me' zone. It is literally the only couple of hours during the week that I have to myself. I immediately apologized to the women and asked if I was in her way. Her response took me a little off guard. This woman was well into later life and used a profanity at me followed by the line 'of course you were.' Okay. I can understand if I was in her way. However, she could have said excuse me or brought it to my attention since I in no way say her since the door was open to the frozen food case. Second, why pull out the s word. Not necessary at all. I hope that my kids will grow up knowing that politeness is always the best response. Overall, I think so far I am already ready for the month of January to be over and it has just started. So I am feeling a little blah. Given my current winter mood I have been making a lot of soups and bean dishes. Last night I made a new recipe for Rajma (Northern Indian Kidney Bean Masala Stew) from a recent issue of Saveur magazine.

This recipe has 17 ingredients. It takes an hour and a half of total time, 45 minutes of which is active and makes 4 servings. I did make a number of modifications. First I doubled the recipe. Four servings is not enough for my family, which includes two growing boys. Second I try to follow a recipe as much as I can but sometimes I am unable to find a particular ingredient. So with this recipe I left one out. I have used chiles de arbol when I lived in a much larger city. Finding them in my city just isn't a possibility, so I chose to not use them. Finally, since I was making this for my kids I seeded and diced my serranos. It would have been too spicy for my kids to eat otherwise. I also chose to cook my beans on the stove. I have a pressure cooker which I use for canning, but I find it a pain to take down and use for everyday cooking. I let my beans cook for two hours in order to be fully softened. I followed the remainder of the recipe as written.

By leaving out the chiles de arbol and seeding the serranos this dish had a slight kick, without being too spicy for my kids. I let my beans cook down slightly so they were thicker than a traditional stew, but still worked well served over brown rice. My husband really loved this dish and was happy that it tasted different than the normal Indian curries that I make frequently.

For the recipe go to Rajma.

December 29, 2012

Roasted Chicken Thighs with Lemon and Oregano


The weather today was unpleasant. I love snow when I'm inside warm in my house with the gas heat turned up. However, today the weather was cold, windy and there was lots of sleet. I hate sleet. It's not rain, it's not snow, it's just miserable. I think I might also be a weather wimp. In the summer I begin to hate the heat in about July and I complain the rest of the summer. In the winter I complain that it is too cold and I am always wrapped up in three blankets. I seem to never be able to find the right heat to feel just comfortable. It would help if the area that we lived actually had 4 seasons every year. There are a lot of years when we are lucky if we have two seasons. I do love winter foods. There is something very comforting and relaxing about soups, stews and winter meat dishes. One of my favorite winter dishes is roasted chicken. There are so many ways to prepare it and a little change in flavor can make a huge difference. Last week I tried a new recipe for Roasted Chicken Thighs with Lemon and Oregano from the December issue of Bon Appetit magazine.

This recipe has 11 ingredients. It takes a total of 30 minutes, 20 minutes of which is active and makes 4 servings. I have never seen boneless skin-on chicken at the store so I used bone-in skin-on thighs instead. Since my chicken had bones I increased the cooking time to 25 minutes in the oven instead of the 6-8 minutes in the recipe. I also doubled the recipe in order to have 8 large breasts so I had leftovers. Be very careful when taking the skillet out of the oven. I have had the misfortune of touching the handle of the skillet after taking it out of the oven one too many times. I suggest putting a pot holder or towel over the handle after taking the skillet out of the oven to prevent burns. I chose not to drizzle the oil over the chicken at the end of the recipe. The sauce was more than adequate to keep the chicken moist. I followed the remainder of the recipe as written.

My family really liked this recipe. If you have never browned chicken on the stove before there are a few things to keep in mind. First don't use a non-stick pan. Non-stick pans are okay for many things, but roasted chicken isn't one of them. I use stainless steel pans and love them. Second, do not try flipping the chicken until it releases naturally from the pan. If you try flipping the chicken before it is fully browned the skin will break and you will not end up with that crispy browned skin that everyone loves. For this recipe I modified the step where the thighs were kept skin side down in the skillet once in the oven. I flipped them over to cook during their oven time in order to keep the crisp beautifully browned skin.

For the recipe go to Roasted Chicken Thighs.
Related Posts Plugin for WordPress, Blogger...