Showing posts with label Raisins. Show all posts

November 9, 2014

Homemade Raisin Bread


When my oldest was born my husband acquired a new habit, he started insisting on having our door closed at night. Part of the reason is that we have two cats who come in and make noises, waking us (mostly my husband) up. The other part is that we have to leave a light on in order for my kids to be able to find the bathroom at night. I'm a pretty good sleeper, so having the light or noise doesn't bother me. My husband is noise and light sensitive, he has to have the room quiet and dark or he can't sleep. We are also opposite when we wake up, I wake right up and am ready to go. My husband can be a little grouchy in the morning, it's best to let him get ready by himself. I don't mind the door being closed, except our room stays warmer in the summer and cooler in the winter with the door open. Plus I like my door open, that way my kids don't knock loudly when they wake up in the middle of the night. Then I have to get up out of bed to open the door (my husband likes it locked also), and see what the problem is. Honestly, I like my sleep and that is one extra step I don't seem to have in the middle of the night. Maybe when we are empty nesters my husband will allow me to sleep with the door open once again....


We eat a lot of bread in my house. My kids are constantly hungry and homemade bread is a great way to save money. We use it for toast, sandwiches, french toast, croutons, you name it. Plus homemade bread makes great breadcrumbs. The following is a recipe for Homemade Raisin Bread. It can be made with or without a bread maker.


Homemade Raisin Bread


Ingredients
  • 1 cup warm water
  • 1 1/2 tablespoons unsalted butter
  • 1 teaspoon salt
  • 3 cups bread flour
  • 2 tablespoons granulated sugar
  • 2 tablespoons dry milk
  • 1 teaspoon cinnamon
  • 1 3/4 teaspoons active dry yeast
  • 3/4 cup raisins
Cooking Directions
  1. If using a bread maker add liquid ingredients to the bread pan.
  2. Add dry ingredients (except yeast) to the pan.
  3. Man a will in the flour and add yeast.
  4. Select regular/basic setting on your bread maker, makes 1.5 pound loaf.
  5. If making by hand or with a mixer, mix wet ingredients together.
  6. In a separate bowl combine dry ingredients.
  7. Add yeast to dry ingredients.
  8. Add wet ingredients to dry ingredients and combine until dough forms.
  9. On a floured surface or in your mixer knead dough for 5 minutes.
  10. Add raisins.
  11. Knead 3 more minutes.
  12. Roll dough into ball and add to an oiled bowl.
  13. Cover bowl with plastic wrap and let sit until doubled (1-2 hours).
  14. Punch dough down.
  15. Form dough into a loaf shape and add to a greased loaf pan.
  16. Cover with plastic wrap and let rise until 1 inch above the top of the pan (1-2 hours).
  17. Bake in a pre-heated 350 degree oven for 30-35 minutes.
  18. Tent with foil if crust and top brown too quickly.
  19. Wait until cool to slice.
Tips:
  • All-purpose flour can be used instead of bread flour, however, bread flour makes a superior rise and flavor. 
  • I prefer dry milk and water in bread recipes. However, I have made this recipe with regular milk (omit the dry milk and add 1 cup regular milk). Heat the milk with the butter on the stove and then add to other ingredients. 
  • Don't let this dough over rise in the loaf pan or the top will fall in the oven (trust me I did it once). 
  • Don't worry if the bread begins to get really brown on top, my family loves the really browned outside. The first time I made it I thought it was burnt, but they absolutely loved the browned sugar tasting crust! 

December 24, 2013

Oatmeal Raisin Bars

Oatmeal Raisin Bars
Oatmeal Raisin Bars


The stress of the holidays is almost over. As much as I love watching my kids faces during Christmas morning and spending time with my family I am always relieved when all the chaos is over. For what seems like 3 months all everyone talks and think about is Christmas. This year stores had their Christmas decorations out before Halloween, making the holiday seem even longer than normal. I personally love the day after Christmas. My kids have new toys to distract them and I can sit and relax with a cup of coffee. No more shopping, wrapping, or cooking. Things can go back to the way they are the other 9 months of the year. Plus the New Year brings new things to look forward to and the ability to leave the stress of the last year behind us. So as Christmas comes tomorrow, I will be happy. My kids will be ecstatic with all the gifts, while I will be happy that I can relax, I survived another Christmas.

Since we have been eating lots of fattening foods the last couple of weeks, I have been trying to have snacks that are healthier. Today I tried a new recipe for Oatmeal Raisin Bars from the January issue of All You Magazine.
Spring Hill Cemetery Huntington, WV

This recipe has 10 ingredients. It takes 40 minutes of total time, 5 minutes of which is active and makes 9 bars. I only made a few changes to the original recipe. First, I substituted pepitas for the sunflower seeds called for in the recipe. My family loves pumpkin seeds and I use them in snacks frequently. Second, I found that I had to allow the bars to cook an additional 5 minutes in order for them to fully brown and set.
Spring Hill Cemetery Huntington, WV

These bars taste more like baked oatmeal than they do raisin bars. I chose to pour maple syrup over two of the bars as a breakfast. I would suggest making a few changes to the original recipe. First, I would replace the raisins with fresh fruit. Fresh blueberries would be much lower in sugar and higher in vitamins than raisins. Second, I would add maple syrup to the bars in order to make them sweeter. As originally written the bars are a little on the not sweet side of things. I would suggest either adding maple syrup to the batter or eating the bars in a bowl with maple syrup drizzled over them. With a few modifications, these could be a great snack!

For the recipe go to Oatmeal Raisin Bars. 

September 10, 2013

Cinnamon Raisin Strata

Cinnamon Raisin Strata


I don't sit still well. I never have. If I don't have a project or something to do, I get bored. Very, very bored. I also fidget all the time. I am one of those people that is always tapping their foot or fingers. It drives my husband nuts. He loves to take naps in the middle of the day, but I just can't do it. The moment I try to lay down I think of something that needs to be done. At any given time I have at least 3 projects that I am working on. Today I decided that I needed to make new covers for the pillows in our living room. This weekend I started re-upholstering our chairs. Last week I painted the bookcase. My brain has the habit of always seeing what needs to be updated or fixed. There are many days that I wish that I was more like my husband. It would be nice if I could sit down and relax occasionally. Cooking is one of the many ways that I distract myself. Last week I tried a new recipe for Cinnamon Raisin Strata from the Eggbeaters website.
Ritter Park Huntington, WV

This recipe has 8 ingredients. It takes 9 1/2 hours of total time (including fridge time), 10 minutes of which is active and makes 9 servings. I did make a few changes to the original recipe. First, I made my own cinnamon raisin bread from scratch. Homemade bread is always better than store bought. I allowed the bread to sit in the egg mixture overnight and then cooked it for a little over an hour. I like to have the outside of my strata to turn slightly crispy and brown and cooking it for a little longer than the recipe suggested allowed for this to happen.
Water Fountain Ritter Park, Huntington, WV

I like that this recipe is lower in fat. Per serving it has 9 grams of fat and 13 grams of protein, making it a nice breakfast option. My youngest was a big fan of this recipe. However, I would suggest adding vanilla and more maple syrup, especially if you like your bread dishes sweet.

For the recipe go to Cinnamon Raisin Strata.

Cinnamon Raisin Strata

Recipe Type: Breakfast
Summary:
A very easy breakfast recipe for Cinnamon Raisin Strata. It has 13 grams of protein per serving.
Preparation Time: 0h, 10m
Total Time: 9h, 30m
Yield: Serves 9

August 25, 2013

Cinnamon Raisin French Toast

Cinnamon Raisin French Toast


We live in a college town. During the summer months our city is pretty dead. You can go into a store and it's pretty uncrowded. Until this weekend. School starts for Marshall University tomorrow and suddenly our city becomes full of students. It's not too bad, except that it takes a period of adjustment. The baggers at the grocery store don't bag correctly, there are a ton of kids driving their parents SUV's (badly), and downtown is full of people walking around. While all of these things can be really annoying for a couple of weeks, without the university our city wouldn't have nearly as much money. The university is what keeps the city running for most of the year. Plus this weekend they were giving away lots of free coupons for restaurants in our area. I now have enough coupons to not have to pay for meals for my kids until at least December. There is nothing like free food to make up for a few weeks of incoming freshman. This weekend I was trying to use up all the leftover food from last week. I tried a new recipe for Cinnamon Raisin French Toast from the Food Network.
Marshall University Huntington, WV

This recipe has 6 ingredients. It takes 24 minutes of total time, all of which is active and makes 4 servings. For this recipe I loosely followed the original recipe, with a number of modifications. First, I made my own bread. If you have never tried making your own bread, you really should. It's very easy once you try making it a few times. I had leftover cinnamon raisin bread that I had made on Friday. I used it in this recipe. In my fridge only ever has non-fat or 2 percent milk, so instead of using half and half I utilized the 2 percent milk I already had. Finally, instead of cooking the french toast in the oven, I soaked the bread peaces in the milk mixture and then cooked them on my griddle.

Old Marshall College Sign Marshall University
My two boys were huge fans of this french toast. Since I used regular bread, I ate something else for breakfast. I can tell you though that this French toast smelled great! It didn't last long at all, less than half of a day. It was great with both butter and maple syrup. The recipe would also be great with other types of bread, especially ones with a lot of crust.

For the recipe go to Cinnamon Raisin French Toast.

Cinnamon Raisin French Toast

Recipe Type: Breakfast
Summary:
A simple recipe for French Toast. Works with a variety of breads, including cinnamon raisin.
Preparation Time: 0h, 10m
Cooking Time: 0h, 14m
Total Time: 0h, 24m
Yield: Serves 4

July 20, 2013

Hot Out of the Oven: Cinnamon Swirl Raisin Bread

Click for Recipe for Cinnamon Swirl Raisin Bread
Cinnamon Swirl Raisin Bread


My husband grew up in a small town. There are supposedly 2000 residents still living in it, but I believe that they are counting chickens and pets. It's a great small town and I love visiting my in-laws at least twice a year. My boys go up and fish, take hikes in the forest and generally love every minute of their stay. There is literally one stop light in the whole town and my in-laws know everyone by name. My dad grew up in an even smaller town (there was no stop sign at all), so small town life was something I grew up surrounded by. One of my favorite aspects is the casserole. Every time someone is sick or dies my mother-in-law makes a covered dish. My husband jokes that the way that you can spot a Methodist is by the covered dish socials. She makes a mean casserole and I love her cooking. It is also a long standing joke in my household that when my mother-in-law calls and asks me if my husband knows such and such that that person is either ill or dead. Since most people in the town are getting older (like the whole state of WV) there are a lot more casseroles to be made and a lot more phone calls. There is something very comforting about sitting around in my in-laws kitchen while my mother-in-law cooks. The town looks and feels like it could of stepped right out of a 1950's sitcom, it feels like home. It's also one of the many reasons that I love my state. Homemade bread is one food that instantly makes me feel the same way that small town WV does, comforted and perfect. This week I tried a new recipe for Cinnamon Swirl Raisin Bread from the Betty Crocker website.

This recipe has 13 ingredients. It takes 3 hours and 10 minutes of total time, 35 minutes of which is active and makes 16 servings (per loaf). Since I make bread every week I take the easy way out and combine all the ingredients in my mixer. After they have been combined I take out the dough and knead it by hand for 6 minutes. I do not wait for the yeast to proof. I know that my yeast is fine so I add the yeast to the dry ingredients on the bottom of the bowl and then add the wet ingredients on top. I allow the egg to come to room temp before adding so it doesn't shock the yeast. Rising times are really relative. My kitchen always takes at least 2 hours for a good rise, even in the summer. Don't think that if your dough has not come over the top of the loaf pan in an hour that you did anything wrong, it just needs longer to rise. Make sure that it has just come to the top of the pan and not puffed over or your bread tops will fall during baking. With breads with egg they will rise over the top nicely when placed in the oven.

The tops of this bread turned out beautiful. It rose very nicely in the oven and the dough was very easy to work with. I only had to add a little under 6 cups of flour and the dough was very smooth, which was nice. So many dough recipes have a tough dough to work with before kneading, but this bread was an easy to work with and simple to complete. Plus since it makes two loaves it was enough for three days. You can also freeze the second loaf for later use, just make sure to wrap it well in butcher paper.

For the recipe go to Cinnamon Swirl Bread.

June 24, 2013

Craving Cookies and Ran Out of Eggs? Try Eggless Oatmeal Raisin Cookies

Click for Recipe for Eggless Oatmeal Raisin Cookies
Gluten Free Eggless Oatmeal Raisin Cookies


I canned a batch of cherry jam this evening. There is something about making homemade jam that always puts me in a great mood. It is comforting and reminds me of my childhood. One of the main reasons I love to cook and bake is that it makes me feel connected to my mother. Even though she has been gone for over 7 years, I am instantly reminded of her when I am in the kitchen. She loved cooking and was one of the best cooks that I have known. Never needing to measure, she made delicious meals and was always happy while doing it. So as I made jam this evening, I thought of her and smiled. She would have loved to be standing next to me, talking up a storm and enjoying every minute of it. One of the first things that my mother taught me to make growing up was cookies. To this day I haven't met very many cookies that I don't like. Last week I tried a new recipe for Eggless Oatmeal Raisin Cookies.

This recipe has 11 ingredients. It takes 46 minutes of total time, 10 minutes of which is active and makes 36 cookies. I did make a few changes to the original recipe. First I used brown rice flour instead of all-purpose. I was out of chocolate chips so I omitted them and increased the amount of raisins. Be sure to watch the cookies in the oven. They will go from under done to done in a short amount of time. Make sure to not move the cookies until they are cool or they will fall apart.

Once these cookies cool they come out slightly crunchy, with a nice taste. My two boys didn't notice that they were missing egg and the butter did a nice job of masking any taste differences. I am always running out of eggs halfway through the week thanks to my kids eating everything in sight and this recipe is a nice way to still be able to bake even if I have no eggs in the fridge. Plus the recipe could be modified to include white chocolate chips, dried cranberries, pecans or the add-in of your choosing.

For the recipe go to Oatmeal Raisin Cookies.

May 30, 2013

A Great Way to Celebrate Summer Berries: Dark Chocolate and Fresh Raspberry Mix-It-Up Muffins

Click for Recipe for Gluten-Free Fresh Raspberry and Dark Chocolate Chip Muffins
Gluten-Free Fresh Raspberry and Dark Chocolate Chip Muffins


Fresh berries never last long in my household. Between my two boys and I we are able to eat almost our weight in blueberries, blackberries and raspberries during the summer months. Growing up there was a large patch of wild blackberries that we would go every summer to pick. We would collect as many fresh berries as we could carry home and my mother would bake pies and desserts for weeks. I remember being covered head to toe in berry juice and being as happy as can be. My two boys seemed to have inherited my love of all things berries, they will go into the fridge and sneak as many as they can get their hands on. Luckily berries have been inexpensive recently so I have been baking and cooking with them frequently and allowing my boys as many bowls as they can handle (within reason). This week I tried a new recipe for Mix-It-Up Muffins from the June 2013 issue of Parents Magazine.

This recipe has 13 ingredients. It takes 35 minutes of total time, 15 minutes of which is active and makes 10 muffins. I did make a number of changes to the original recipe. First, I made two batches of muffins, one gluten-free and one regular. I made half the muffins with carrots and raisins (not pictured) and half dark chocolate-raspberry. As I always do when making muffins I used foil liners. They are so much easier to unstick the muffins from, especially when using gluten-free flours. One step that the recipe leaves out is to roll the berries in a small amount of flour before adding them to the batter. This allows the berries to not 'bleed' into the rest of the muffin batter.

My youngest son was a larger fan of these muffins than my oldest. I would suggest a few changes to the original recipe. First the raspberries ended up a little soggy in the recipe. I would cut the overall amount used or switch to using blueberries and roasted cut-up almonds instead. The recipe would also work well with the dark chocolate chips and dried blueberries, cherries or cranberries. This would also keep the berries from making the muffins soggy. The nice thing about this recipe is that it can be modified very easily to suit your tastes and what you have in your pantry. White chocolate chips, nuts, raisins and dried coconut would all work very well with the original recipe.

For the recipe go to Dark Chocolate and Fresh Raspberry Muffins.  (registration required)

January 26, 2013

Overnight Hot Oat, Dried Cranberry and Quinoa Cereal

IMG_0351_zps0d82e148 photo IMG_0351_zps0d82e148-1_zpsb2cfd3f2.jpg

My meal plan got thrown-out the window this week. With a Monday holiday and very cold weather, dinners haven't gone as planned. I utilized a lot of leftovers and baked a little more than usual. My youngest somehow ate an entire batch of brownies by himself. Luckily for me I was able to eat one before the rest went into his hollow stomach. Breakfast is still a struggle with my youngest son. He would rather eat anything, except something healthy. Oatmeal is the one breakfast food that I can almost always convince him to eat, he loves it. The only problem I have is that the steel cut oats that he loves take a long time to prep when he is hungry in the morning. Therefore I have been trying a variety of overnight oat recipes. Last week I made a new recipe from Bon Appetit magazine for Overnight Hot Oat, Dried Cranberry and Quinoa Cereal.

This recipe has 8 ingredients. It takes 10 minutes of prep, an overnight soak and then 5 minutes in the morning and makes 4 servings. I decided to double the recipe in order to have enough for everyone in my family. For the dried fruit I used dried cranberries. For the toppings I added pumpkin seeds, a small amount of vanilla and maple syrup. I have never been able to find cardamom at my local stores so I left it out. Make sure to rinse your quinoa very well. If you have never used quinoa before rinsing is a very important step. The rinsing gets rid of the bitter taste and without the rinse the quinoa will have a distinct bitter taste, that is not appetizing. Even if the brand that you buy claims that it is pre-rinsed, still rinse the quinoa again. I followed the remainder of the recipe as written.

My youngest son and I both liked the idea behind this recipe. However, it needs a few changes. The taste of the quinoa was very strong. My husband wasn't a fan of the quinoa taste at all, so this recipe as written would have to be for somehow that really likes quinoa. I would suggest decreasing the amount of quinoa to 1/4 cup and increasing the steel cut oats to 3/4 cup. Adding additional fruit for sweetness might also help. The recipe suggests using barley instead of quinoa, which if you can eat gluten would be a great change and I think make the dish even better.

For the recipe go to Hot Oat and Quinoa Cereal.

January 20, 2013

Coconut-Carrot Morning Glory Muffins

IMG_0317_zpsb38dd33c photo IMG_0317_zpsb38dd33c-1_zps059e2a78.jpg

 I have been in the kitchen literally all weekend. My youngest is in a massive growth spurt and as soon as he has finished one meal he is ready for the next. He also doesn't just eat little meals or sandwiches, he wants full on pot roast or burgers. I think that he gets this from my husband. On Friday I made a pasta dish with chicken sausage. Today I found out that after dinner my husband went in and made himself turkey sausage as a snack since the meal didn't have enough meat. Some days I think that it might be easier to have girls instead of a house full of three males. I don't even want to think about how bad it will be when they are teenagers. Since I am being eaten out of house and home I have been baking and cooking a ton. Last week I tried a new recipe for Coconut-Carrot Morning Glory Muffins from the February 2013 issue of Eating Well magazine.

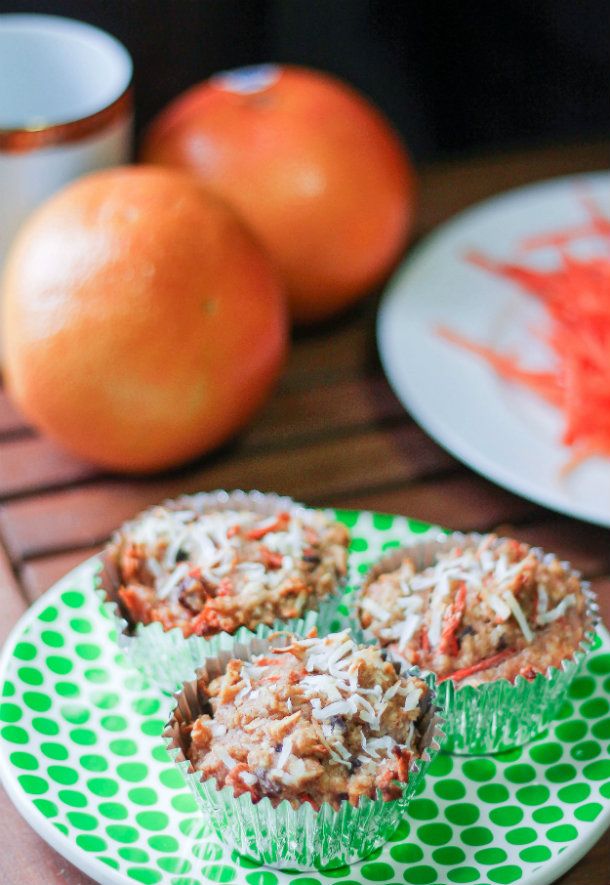
This recipe has 14 ingredients. It takes a total of 1 hour, 20 minutes of which is active and makes 12 muffins. Since I eat gluten free I did make a number of modifications. First instead of using wheat flour I used all-purpose gluten free flour. The flour that I prefer has coconut flour as a base and works very well. I also use foil muffins cups. I would highly recommend these if you haven't tried them before. The muffins never stick and they come out so much easier than the paper equivalents. Best of all the generic brand is only 59 cents at my local grocery store. I did find that I had to bake my muffins for slightly longer than the 35 minutes suggested by the recipe. This might have been due to the gluten free flour. I followed the remainder of the recipe as written.

These muffins weren't sweet enough for me. It might be that I like my muffins almost as sweet as cupcakes, but even my husband who prefers things not sweet thought that these needed more sugar. I also thought that there were too many shredded carrots. I would reduce the total amount of shredded carrots, as written the muffins taste too much like carrots and not enough like raisins or coconut. Increasing the amount of raisins would also help the sweetness and flavor of the muffins overall.

For the recipe go to Coconut-Carrot Morning Glory Muffins.

October 17, 2012

Slow Cooker Chicken Tagine


The weather in the area that I live has been all over the place. One morning it is 30 degrees and the next 70. My body hates all the up and down of the weather changes. I would be much happier if the weather just stuck to hot or cold, instead of layers one day and shorts the next. Regardless of the crazy weather lately this is still the time of the year that I love to use my crock-pot. There is something about fall that just shouts for a slow cooker. Coming home to a great pot roast or chili in the evening is comforting and perfect for a fall dinner. Recently, I tried a new recipe for Chicken Tagine from the November issue of Family Circle magazine, which looked flavorful and perfect for a busy weeknight meal.

This recipe has 13 ingredients. Since I am now eating gluten free I made a few changes. Instead of regular wheat flour I used brown rice flour. I substitute brown rice flour frequently and it works great in recipes. Additionally, I made my chicken stock from scratch which I almost always do in dishes. I prefer the taste and flavor to store bought. Finally, instead of couscous I used quinoa. Quinoa is a great substitute for pasta or rice and I use it as a base for recipes frequently. I followed the remainder of the recipe as written.

My two boys really loved the chicken in this dish. They weren't as big of fans of the onion and fruit, picking around it to eat the rest of the chicken. The one change that needs to be made to the recipe is the amount of salt. There was nowhere near enough salt in the recipe. I salted my chicken stock and the dish was still undersalted. The cinnamon flavor could also be increased to 1 1/2 tsp like the cumin and ginger. Overall, an easy crockpot recipe that was very kid friendly.

For the recipe go to Chicken Tagine.

July 23, 2012

Raisin Scones

I have a serious soft spot for scones. It steams from my mother who collected antique tea pots and tea cups. When I became a teenager we would go to high tea at the Four Seasons hotel in downtown Seattle. We would go all out, it wasn't jeans and t-shirts, I would dress in vintage Gunny Sack dresses (which are great if you have never worn one, love them!) and we would make a whole day of the event. Once I started working I decided to take my mom to Victoria, BC and to the Empress Hotel. She had read about their high tea for years and she was so excited. We had a great time and the weekend that we spent is one of my favorite memories. When my mother passed away my oldest was only nine days old and I was unable to go home. One of my aunts saved my mother's two favorite tea cups before they were scooped up by other family members and carefully shipped them across the country to my house. I am forever grateful to my aunt for this act. You can see the two tea cups on the corner of the photo. With all these memories tied to high tea and my mother scones are one of my greatest reminders of these times. Last week I tried a new recipe for Raisin Scones, which looked very simple and perfect for an afternoon tea at home with my two boys.

This recipe has 8 ingredients. It takes 25 minutes of total time and makes 12 to 14 scones. I did make a few modifications. I have never used a pastry blender or two knives for my biscuits or scones. Instead I use my hands, making sure to only break the butter into pea size pieces and not to overly handle the dough. Over-handling the dough results in tough scones that stay flat when baked. When cutting out the scones make sure to twist the biscuit cutter. This twisting allows the edges to bake correctly in the oven. Avoid having to re-work the dough frequently; try to space the scones close to one another when cutting them out to avoid making the dough tough. To brush the top of the scones with the egg wash I use a silicon pastry brush. I love using silicon brushes, they are great for a variety of baked goods and make a beautiful finish on scones and bread.

My two boys ate three of these scones as soon as they were out of the oven. They have a nice taste, without being overly sweet and are very simple. I would recommend eating these scones within a day of baking. Scones really are best when warm and go stale quickly. This is definitely a recipe I would make again!

For the recipe go to Raisin Scones.

May 15, 2012

Slow-Cooker Chicken Mole

I love chocolate! There is something great about eating a piece of chocolate after a particularly bad day. It literally almost erases all the negative things that have happened and leaves me in a great mood. The only problem is that my two kids share this love and my chocolate stashes never seem to stay hidden. I particularly love when they put the wrapper back so that I think there is still candy and then open it to discover that it has been completely scavenged. That's really awesome (not!). Luckily I have discovered that chocolate can also be great to cook with and since recipes normally use bittersweet chocolate my two kids leave the baking chocolate alone. Given my love of chocolate I was very pleased to see a recipe for Slow-Cooker Chicken Mole in the December issue of Everyday Food Magazine,
This recipe has 14 ingredients. It takes 4 1/4 hrs, 15 minutes of which is active and makes 6 servings. I had no problems finding any of the ingredients at my local grocery store and made no ingredient modifications. I ended up leaving off the cilantro on the plate since I completely forgot about it, opps! I did find that 4 pounds of chicken thighs ended up being far more than 12 thighs for me, I think my grocery store must sell smaller thighs than the ones the recipe used. Since everything was going into the blender I didn't overly chop any of the ingredients before putting them in. I have a very good blender that can pretty much chop anything, including ice. As I always do, I chose to cook this recipe on low, I prefer the flavor on low for a longer amount of time. For the toasted almonds, I toasted my almonds on the stove, I find it much quicker and easier than the oven. When the recipe is finished make sure to pour off the layer of fat and soak up any remaining fat with a paper towel. There was a good cup of fat that I had to pour off and without this step it would have been far too fatty. With this modification the recipe was perfect. I followed the remainder of the recipe as written.


My two kids loved this recipe. At first they were reluctant to eat it, but as soon as I mentioned that it was chocolate chicken, they ran to their plates. I did find that I had to add salt to my husband's and mines servings, but that it normal for most recipes. I liked that this recipe was full of flavor, but mild enough even for people that don't like spicy foods. The sauce was absolutely delicious and the chicken thighs ended up melt in your mouth tender. Overall, a great slow-cooker recipe that I will definitely make again.

For the recipe go to Slow-Cooker Chicken Mole.

March 1, 2012

Food Network Magazine Soda-Bread Biscuits

We are big fans of baked goods in my household and would be horrible on a low-carb diet. My kids have been known to eat an entire loaf of homemade bread in a day and my husband has a soft spot for brownies. As for me I haven't met a scone, muffin, or biscuit that I don't love. Given my family's love of baked goods I am always looking for new recipes to serve as dinner sides. One of our favorite breads is Irish soda bread, so I was intrigued when a recent issue of the Food Network Magazine had a recipe for Soda-Bread Biscuits.

This recipe has 8 ingredients. It takes approximately 30 minutes to prep and bake and makes six biscuits. I had no problems finding any of the ingredients at my local grocery store and made no ingredient modifications. I chose to make larger biscuits, so I had a total of six. I turned my baking sheets halfway through the baking time in order to prevent burning. I followed the remainder of the recipe as written.

The Irish soda bread recipe that I normally use is very traditional, and I love it. However, for biscuits I love experimenting with new flavors and this recipe does a nice job of combining the idea of soda bread with the delicious flavors of caraway and raisins in a biscuit. These were perfect for a side at dinner and they tasted great with melted butter. Overall, an easy biscuit recipe that my whole family enjoyed.

For the recipe go to Soda-Bread Biscuits.

February 21, 2012

Food Network Magazine Roasted Carrots

Sorry I have been so absent on-line. Currently, I am on day four of no internet at home. On a positive note the phone company is coming to install DSL on Friday! Having no Internet has been weird for me since I grew up in Seattle and had Internet before anyone I knew. I never knew how wired I was until I didn't have access! I am going to try to still do some short posts this week so I don't lose all my followers, so here goes!

In the last couple of weeks I have been experimenting with new vegetable side dishes. My youngest is obsessed with spicy foods, but has decided that he currently doesn't like vegetables. In order to combat this new trend I have been trying as many different ways to prepare fresh vegetables as I can. The January/February issue of The Food Network Magazine had a number of great side dish recipes including one for Roasted Carrots.

This recipe has 9 ingredients. It takes approximately 30 minutes to prep and cook and makes 4 servings. All the ingredients are basic and I either had in my pantry cupboard or were easy to find at my local grocery store. I did find that the carrots were too crunchy for my tastes when roasted for 20 minutes, I suggest leaving them in the oven for closer to 30 minutes. Instead of walnut oil, which I have never been able to find in my area, I substituted canola oil. I followed the remainder of the recipe as written.

My husband really liked these carrots. He normally isn't a large carrot fan, but he loved the combination of the raisin, walnuts and roasted carrots together. I am happy to report that both of my sons also ate this dish without complaints and even snacked on the leftovers the next day. Overall, a very easy recipe that takes little prep work and was well received by my whole family.

For the recipe go to Roasted Carrots.

January 15, 2012

Parents Magazine Pork and Potatoes

If you've read my blog for any given amount of time you know that my family loves pork. My husband and two boys could only eat bacon for a week straight and be perfectly content. Growing up my mother rarely prepared pork, we were more of a beef and chicken type of family. My father never cared much for pork since my mother really only prepared pork chops, so it wasn't until I moved out on my own that I started trying new ways to prepare pork. After getting married to my bacon loving husband I learned quickly that there was much more to pork than the pork chops I had grown accustomed to growing up. One of my favorite cuts of pork is tenderloin, it's delicious. It's a very versatile cut and can be used in numerous ways. Recently the January issue of Parents Magazine had a recipe for Pork and Potatoes, which cost less than ten dollars for four servings and looked very child friendly.

This recipe has 10 ingredients. It takes approximately 50 minutes to prep and cook and makes 4 servings. All the ingredients are very basic and I either had in my pantry or I was able to easily find at my local grocery store. To secure the pork tenderloin I used kitchen twine, since I find it much easier to work with than toothpicks. I did make a few changes to the mashed potatoes. Instead of using chicken stock I used butter and buttermilk. I prefer the taste of the buttermilk and will sacrifice the calories for the better flavor. I followed the remainder of the recipe as written.

My two boys loved this pork. I liked how easy the dish was to prepare and that it had few ingredients. My husband felt that it needed more flavor. The applesauce and raisins didn't produce a very strong taste to the pork. I think that the adding HP Fruity Sauce or a chutney would add to the overall flavor of the pork. Overall, a very kid friendly recipe that is very easy on the family budget and perfect for a busy weeknight meal.

For the recipe go to Pork and Potatoes (registration required).

November 7, 2011

Better Homes and Gardens Raisin Sweet Bread

With four people in my house, we eat a lot of bread. About four years back my mother-in-law gave me her old bread machine and I started making bread once or twice a month. A couple years later the bread machine broke and I started making all my bread from scratch. I had my share of bread disasters with my bread resembling a hockey puck, but as time went by I got fairly comfortable making a variety of bread recipes.I am a big fan of breads using raisins. There is something delicious about spreading butter on hot raisin bread. Recently the September issue of Better Homes and Gardens magazine had a recipe for Raisin Sweet Bread, which looked delicious and great for a weekend breakfast menu.

This recipe has 13 ingredients. It takes approximately 4 hours of prep and baking and makes 40 servings. The ingredients are basic and I either already had or I was able to find at my local grocery store. The original recipe uses golden raisins, which I used since my family loves them, but regular raisins would also work. Instead of bread flour I used the all-purpose flour that I already had in my pantry. I had no problems with rising or texture, so the all-purpose flour worked fine Be careful to watch the bread to prevent over browning, I had to tent my bread earlier than the recipe suggested. I followed the remainder of the recipe as written.

My two boys loved this bread. It has a sweet taste and looks great after being baked. It makes three large loaves, so it would be great for entertaining. The ingredients could easily be modified to suit your tastes, substituting regular raisins, using all whole milk instead of whipping cream etc. This recipe would work particularly well for a holiday breakfast or brunch.

For the recipe go to Raisin Sweet Bread.

October 30, 2011

Eating Well Nana's Creole Pecan Cake Bars

I love when I get the first issue of a new (to me) food magazine. There is something thrilling to me about picking out the first recipe that I want to try and review. I spend a good hour or two every week going through my food magazines and tearing out recipes that I want to try in the future. Then I sit down with the file folder of saved magazines that I have collected and go through to find my menu plan for the week. When I get a new magazine it's exciting having a new set of recipes to mull over and decide which ones to try. My newest magazine Eating Well had a recipe for Nana's Creole Pecan Cake Bars, which looked delicious and a great first recipe to review.

This recipe has 12 ingredients. It makes 4 dozen bars and takes approximately 2 hours of total time, with 30 being active. All the ingredients I either had or were easily available at my local grocery store. I used dried dates, since those were what I had available and golden raisins as suggested by the recipe. I did find that my baking time was significantly less than the 45 minutes stated in the recipe. My total cooking time was closer to 30-35 minutes. Additionally, I rotated my pan halfway through to ensure even baking. Finally, I made my bars larger than the recipe suggested, so I had closer to 2 dozen total cookies. I followed the remainder of the recipe as written.

These bars are different than normal cookie bar recipes. They have a texture that is more consistent with cake, and are full of nuts and dried fruit. The corner cookies get a slightly sweet and crunchy texture, which is delicious. My family loved these cookies and how they were different than other cookie recipes I have tried previously. Overall, a great new recipe from a new (to me) magazine I look forward to using again in the future.

For the recipe go to Nana's Creole Pecan Cake Bars.

September 13, 2011

Cinnamon Swirl Bread


I love making homemade bread. The whole process of kneading, waiting for it to rise, the punch down, the forming of the loaf, I enjoy the whole process. However, it wasn't until about 4 years ago that I started making my own bread. At first I used the bread machine that my mother-in-law gave me, but I quickly got frustrated by the shape of the loaf and the inability to make certain breads without having to finish the process by hand. Therefore, when my bread machine broke, I started making all my breads from hand and haven't looked back. One of my boy's favorite recipes is Cinnamon Swirl Bread, they absolutely love it and it is very easy to make. The recipe is as follows:
  • 2 1/2 cups water
  • 2 tablespoons unsalted butter
  • 1 egg
  • 1 cup raisins
  • 1/2 cup sugar
  • 2 teaspoons cinnamon
  • 3 teaspoons salt
  • 4 1/2 teaspoons active dry yeast
  • 1/4 cup packed brown sugar
  • 2/3 cup dry milk powder
  • 2 cups quick-cook oats
  • 5 cups flour (if bread is too sticky up to another 1/2 cup of flour can be added)
1. Combine 2 cups of the flour, oats, milk powder, brown sugar, yeast and salt. In a sauce pan melt butter and water and heat to approximately 120 degrees. Add butter and water to dry ingredients, beat until combined. Add egg, beat until smooth. Add remaining flour until a firm dough forms (the amount of flour can vary, add
enough flour so the dough isn't overly sticky, but not too stiff). Stir in raisins.

2. Knead on a floured surface for 6-8 minutes. Place in a greased bowl, turning to coat top and cover with plastic wrap. Let rise for about an hour or until doubled.

3. Punch down dough. Divide dough in half and roll each half into a 18 by 9 inch rectangle. Combine sugar and cinnamon, reserving 2 tablespoons for topping, Sprinkle mixture over each rectangle to within a half inch of the edge. Roll up rectangles starting from the short side and pinch seams to seal.

4. Place loafs into two greased loaf pans. Cover with plastic wrap and let rise 30 minutes or until doubled in size. Sprinkle with remaining cinnamon sugar mixture.

5. Bake for 35-40 minutes at 375 degrees. If tops begin to overly brown, place a tent foil over top. Makes two loafs.

This recipe is very easy and I has consistent results. It is delicious with butter or makes great cinnamon toast. My whole family has fallen in love with this bread and I make it about once every two weeks. A great, simple bread recipe.


Note: I use bread flour for my bread baking, but all-purpose flour works fine also. I added to the recipe that additional flour can be added if the dough is too sticky to handle and realized when I made this bread last night that I normally use 4 1/2 teaspoons of yeast, not 5 teaspoons. The recipe is now exactly as I bake it.

I adapted this recipe from page 543 of The Taste of Home Cookbook 2009 edition.
Related Posts Plugin for WordPress, Blogger...