Showing posts with label Thyme. Show all posts

August 11, 2013

Tuscan Chicken and Beans

Tuscan Chicken and Rice


West Virginia has taught me to slow down. Growing up in Seattle everything was always busy. I woke-up early, I worked long hours and I was always stressed. When I moved to West Virginia I stuck out. I didn't understand why it took a week for my paper work to be processed for my apartment or that when I went in to my work study assignment that the office had taken Friday off. After 10 years I have learned to love taking things a little slower. This afternoon my husband and I took my two boys and our dog around taking photos. In typical summer fashion there was a large summer downpour. Everyone at the park ran to their cars and waited. No one pulled away, we just all watched the storm and took a moment. It was perfect. There are many things that can be frustrating about life, but learning to sit on your porch and enjoy the summer warmth, say hello to your neighbor and just relax is something that we could all do with a little more of. So thank you West Virginia for teaching me that sometimes it's okay to just sit and wait, most things can sit at least a few minutes. With slowing down in mind, I made a slow cooker recipe today. I tried a new recipe for Tuscan Chicken and Beans from the September 2013 issue of Family Circle magazine.
Camden Park Wayne County, WV

This recipe has 13 ingredients. It takes 8 hours and 15 minutes of total time, 15 minutes of which is active and makes 6 servings. The major change I made to the original recipe was to make my own Greek seasoning. I try to cut costs as much as I can and making seasoning blends is much cheaper. I already had all the ingredients so it was easy to put together. Instead of using an additional 1/2 teaspoon of thyme I increased the amount of seasoning to 2 teaspoons. The Greek seasoning that I prepared already had thyme so I found it unnecessary to add more. At dinner time I was unmotivated to go down to my garden to pick fresh oregano, so I left it out. The taste was delicious without it.
Camden Park Sign Wayne County, WV

My kids who have been horrible about eating dinner recently, loved this recipe. They ate their entire plates, which for them is a big thing. My husband was also very impressed, especially since he has been burned out on chicken thighs, but was very pleased with them in this recipe. The flavors work very well together and the chicken is fall off the bone tender. The recipe would also work well with lamb instead of the chicken.

For the recipe go to Tuscan Chicken and Beans. (registration required)

Tuscan Chicken and Beans


Recipe Type: Main
Summary:
A slow cooker chicken thigh recipe for Tuscan Chicken and Beans. Great flavor and easy to prep.
Preparation Time: 0h, 15m
Total Time: 8h, 15m
Yield: Serves 6

July 3, 2013

Short on Time to Make Dinner? Try Sesame Lemon Chicken

Click for Recipe for Sesame Lemon Chicken
Sesame Lemon Chicken


I hope everyone is ready to have a great 4th of July tomorrow. I'm all set, I bought the last of the food items that I needed tonight. Tomorrow I just need to cook everything and then enjoy my efforts. My town always has fireworks on weird days and tonight is no exception. Instead of having fireworks on the 4th they are having them this evening. So I will not be going bed to at least 11 since I can't sleep through very loud noises or explosions. My kids are excited though and we can see the display from our front window so at least I can enjoy everything from my living room. Our three dogs on the other hand will more than likely be less than thrilled. There are nights like tonight when I am low on time and I look for meals that are quick and take little effort. Today I tried a new recipe for Sesame Lemon Chicken from the July/August issue of the Food Network Magazine.

This recipe has 13 ingredients. It takes 35 minutes of total time, 30 minutes of which is active and makes 4 servings. I did make a few changes to the original recipe. First I can't eat pita chips so I left them off the salad. The most important change that I made was to use the entire amount of rub on the chicken. There was no were near enough rub for both the chicken and salad. So instead I used all the rub on the chicken and made a homemade vinaigrette from the blackberry sage vinegar I blogged about earlier. Finally my broiler has been broken so I cooked the chicken at 425 until it hit 170 degrees, about 25 minutes.

The rub on the chicken turned out really well. I'm glad that I made my own vinaigrette for the salad. The homemade dressing was delicious and perfect as a side with the chicken. If you are going to use the rub to make the dressing I recommend doubling the recipe or there will be no where near enough. The skin on the chicken was perfect, nice and crispy.

For the recipe go to Sesame Lemon Chicken.

June 4, 2013

Tired of Boring Pork Dishes? Try Ginger Orange Pork Tenderloin with Ramps

Click for Recipe for Ginger Orange Pork Tenderloin with Ramps
Ginger Orange Pork Tenderloin with Ramps


Today was free museum Tuesday at the Huntington Museum of Art. Since my husband and I are trying to expose my youngest son to a wide variety of cultural experiences we thought this would be a great day to take him. Plus it was free which is always a bonus since I am basically pretty cheap. Given the fact that he is 4 he did very well. Most of the paintings and sculptures lost his interest quickly, but he did enjoy the Eastern weapon room and the antique firearms. The piece of art that grabbed his attention the most was outside. It had metallic arms that moved around, basically a modern art version of a whirligig. He was fascinated. There was also a lizard running around the outside walls of the museum that he was determined he should take home (don't worry that was a no go). One of my favorite parts about the museum is that they have a large section of land with nature walks. Since I have a lively 4-year-old it was a great way to wind him down. Given that today was a busy day, I utilized leftovers from a meal I made earlier in the week. It is hard to have fresh meals every night, so I make a point of eating leftovers at least once a week. This way no food is wasted and I save money from my food budget. Tonight my family enjoyed leftovers of the Ginger Orange Pork Tenderloin recipe from the April 2013 issue of All You magazine.

This recipe has 8 ingredients. It takes 45 minutes of total time, 15 minutes of which is active and makes 4 servings. I did make a few changes to the original recipe. First, I found clearance blood orange juice, so I utilized it for the recipe. Second, my shallots had gone bad, so I used the ramps that I had in the freezer. I used one whole ramp (leaves and stem), minced. Instead of vegetable oil I used canola oil, I prefer olive oil and canola in my baked goods and recipes. I am happy to say that my herb garden is doing great, so I was able to use fresh thyme.

The ramps added a nice flavor to the sauce in this dish. The pork was pretty plain, so I would suggest a few changes. I would either rub the pork with a spice rub (cayenne would work well if you like a bit of a kick, or a combination of cumin, coriander or cinnamon). Another option would be to marinade the pork in a citrus marinade. Not only would this make the taste delicious it would help to keep the pork moist while cooking. Most importantly I would double the sauce amount since it was the best part of the recipe,  you will want plenty of it to enjoy!

For the recipe go to Ginger Orange Pork Tenderloin.

May 7, 2013

Balsamic Pot Roast Recipe


Click for Recipe for Balsamic Pot Roast
Balsamic Pot Roast
Our weather has finally been warm enough overnight to start my garden. So this weekend my oldest son and I went to find flowers for our front bed and heirloom tomato starters. We ended up with three different heirlooms and a bunch of new herbs for an herb pot. My son insisted on using his bare hands to help do the planting and was full of dirt by the time we were done. By the end of the weekend everything was planted and by the middle of the summer I will be swimming in tomatoes, which will be perfect for recipes and canning. Last week was one of my busier weeks so I relied heavily on my crock-pot. I tried a new recipe for Balsamic Pot Roast from the March 2013 issue of Family Circle magazine.

This recipe has 12 ingredients. It takes 10 hours and 15 minutes of total time, 15 minutes of which is active and makes 6 servings. Since I never have 10 hours to wait for my crock-pot I cooked the roast on high for 6 hours. I chose to serve the roast as is instead of with the polenta and sweet peppers. The majority of the time I make my own stock, but for this recipe I used store bought. Make sure to buy high quality balsamic vinegar. There is a great difference in taste between cheap and quality balsamic.

My family really liked the flavor of this roast. The balsamic kept the roast very moist and the sauce was perfect. I served the roast with brown rice, which worked well to soak up the extra sauce. I like that the recipe only has 11 grams of fat and 53 grams of protein, it was a nice change of pace to my normal pot roast recipe.

For the recipe go to Balsamic Pot Roast. Registration required. 

April 15, 2013

Recipe for Roast Bacon Wrapped Pork

Click for recipe for Pancetta Wrapped Pork Roast
Pancetta Wrapped Pork Roast


I have fallen off the healthy breakfast eating band wagon the last month or so. Normally I am great about eating breakfast, but due to a variety of reasons the last couple of months I have grabbed for sweets more often than not first thing in the morning. It has finally started to catch up with me and I have been feeling not so fabulous the last couple of weeks. Therefore I woke up this morning and started my day the right way food wise. I have felt much better the rest of the day and am going to continue the healthy eating especially in the morning. One breakfast food that my family loves is bacon. The males in my family could eat bacon three times a day and be incredibly happy. This weekend I tried a new recipe for Roast Bacon Wrapped Pork from Food and Wine magazine.

This recipe has 7 ingredients. It takes 1 hour and 30 minutes of total time, 20 minutes of which is active. I used pancetta instead of bacon since it goes great with pork roast. Make sure to tie off the roast or the meat will dry out during cooking. The resting time is also essential. It helps to keep all the moisture in the roast and is vital to any pork recipe.

The flavor from the fresh herbs was great. I really love using fresh herbs since they create a lot of flavor with little effort. Plus they are very easy to grow in your garden. The roast that I bought wasn't the best. I would suggest using a high quality roast, the better quality really does make for a better tasting slice of meat. Overall, the flavor on this roast was delicious and the same herbs would work well with a tenderloin.

For the recipe go to Roast Bacon Wrapped Pork.

March 31, 2013

Recipe for Roasted Chicken Thighs with Tomatoes, Olives and Feta

Click for Recipe for Roasted Chicken Thighs with Tomatoes, Olives, and Feta
Roasted Chicken Thighs with Tomatoes, Olives, and Feta

I hope that everyone had a great Easter! We had a nice relaxing day at home. I woke-up early and made homemade yeast rolls. The recipe is from my mother-in-law and they always turn out delicious. For the main food I made glazed ham, buttermilk mashed potatoes and roasted asparagus with goat cheese and crumbled bacon. If you have never tried roasted asparagus before you really should. My two sons love it and ate over a pound of asparagus between the two of them. Roasted veggies are a great way to get kids to eat their vegetables since they take on a caramelized flavor. For dessert I made a gluten free yellow cake with cherry filling and homemade butter cream frosting. My boys had fun helping me decorate the cake with peeps and Cadbury eggs. It was a great day! Today's recipe is for a family favorite, roasted chicken thighs. Last week I tried a new recipe for Roasted Chicken Thighs with Tomatoes, Olives, and Feta from the April 2013 issue of Martha Stewart Living.

This recipe has 10 ingredients. It takes 1 hour of total time, 10 minutes of which is active and makes 4 servings. I did make a few changes to the recipe. First I had potatoes that needed to be used so I added baby potatoes cut in fourths and tossed with olive oil. My two boys love olives so I doubles the amount and sliced them before roasting. I left off the fresh mint leaves for garnish since I was serving it to my children. Make sure to temp the chicken, over cooking chicken thighs makes the meat tough. As I have said before a great meat thermometer is a must (and a great present for a home cook).

The skin on this chicken turned out crispy and the thighs had great flavor. Oftentimes with roasted chicken recipes that actual chicken part of the dish turns out rather bland, this recipe was an exception. The thighs were well flavored and the vegetables turned out delicious. My two boys loved the olives and told me that this one of their favorite dishes that I have made recently. High praise from two very picky little boys.

For the recipe go to Roasted Chicken Thighs with Tomatoes, Olives and Feta.

February 13, 2013

Easy Slow Cooker Smoky Navy Bean Soup


While some people will only eat beans if they are forced, I love them. When I was growing-up my dad was a meat and potatoes kind of guy so beans rarely made an appearance. Then when I turned 15 I decided to become  a vegetarian. I quickly had to learn to make beans. My first dozen attempts were less than stellar, the flavor wasn't great and beans weren't a favorite food of mine. Then I discovered that when made the right way, beans can be delicious. My kids have grown-up eating beans. To them they are just another food and they don't think twice about eating them. My oldest in particular loves pinto and chickpeas and will pick them out of dishes. This week I have made a number of bean dishes since my schedule has been hectic and they are hearty and create a ton of leftovers. Today I tried a new recipe for Smoky Navy Bean Soup from the March 2013 issue of Family Circle magazine.

This recipe has 10 ingredients. It takes 10 hours of cooking on low, 15 minutes of prep and makes 8 servings. This was a recipe that I followed pretty closely with only a few modifications. Instead of adding 6 cups of water, I added 3 cups of homemade chicken stock and 3 cups of water. For the carrots I used pre-peeled baby carrots, approximately 15. I chose to skip the step of pureeing the soup. My kids were hungry and I like my bean soup to have more texture. I followed the remainder of the recipe as written.

I was surprised by how many leftovers I had of this soup. The recipe states that it makes 8 servings, but I had enough leftovers for at least two more meals. Make sure to adequately salt the soup before serving, it will need it. I did find that the ham steak that I used ended up a little tougher than I like, next time I would use a fatter cut of ham. Overall, an easy bean soup recipe that is great for fall and winter.

For the recipe go to Smoky Navy Bean Soup.

January 23, 2013

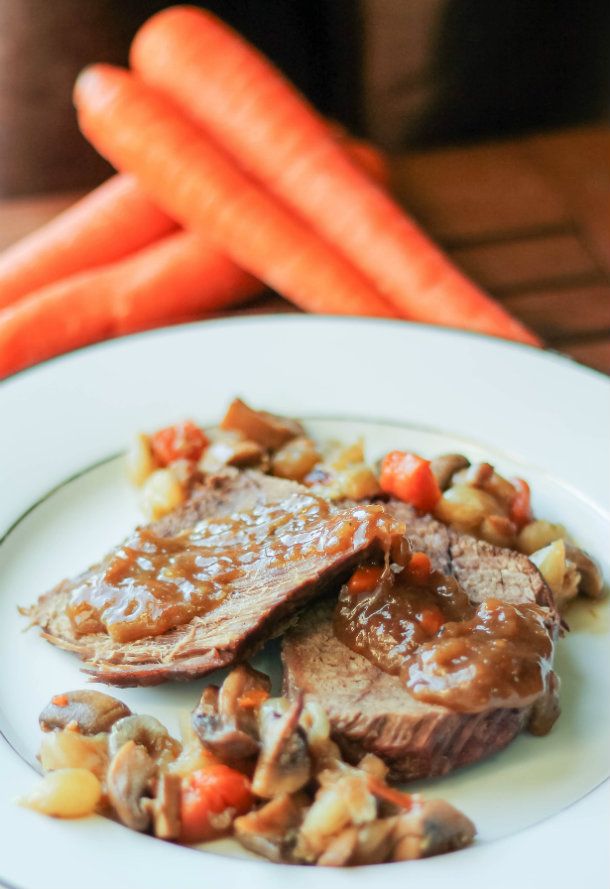
Classic Pot Roast

IMG_0344_zpsc43554e9 photo IMG_0344_zpsc43554e9-1_zps99730bb1.jpg

I was so proud of the males in my family tonight. For dessert I made pudding using silken tofu and they all ate their whole servings. I even sweetened it with sorghum and my oldest thought it was delicious. This just goes along my whole opinion that kids will eat a variety of food if you give it to them and don't make a fuss. I still serve sugar, I just limit the amount of granulated sugar and try to use honey, sorghum and maple syrup when possible. My kids have slowly adjusted, so much so that my oldest has been nagging me to allow him to take a packed lunch to school since he loves my food so much. I love that my kids will eat just about anything without complaints, especially if it contains chicken or pork. One of my family's favorite meals is pot roast. There is something so comforting about starting a pot roast on a Sunday and sitting down in the evening for a delicious meal. This week I tried a new recipe for Classic Pot Roast from the February 2013 issue of Parents magazine.

This recipe has 13 ingredients. It takes a total time of 3 hours, 30 minutes of which is active and makes 8 servings. I had no problems finding any of the ingredients at my local grocery store. Since I eat gluten free I used cornstarch instead of all-purpose flour to thicken the pan juices. If you aren't a fan of carrots skins than I would suggest peeling them before chopping. The recipe doesn't state this, but I always do it since my youngest isn't a fan of carrot skin. Make sure to let the roast rest. This rest time is very important for letting the juices stay in the roast. If you cut the roast before letting it rest the juices will spill out making for a drier roast. I followed the remainder of the recipe as written.

My husband really loved this roast. He thought it was one of the best pot roast recipes that I have made in a long time. My oldest was also a big fan, he ate most of the leftovers. The roast was a little on the dry side without the pan juices. I would add additional beef stock to the pan while the roast is cooking to ensure a larger amount of pan juice to serve with the roast.

This recipe is currently not available online, but can be found in the February 2013 issue of Parents magazine. Here is another recipe for pot roast from Parents magazine.

December 16, 2012

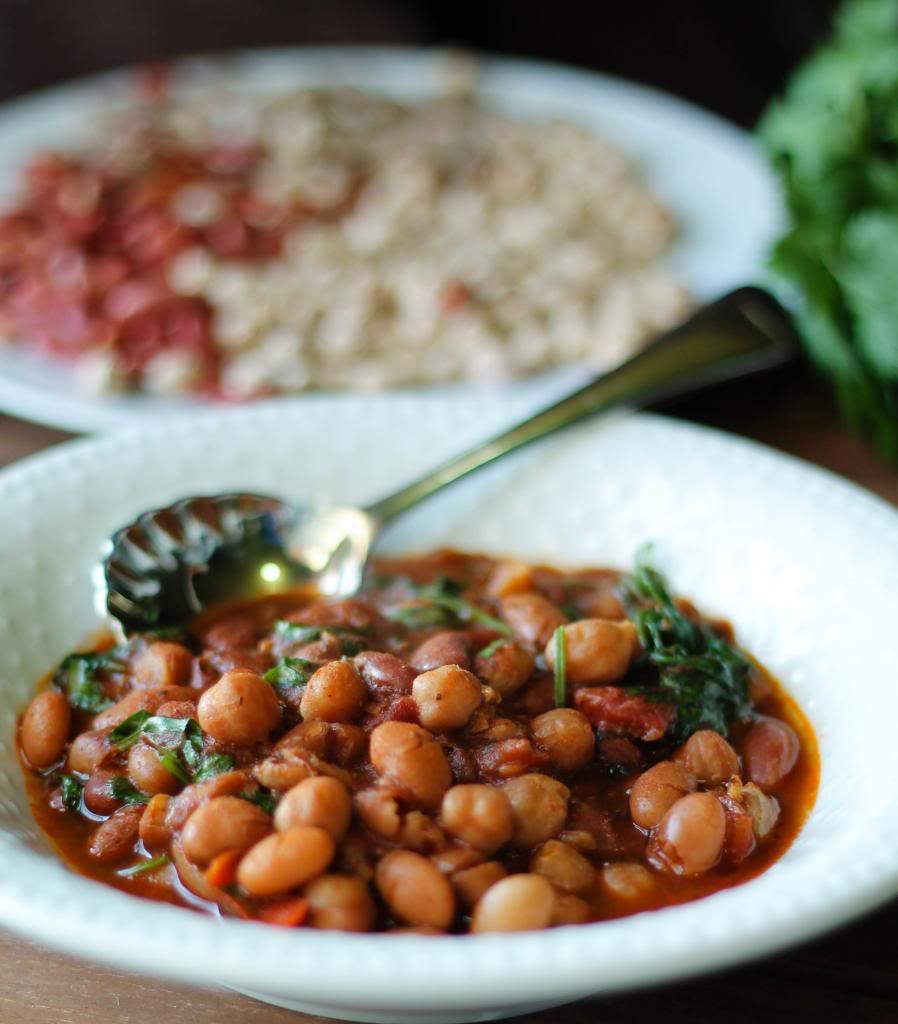
Stewed Beans

Photobucket

As I have talked about before we eat a lot of beans in our house. I love that beans can be used in so many different ways and that they are a great source of protein. It doesn't hurt that they are also inexpensive and make for numerous leftovers. When I first met my husband he had really only eaten pinto and black beans. Pinto beans are very popular in West Virginia and almost any home cook has a recipe. Having grown-up in Seattle I had never really made anything other than chickpeas and kidney beans in vegetarian chili. Luckily after we got married I learned that there are a vast array of beans that can be used in so many different recipes. One of my favorite ways to prepare beans is stewed, it is easy and delicious. Last week I tried a new recipe for Stewed Beans from issue Number 152 of Saveur magazine, which looked like a great vegetarian meal option.

This recipe has 17 ingredients. It takes 2 hours of total time, 30 minutes of which is active and makes 10-12 servings. I had no problems finding any of the ingredients at my local grocery store. I did adjust some of the cooking times on the recipe. I cooked the onion mixture for a full twenty minutes to ensure that the onions fully caramelized before adding the spices. Additionally, my total cooking time was 1/2 hour longer than suggested. I tasted the beans as the recipe was written and I felt that the chickpeas needed a longer cooking time so I put them back on the stove for an additional 30 minutes. Finally, this recipe will need a lot of salt added once it is completed. The flavor is delicious, but it definitely needs salt to bring out the flavors fully. I followed the remainder of the recipe as written.

While this recipe takes a bit of planning and cooking time the results were worth the time spent. The beans were very flavorful and my whole family, including my two boys enjoyed them. My husband added hot sauce to his serving and it really did make the beans taste even better. I would suggest this addition if you like spicier foods as it really did bring out the taste of the beans. Overall a great vegan recipe full of protein and makes enough for multiple meals. 

For the recipe go to Stewed Beans.

September 6, 2012

Chuck Eye Roast


This hasn't been the best year for beef in my area. I don't know if it's nationwide or just my area, but every single roast that I have bought has been relatively horrible. They have been tough, or too small or lacking great beef flavor. The local super store in my area doesn't feel the need to have any beef roasts over two pounds. I think they might have a different idea of an actual roast. They cut them the thickness of a steak and try to label them as a roast. The other stores in my area haven't seemed to do much better. Normally I have no problems finding great beef, but this year I have almost given up on buying any more beef.  This week I decided to try one more time and prepared a recipe for a Chuck Eye Roast from the May issue of Food and Wine magazine.

This recipe has 10 ingredients. As I stated in the introduction I had to go to multiple stores to find a beef roast over 2 pounds. The one I found wasn't completely marbleized, but I settled on what I could find. I had an even worse time finding ground bay leaves. I'm sure in larger cities it is easy to find a variety of spices. When I lived in Seattle there were whole stores specializing in hard to find spices. However, here I am limited a handful of stores and ground bay leaves were one of the spices that is not available at all in my area. So I left it out. Instead I substituted 1 teaspoon of ground sage. My beef roast took exactly 1 hour to cook. Make sure to tie off your roast with twine to ensure your meat stays moist. I followed the remainder of the recipe as written.

I love beef roast and I have been disappointed with the last 3 roasts I have made this summer. This roast was the exception. The middle of the roast was very moist and tender and the spices worked very well together. The cooking time was perfect and I loved the sweet paprika. This recipe made me remember what I love about oven roasts and I will definitely make this again.

For the recipe go to Chuck Eye Roast.

June 17, 2012

Corn Soup

I love this time of the year. The grocery stores and farmer's markets are full of fresh fruits and vegetables and there are so many delicious recipes to try using fresh ingredients. When I was little my mother had a yard full of beautiful tomatoes and our neighbor had wonderful raspberries that grew into our yard. I always loved summer since it meant fresh salads, soups and desserts. My two boys love fresh ingredients as much as I do. I have never met two kids that love going to the farmer's market and picking fruits and vegetables for recipes as much as they do. They have also become quite adept at naming all the things that they see and love to impress people with their knowledge. One of my favorite fresh vegetables to use in the summer is corn, and I was pleased to see a recipe for Corn Soup in a recent issue of Martha Stewart Living.
This recipe has 10 ingredients. It takes 1 hour and 40 minutes of total time, 30 minutes of which is active and makes 4 servings. I had no problems finding any of the ingredients and made no ingredient modifications. I used the whole 2 cups of corn kernels, my family loves a lot of corn in their soup. I chose to leave off the sliced scallions as a garnish since I was serving this recipe to my kids. Additionally, I did not follow the final step and puree half the soup. My husband isn't a fan of pureed soups, so I kept all the kernels whole. Finally, make sure to not be afraid of adding salt. This soup needs a decent amount of salt to bring out the flavor. I followed the remainder of the recipe as written.

I really liked the creamy taste of this soup. My husband normally doesn't like cream soups, but he thought the taste of this soup was pleasant. This made way more than the 4 servings suggested by the recipe. I'm not sure if I ended up making more stock than the recipe or what, but I ended up with enough leftovers for another meal for my family of four. This recipe is a great way to use fresh corn and very easy to prepare.

For the recipe go to Corn Soup.

May 7, 2012

Chicken Barley Soup

Most people love soup in the fall and winter. I love soup all year long. There is something incredibly comforting about eating a warm bowl of soup and it's perfect accompanied by a delicious loaf of homemade bread. My oldest son will go through weeks of picky eating where he will refuse to eat anything except homemade soup. I thought that I could trick him one week by serving canned soup, he guessed it right away and asked what was wrong with the soup that I was serving him. He's such a soup fan that for his birthday this year I told him he could have any meal that he wanted, he chose my homemade chicken noodle soup and whole-wheat bread. I love that child! So as you can guess we eat soup throughout the year, even when the heat goes up. Recently, Everyday Food Magazine had a recipe for Chicken Barley Soup which promised 7 grams of fat and 27 grams of protein all in under 45 minutes of total time.

This recipe has 11 ingredients. It takes 45 minutes of total cooking and prep, 25 minutes of which is active and makes 4 servings. I had no problems finding any of the ingredients at my local grocery store and made no ingredient modifications. As I always do with soup recipes I used homemade chicken-stock. I feel that the taste is better and it allows me to control the amount of salt in my recipes. I wasn't sure how large my sprigs of thyme should be so I used a medium amount so there was flavor, but not overboard. Make sure to adequately salt the soup, since I don't salt my stock it took a decent amount of salt to fully flavor. I followed the remainder of the recipe as written.

The flavor of this soup was delicious after it was salted fully. However, both my husband and I found that the chicken was almost unnecessary. The taste of the barley and spinach was more than enough to make the soup balanced and the chicken was just kind of there. I think that I made this recipe again I would make it without the chicken. I bet it would also be delicious made with vegetable stock if you are vegetarian or looking for a new meatless recipe. My main advice with this recipe is to make sure to add adequately salt. So many people think that a recipe doesn't have enough flavor because they have under-salted the dish, don't skimp on the salt in homemade soup. I promise even if you add what you think is a large amount of salt it is still far less than sodium than canned soup.

For the recipe go to Chicken Barley Soup.

March 7, 2012

Everyday Food Pork Kebabs with Roasted Squash and Sauteed Greens

The last couple of months have been a constant struggle with my two boys over eating their vegetables. There are a few veggies that they will eat a ton of and others that they will pick around at and refuse to eat more than a bite. Luckily, they are great about eating carrots and salad, but I don't want to limit them to only a few vegetables. My food philosophy with my kids is to put the food in front of them and not pressure them to try it until they're ready. A big part of this effort involves only having healthy snacks in the house and including fruit and vegetables at every meal. I was pleased when I was looking through the January/February issue of Everyday Food Magazine and noticed a recipe for Pork Kebabs with Roasted Squash and Sauteed Greens, which looked full of vegetables and promised 31 grams of protein per serving.

This recipe has 10 ingredients. It takes 45 minutes of total time, 15 minutes of which is active, and makes 4 servings. I had no problems finding any of the ingredients at my local grocery store and made no modifications or substitutions to the ingredients. Make sure to remove all the excess fat and silver skin before preparing the kebabs or the taste will not be as good. Additionally, watch the butternut squash and turn them during the baking time or they will begin to burn. I found that my arugula took slightly longer than the three minutes suggested by the recipe to completely wilt. Also make sure to salt the greens or they will lack flavor.

My two boys loved these kebabs. They were very popular with all members of my household and were very kid friendly. I liked that this recipe included vegetable sides, so there were no other dishes that had to be served along with it. Having everything included in one recipe saved me time and money and the arugula was a nice change of pace from my family's normal vegetable routine. Overall, a recipe that I would make again in the future and a great way to expose kids to a larger variety of foods.

For the recipe go to Pork Kebabs with Roasted Squash and Sauteed Greens.

January 24, 2012

Everyday Food Roasted Beets with Orange and Thyme

Growing up I hated beets. My mother would try over and over again to make me eat them and I stubbornly refused. It wasn't until I got married that I discovered that beets weren't just from a can or jar and could actually be delicious. In the last 8 years I have fallen in love with roasted beets and make them frequently. My two boys are hit or miss on whether they will eat them, but luckily my husband loves roasted beets and will eat them as many times as they are prepared. One of my favorite ingredients to pair with roasted beets are fresh herbs, so I was intrigued when the January/February issue of Everyday Food Magazine had a recipe for Roasted Beets with Orange and Thyme.

This recipe has 9 ingredients. It takes approximately 50 minutes to prepare and roast and makes 4 servings. I actually had a hard time finding fresh beets locally. For whatever reason all my local stores were out of beets for over two weeks. Luckily, I was finally able to find them and prepared the dish. All the remaining ingredients are basic and I had no problems finding them and made no substitutions. I used local honey, I always try to use local honey when available. I followed the remainder of the recipe as written.

Fresh herbs and roasted beets when paired together are delicious. This recipe is very easy to put together and has a nicely balanced flavor. My husband and I thoroughly enjoyed these beets, I particularly liked the flavor from the grated orange peel and fresh thyme. Overall, a very simple roasted beet recipe.

For the recipe go to Roasted Beets with Orange and Thyme.

January 23, 2012

Everyday Food Roasted Squash with Parmesan Herbs

One of my favorite things about the fall is the abundance of inexpensive squash. For many years I only made acorn squash roasted with maple syrup or brown sugar. As I got older I branched out to other types of squash and absolutely fell in love with butternut and spaghetti squash. I love how easy it is to create a delicious pasta dish with roasted squash and how little effort it takes. The squash I use the most is butternut squash and since I use it so frequently I figured that it was time to try other squash varieties. Recently, Everyday Food Magazine had a recipe for Roasted Squash with Parmesan and Herbs, which looked delicious and different than my normal squash routine.

This recipe has 10 ingredients. It takes one hour and twenty minutes to roast the squash,15 minutes to prepare the dish and makes 6 servings. All the ingredients were easy to find at my local grocery store and I made no substitutions. I used flat leaf parsley, which is the only kind that my husband will eat, he doesn't like the texture of regular parsley. The longest part of this recipe is making sure to remove the seeds and scraping out the flesh of the squash after roasting. I actually added more than the recommended 2 tablespoons of Parmesan cheese, my family loves cheese so I added more than twice the amount. I followed the remainder of the recipe as written.

Getting my kids to try new types of vegetables can often be difficult on the best of days. This recipe was well received by both of my boys, they actually thought the squash was pasta. I liked that one squash made more than enough for my family of four and the taste of the fresh herbs was delicious. A great way to try new squash varieties and very kid friendly.

For the recipe go to Roasted Squash with Parmesan Herbs.

January 21, 2012

Food and Wine Roasted Brussels Sprouts with Toasted Pecans and Avocado

 I absolutely love Brussels sprouts. Unlike most kids growing up I would make a beeline for the Brussels sprouts during the holidays. They are delicious! When I first got married to my husband his idea of a vegetable was the topping on his pizza at the student center. Over the years I have slowly reformed him to thinking that vegetables are a normal side at dinner time. My two boys have taken after me and love most any vegetable I put in front of them. Brussels sprouts have become a family favorite and I was interested when the December issue of Food and Wine Magazine had a recipe for Brussels Sprouts with Toasted Pecans and Avocados, which looked delicious and different than other recipes I have tried. 

This recipe has 8 ingredients. It takes approximately 40 total minutes, with 20 minutes being active, and makes 8 servings. All the ingredients were easy to find at my local grocery store and I made no substitutions. Instead of toasting my pecans in the oven, I used the stove-top. I find it easier to use this method when making small amounts of roasted nuts and it saves my oven for the main dish I am preparing. Additionally, I only prepared a pound of Brussels sprouts since that is the size package that I am able to find locally (I would love to be able to find them bulk). Since I had a smaller amount of sprouts I only used one baking sheet, instead of the two suggested by the recipe. I followed the remainder of the recipe as written. 

Roasted Brussels sprouts are always popular in my house and this recipe was no exception. The pecans created a nice texture to the Brussels sprouts and the avocado a delicious flavor combination. This recipe makes a large number of servings and re-heated well for an additional meal the next day. My husband loved the taste from the fresh thyme and balsamic vinegar, which gave the sprouts a nice sweet taste. Overall, a great and unusual roasted Brussels sprouts recipe. 

December 21, 2011

Eating Well North Country Braised Chicken

I have always been an active person. Growing up I was active in swimming, dancing, gymnastics, basically you name the physical activity and I was ready to try it. My eating habits have been mostly healthy as well, with periods of my life being vegetarian and vegan. When I got married I quickly realized that my husband and I were polar opposites in the healthy lifestyle boat. To him healthy was only eating 4 pieces of bacon instead of 6. Now don't get me wrong, I love bacon also, but I'm more of a one or two piece person and nothing more. When my husband and I were married around two years and I was pregnant with my first child my mother was diagnosed with cancer. I was 2500 hundred miles away and my son was nine days old when my mom passed away. This was the second woman in my family to pass away from cancer, my grandmother died before I was born. I quickly decided that I needed to change the way that I was creating food for my family and I started cooking as many things as I could from scratch. It has been a gradual process with my husband. I have gotten him to the point that meat is normally an ingredient rather than a centerpiece to a meal and he even asked for me to start making tofu once a week (score!). The one ingredient I have had a harder time convincing him to eat more frequently is chicken breast. My family prefers chicken thighs and I am always struggling to find a recipe using breasts that will be enjoyed. Last month I started receiving a new magazine, Eating Well, and I was excited to find a recipe for North Country Braised Chicken, that used chicken breast, and was low in fat and looked delicious.

This recipe has 12 ingredients. The total time is 45 minutes, with 30 minutes being active, and makes 8 servings. I had to go to multiple stores to find all the ingredients for this recipe. I was unable to find rutabaga at any of my local grocery stores, but was surprised to find that my local super store had them readily available. For the thyme I chose to use fresh instead of dry, I prefer the flavor when it is easily available. I had just bought a new dutch oven, so I was excited to try it out in this recipe. The one change that I made to this recipe was the cooking time. I found that my rutabaga took a lot longer to cook than the suggest 20 minutes, probably closer to 30-35 minutes to get to be fully tender. I followed the remainder of the recipe as written.

With only 5 grams of fat and 268 calories per serving, this recipe is very healthy. My two boys had never had rutabaga before and I was unsure if they would even eat any of it. It turns out I had nothing to worry about, they loved it. The rutabaga and pears had a sweet flavor and their tastes blended together perfectly. With 26 grams of protein, this recipe is healthy and delicious and might just convert my family to eating more chicken breasts.

For the recipe go to North Country Braised Chicken.

December 12, 2011

Family Circle Root Vegetable Gratin

I have a slight obsession with root vegetables, I absolutely love them. The fall/winter season is one of my favorite times of the year since root vegetables are so easy to find and there are numerous new recipes to try. My two boys are just beginning to appreciate and eat parsnips and turnips, so I have been looking for more ways to incorporate them into my family's diet. Hence, the McDonald's plate in the photo. As I was looking through the November issue of Family Circle magazine I ran across a recipe for Root Vegetable Gratin, which looked delicious and a great way to use root vegetables.

This recipe has 16 ingredients. It takes two hours of prep and cooking time and makes six servings. The prep on this recipe took me slightly longer than the 25 minutes suggested, I find that it takes me a while to prep butternut squash. I was easily able to find all the ingredients at my local grocery store and didn't have to make any modifications to ingredients. I found that even after sitting for 10 minutes the gratin was still not completely thickened. After sitting overnight in the fridge the thickness was much better than when I first served the recipe. I followed the remainder of the recipe as written.

My two boys were big fans of this recipe. Root vegetables are always a hit in my household and this recipe was no exception. The recipe states that it makes 6 servings, but I found that it made more like 8-10 when served as a side dish. I would suggest allowing the gratin to sit longer than 10 minutes in order for it to fully set. Overall, a great fall dish.

For the recipe go to Root Vegetable Gratin.

December 10, 2011

Family Circle Apple-Sausage Stuffing

I'm lucky that my husband will normally eat my food without complaints. However, the one complaint that he frequently voices about my culinary skills is my lack of ability to make a dish more than once. My husband claims that if he likes a dish and tells me how much he enjoys it, he will never see it again. I think he has now gotten to the point that he never tells me if he loves something for fear that it will never make an appearance at the dinner table again in the foreseeable future. The one exception to this rule is the holidays. I am pretty stuck in my ways about what I like to fix at Thanksgiving, Christmas and Easter. Every once in a while I will try a new variety of mashed potatoes or biscuit, but the main food categories still remain. In the weeks leading up to Thanksgiving this year I decided to experiment with new side dish recipes and came across a recipe for Apple-Sausage Stuffing in the November issue of Family Circle magazine, which looked easy to prepare and a great new way to make a traditional holiday side dish.

This recipe has 13 ingredients. It takes approximately at hour to prep and cook, and makes 8 servings. All the ingredients I was easily able to find at my local grocery store. I used homemade chicken stock and whole-wheat bread which I made the day before to save time during dinner prep. Since I don't salt my chicken stock I had to add a larger amount of salt than if I had bought store bought stock. I found the stuffing to be too dry with the amount of chicken broth stated in the recipe, I would suggest adding additional stock until the stuffing looks sufficiently moist. As written the stuffing was too dry for my family's liking. I would also suggest making sure that your cubes of bread are small enough for them to get toasted adequately. Normally I would always use homemade bread, but this recipe I think might actually work better with store bought. I found that the consistency of the homemade bread didn't work as well as I would have liked. Part of that could have been due to the fact that 10 slices of homemade bread can be vastly different than 10 pieces of store bought. I followed the remainder of the recipe as written.

I liked the combination of the granny smith apple and the sweet sausage in this stuffing. It lent a nice sweet/tart taste to the overall flavor of the stuffing. I think I would have preferred white bread for the bread cubes. The whole-wheat was a little over powering to the rest of the flavor. White bread would allow the flavor of the granny smith and sausage to shine through more effectively. Overall, this recipe would work well as a side dish for poultry or pork and takes very little prep. 

For the recipe go to Apple-Sausage Stuffing.

December 7, 2011

Woman's Day Prosciutto-Wrapped Pork Tenderloin and Thyme-Roasted Apples

I live in a pork family. My boys and husband could do without any type of meat with the exception of pork. Growing up my mother really only made pork chops and I always liked sausage more than bacon, so it was a big change when I got married and realized how much my husband was in love with bacon. Over the years since we got married I have learned to make a variety of pork dishes and have come around to sharing my family's obsession with all things pork. The November issue of Woman's Day magazine had a recipe for Prosciutto-Wrapped Pork Tenderloin and Thyme-Roasted Apples, which looked delicious and combined multiple varieties of my family's favorite food.

This recipe has 7 ingredients. It takes a total of 35 minutes, 15 minutes of which is active and makes 4 servings. All the ingredients were easy to find at my local grocery store and I didn't have to make any substitutions. I did find that the apples got overdone when they were in the full 18 minutes. We ended up only eating the part of the apples that were not burnt. I would recommend putting the apples in for only part of the cooking time or turning them halfway through. Make sure to let the pork rest for the full five minutes, it makes it come to temp and does make the pork more flavorful. I followed the remainder of the recipe as written.

The pork in this recipe turned out absolutely delicious. It was moist and perfectly cooked thanks to the prosciutto wrap. The apples got overdone, I would suggest either tossing half way through the cooking time or putting them in for only part of the time. Overall, a great and easy pork recipe that was a definite hit in my household.

For the recipe go to Prosciutto-Wrapped Pork Tenderloin.
Related Posts Plugin for WordPress, Blogger...