Showing posts with label Sage. Show all posts

August 13, 2018

Freezing and Drying Woody Herbs


My herb garden can have good years and bad years. This year was somewhere in the middle, not great, not horrible. Too much rain in the beginning of the year and too little in the last couple of weeks. However, I have still had more than enough of an abundance to freeze and dry. Here is a quick rundown of how I keep my herbs useable year round.

To freeze:
  • This works for any woody perennial herb, such as rosemary and sage (thyme, marjoram). 
  • Rinse herbs under water.
  • Pat dry with paper towels (or use a salad spinner which works great). 
  • Try to get off as much moisture as you can in order that the leaves (especially with sage) don't stick together.
  • Spread the stems (or with the case of sage I just freeze the leaves) on a cookie or jelly pan and place in the freezer for 15-20 minutes. Try to spread out the herbs as much as possible. This will allow a better flash freeze. 
  • Place flash frozen herbs in a bag or plastic container in the freezer. 
  • I freeze rosemary whole on the stem, with sage I just freeze the leaves. 
To dry:
  • Drying fresh herbs is very easy.
  • Rinse herbs and pat dry with paper towels. 
  • Strip enough leaves off the end of the stems in order to tie a piece of twine around. 
  • Gather herbs into bunches, tie with a piece of twine (make sure the twine is long enough to hang upside down). 
  • Hang herbs upside down suspended from twine. 
  • It normally takes about 3 weeks to fully dry.
  • Store in an air tight container.
  • I store my herbs whole and then when needed I use a mortar and pestle to grind or hand crumble. 
  • I find that waiting to grind or chop dried herbs until they are being used helps to keep the flavor of the herb intact.
That's it. Very easy. Now soft annual herbs such as basil don't work in the same manner. Those work better frozen in ice cube trays, which I have explained in the past in this post:

http://www.foodieinwv.com/2013/01/freezing-fresh-herbs-in-ice-cube-trays.html


June 22, 2014

Savory Rosemary Sage Bread


I have a habit of buying clearanced appliances.. Most of the time I use them, the ones I don't I give as gifts, a few sit for a few years before I get around to using them. Then there are the appliances that I get from someone else. About 5 years ago my mother-in-law gave me a bread maker. It sat on the shelf for a couple of months and then I used it non-stop for a year. Later it broke and I made bread from scratch for years. Until I found a bread maker marked down to 15 dollars (from 80!), so of course I had to buy it. Honestly, this summer it has been my best friend. It has kept my house cool when the weather is 95 and humid, which is seems to be frequently this year. My herb garden has also been crazy so I have been trying to combine my love of making fresh bread with the over abundance of fresh herbs I have in my garden. I discovered a recipe for Rosemary Sage Bread a couple of weeks back and I love it! The recipe is as follows.


Adapted from Recipe 4 Living
Rosemary Sage Bread

A savory bread that is a great way to use garden herbs. Works well made in both the bread maker and in the oven.

Yield: 2 loaves 16 slices each

Ingredients
  • 1 tablespoon granulated sugar
  • 1 cup warm water
  • 2 1/4 teaspoons active dry yeast
  • 2 tablespoons finely diced fresh rosemary
  • 2 tablespoons finely diced fresh sage
  • 1 teaspoon salt
  • 2 tablespoons softened butter
  • 3 cups bread flour
Cooking Directions
  1. If making in the bread maker add ingredients in order suggested by the manufacturer of your bread maker.
  2. If you are making the bread from scratch use the following instructions.
  3. In the one cup of warm water dissolve the sugar and then mix in the yeast.
  4. After 5 minutes (when the yeast is foamy) add the butter, sage, and rosemary.
  5. In a separate bowl combine the bread flour and salt.
  6. Add the wet mixture and then knead by hand for 10-12 minutes (alternately you may use a mixer for this step).
  7. Rub the inside of a plastic bowl with oil.
  8. Place dough in bowl, cover with plastic wrap, and rise for 1 hour or until doubled.
  9. Punch down dough, and divide into two balls.
  10. Grease the inside of two loaf pans, shape the two pieces of dough into loaves and place in loaf pans.
  11. Cover top of pans with plastic wrap and allow loaves to rise for one hour or until doubled in size.
  12. While the dough is on the last rise preheat oven to 375 degrees.
  13. Bake the loaves in the oven for 20-30 minutes or until golden brown and sound hollow when tapped (total time will depend on your oven, if they brown too quickly tent with foil. A bread thermometer is helpful-when the bread temps 190-200 it is ready to pull out.
  14. Allow cool for 30 minutes in pan and an additional 30 minutes before slicing.
This bread is nice as a side with soup. It also makes great savory toast, my kids loved it with goat cheese (my kids have adult tastes). You can adjust the amount of herbs based on your tastes. Some people might like more or less rosemary/sage. It would also work with other herbs if you have an over abundance of thyme, dill, etc. 


Rosemary Sage Bread


Summary:
A savory bread that is a great way to use garden herbs. Works well made in both the bread maker and in the oven.
Preparation Time: 2h, 20m
Cooking Time: 0h, 20m
Yield: 32 Slices

December 28, 2013

Roasted Brussels Sprouts with Pancetta and Sage

Roasted Brussels Sprouts with Pancetta and Sage Before Cooking


I hate going out on New Years, I always have. When I was younger I normally went to bed far before midnight and on the rare occasion I did stay awake I shied away from parties. It doesn't help that I am not a fan of champagne, it is too dry for my tastes. This year I will probably stay up with my husband watching movies. I like to keep things low key. On New Year's day I will make cabbage soup for good luck and that's it. Nothing fancy, no parties, just my family and a good meal. That's my idea of a great New Year's, simple and no-fuss.

For Christmas Eve I made a number of dishes. My kids and I love Brussels sprouts and I make them every year. This year I tried a new recipe for Roasted Brussels Sprouts with Pancetta and Sage from the December 2013 issue of Eating Well magazine.
Spring Hill Cemetery Huntington, WV

This recipe has 7 ingredients. It takes 35 minutes of total time, 15 minutes of which is active and makes 8 servings. I followed this recipe pretty close to the original. I used 3 ounce of pancetta since that is the size package I purchased at the grocery store. After 20 minutes the Brussels sprouts were still too crispy, so I allowed them to roast for another 15 minutes.
Ohio River
Ohio River 

My kids really loved this recipe. They are big Brussels sprouts fans and this recipe was no exception. The pancetta added a nice flavor to the vegetables and the sage was a perfect herb to go with the Brussels sprouts. With a 130 percent of the daily value of vitamin C per serving this recipe was a nice way to get a healthier side onto my Christmas Eve day meal.

For the recipe go to Roasted Brussels Sprouts with Pancetta and Sage.

September 12, 2013

Pumpkin, Sage, and Browned Butter Muffins

Gluten Free Pumpkin, Sage, and Browned Butter Muffins


I got stuck in a thunderstorm with a scared and crying 4-year-old today. It seems that every time we have a late summer storm it hits right before I have to go to the bus and wait for my oldest to come home. Now it wouldn't be as bad if the bus actually came in front of our house, it doesn't. I have to walk a block down the street and across to wait for the bus. Plus the bus is never on time so I have to arrive 5 minutes early. Today there was lightening, horrible rain and wind waiting for me as I stepped out the door. My 4-year-old was terrified and by the time I got to the bus stop I was sopping wet. It only got better as the tree across the street got struck by lightening and my oldest stepped off the bus crying. It wasn't the best weather scenario to be stuck in. Luckily the nasty weather brought our temperature down 25 degrees from yesterday's high, so I will take the cooler weather. Cooler weather always makes me think forward to fall and most of all fall baking. This week I tried a new recipe for Pumpkin, Sage, and Browned Butter Muffins from Martha Stewart Living.
Ritter Park Sign Huntington, WV

This recipe has 11 ingredients. It takes 1 hour of total time, a half hour of which is active and makes 12 muffins. The original recipe was for 8 mini loaves. I have never owned mini loaf pans, with two boys mini loafs just aren't something that would be eaten in my house. Muffins on the other hand are very popular. Plus they are easy for my boys to grab from the kitchen on their own, which is much easier than cutting a loaf of bread for them. I ended up with 12 muffins and my baking time was approximately 20 minutes. I also made a batch of gluten free muffins. For the gluten free version I used gluten free all purpose baking mix. I do make my own gluten free baking mix on occasion, but this time I used pre-made boxed mix. The baking time for the gluten free muffins was around 25 minutes. I did not garnish the finished muffins with sage. I figured the sage flavor would be too intense and I know my two boys would comment and refuse to eat them.
Ritter Park Huntington, WV
The funny thing with this recipe is that the gluten free muffins turned out higher than the regular muffins. They were crumbly, but that is normal with gluten free baking. The regular muffins were a little intense on the sage flavor for my two boys. It is definitely more of an adult taste, with the browned butter and sage combination. However, I loved the gluten free muffins and ate two while they were still warm. This recipe would also make a great full size loaf, just increase the baking time to about an hour.

For the recipe go to Pumpkin, Sage, and Browned Butter Muffins.

Pumpkin, Sage, and Browned Butter Muffins


Recipe Type: Muffins
Summary:
A simple recipe for pumpkin muffins with fresh sage and browned butter. Great for fall baking!
Preparation Time: 0h, 30m
Cooking Time: 0h, 30m
Total Time: 1h, 0m
Yield: Serves 12

July 9, 2013

Wanting to Escape the Heat and Think of Cooler Weather: Try Pumpkin Chipotle Pasta Sauce


Click for Recipe for Pumpkin Chipotle Pasta Sauce
Pumpkin Chipotle Pasta Sauce


Fall is my favorite time of the year. The weather is cooler, without being cold and the leaves turn beautiful colors. Best of all are the fall foods. I love anything involving apples or pumpkin. Since we are in the middle of the heat of summer it can be a little hard to want to cook. The humidity has been very high and the temps were in the 90's today. Needless to say it doesn't make me want to cook. It leaves me thinking of all the great things to come in the fall. So I decided to try some fall like foods for dinner tonight. I tried a new recipe for Pumpkin Chipotle Pasta Sauce from the new All Recipes magazine.

This recipe has 12 ingredients. It takes 25 minutes of total time, all of which is active and makes 4 servings. I followed the recipe mostly as written. I make my own chicken broth since it allows me to control the amount of salt (and it tastes better). While the original recipe uses butter I substituted extra virgin olive oil. I prefer cooking with olive oil since it is healthier for the heart. Since Vidalia onions are in season that is the type I used in this recipe. They really are delicious. I allowed my onions to caramelize before adding the pumpkin. I hate half cooked onions in recipes, it turns me off.

If you are making this for more than two people you really need to double the amount of sauce. As written it was barely enough for three small sized portions. My husband likes lots of sauce and this needed more to fully coat the pasta. I liked that the chipotle peppers gave it a nice kick, if you like spicy foods you can increase the amount or seed the peppers to reduce the spiciness.

For the recipe go to Pumpkin Chipotle Pasta Sauce.

July 7, 2013

A Delicious Combination: Apple Sage Cake

Click for Recipe for Apple Sage Cake
Gluten Free Apple Sage Cake


There are few household chores that I really hate. The one exception is ironing. My husband has to wear dress shirts to work everyday which means that every Sunday I spend my evening ironing. I don't mind washing dishes, laundry or any other household duties. However, there is something mind numbingly boring about ironing. I just can't enjoy it, even after 10 years of marriage. Many Sundays I put off the ironing forcing myself to have to wake up at 5:30 Monday morning to iron shirts for the week. It's a little better if I do the ironing while watching TV, but only slightly. I try to treat myself to a food I like after finishing my ironing for the week. It makes the whole experience seem better. Tonight I tried a new recipe for Apple Sage Cake from Martha Stewart Living.

This recipe has 9 ingredients. It takes 45 minutes of total time, 15 minutes of which is active and makes 12 servings. I did make a few changes to the original recipe.  First since I eat gluten free I replaced the all purpose flour with gluten free. I mixed the dry and wet ingredients separately and then combined them. The recipes does it all in one bowl, but I prefer doing them one at a time. The edges and the top of the cake brown quickly so if they start to over-brown put a piece of foil over the top.

The granny smith apples in this recipe work really well. The sage is mild and blends nicely with the apples. This cake would be perfect with a cup of tea or coffee. My youngest didn't even notice that the cake had fresh herbs, so don't be intimated by using them.

For the recipe go to Apple Sage Cake.

June 29, 2013

Don't Know What to Do with Fresh Sage? Try Savory Feta and Sage Muffins

Click for recipe for Feta Sage Muffins
Gluten Free Feta Sage Muffins


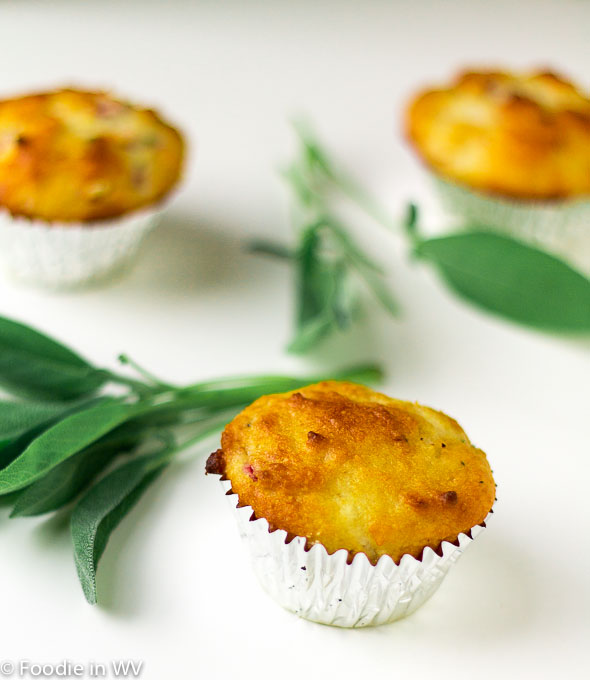
I have started to hate eating at restaurants. When I was younger I ate at restaurants, once or twice a week. Now I eat out maybe once a month. A large part of it has to do with my expectations on food. In my 20's I was happy with any food that I didn't have to cook myself. Now that I am in my mid-thirties my expectations are much higher. If I am going to spend 10 dollars on a burger, it better surpass any burger I can make at home. There lies the problem. It rarely is as good as I can make at home. Now my expectations might be higher than most people. I cook daily and can adequately cook most recipes and dishes. There are also some things that I like more at restaurants that cooked at home, french fries is the best example. They always taste better at my favorite fast food restaurant. Baked goods can be split down the middle, there are some baked goods that taste perfect at a bakery such as donuts, but for the most part I prefer to make them at home. Muffins are an example of a baked good that I think tastes better homemade. Last week I tried a new recipe for Feta Sage Muffins.

This recipe has 13 ingredients. It takes 30 minutes of total time, 10 minutes of which is active and makes 12 muffins. I made a significant amount of changes to the original recipe. First since I eat gluten free I substituted gluten free all-purpose flour for the whole wheat pastry flour. Since I cook gluten free there needs to be eggs or something equivalent to rise the muffins or they will end up very flat. Therefore I added one large egg to the recipe. Finally, I was out of muffin liners so I used ramekins instead. I ended up with a total of 7 ramekins.

I served these muffins as a side to a bean recipe. They were perfect and created a nice savory side dish. The combination of the feta and sage was perfect. These would make a nice compliment to a pork or chicken recipe or a bean soup. Converting the recipe to being gluten free worked perfectly and serving them in ramekins made them the perfect size to serve as mini breads to go with the beans.

For the recipe go to Feta and Sage Muffins.

June 27, 2013

Bake Fresh From the Garden: Strawberry Sage Muffins

Click for Recipe for Gluten Free Strawberry Sage Muffins
Gluten Free Strawberry Sage Muffins


With my oldest home for the summer I have been baking and cooking up a storm. They are able to eat more food than I would think possible for two little children. They are always able to surprise me, especially when it comes to food. As I have posted before I have a new herb garden after my last one left my porch (with help). I try to use everything that I grow in my garden, with little waste. The herb garden that my mother in law purchased at the farmer's market had approximately 15 different types of herbs making for a lot of new recipes. In particular I had 4 large sage plants which I searched for new recipes to try. My two boys love berries in baked goods, so I searched for recipes that combined berries and fresh herbs. I decided on a new recipe for Strawberry-Sage Muffins.

This recipe has 9 ingredients. It takes 40 minutes of total time, 10 minutes of which is active and makes 18 servings. I did make a number of changes to the original recipe. First since I eat gluten free I used a combination of brown rice flour and gluten free all purpose flour as a substitute for the all purpose flour. I love sage, so I used 8 large sage leaves in total. One thing that I did slightly differently than the original recipe is that I tossed my strawberries with the sugar and let it sit for 5 minutes before adding it to the batter. This helped to sweeten the berries and made for a nice flavor in the finished muffins. Gluten free baked goods tend to take a little more batter so I ended up with a total of 14 muffins. I always fill my gluten free muffins to the top of the muffin liners since they don't rise as much as regular muffins.

The strawberries in these muffins had a nice sweet taste which worked perfectly with the mild taste of the sage. The sage works as a nice compliment to the berries without being overpowering. My boys actually thought that these were strawberry muffins and had no idea that they contained herbs from my garden. These muffins were a great way to use fresh sage.

For the recipe go to Strawberry Sage Muffins. 

July 11, 2012

Rigatoni with Tomato Sauce

To say that I love pasta would be an understatement. Growing up I was a very picky eater and my mom had a horrible time for a couple of years getting me to eat anything other than McDonald's or cheese. I was lucky that I was so active in swimming, dance and running that I burned off the McDonald's and cheese without consequences, but my mom realized that neither constituted a healthy diet. Then one day my mom decided to make me an Asian noodle dish that she created. I can still remember the first time she made it, I fell in love. To this day it is possibly the best thing that I have ever eaten. With this success my mother branched out to cooking other pasta dishes, with similar reactions from me. So throughout my teens pasta became a household stable. Once I moved out on my own I ate a lot of pasta, but rarely if ever cooked any recipes at home. After getting married I started cooking as much as I could. It was a great way to relieve the stress of working on my thesis and I found some delicious recipes. Now I cook with my two boys and they have the same amount of zest towards pasta that I do. Recently we tried a recipe for Rigatoni in Tomato Sauce from Saveur magazine.

This recipe has 13 ingredients. It takes an hour and a half of cooking time and 15 minutes of prep and makes 6-8 servings. I had no problems finding any of the ingredients at my local grocery store. I did make a few modifications. I chose to leave off the sliced parsley leaves, I struggle with my two boys with eating parsley especially when it's used as a garnish. For the onion I used a vidalia sweet onion, I love them when they are in season and use them frequently. To crush the tomatoes I place them in a plastic bag, seal it and break the them apart with my hands. This makes for a much less messy clean-up. Finally, for the cheese I used Romano since it was what I already had in my fridge. I followed the remainder of the recipe as written.

I love simple recipes full of flavor. This recipe was easy enough that my two boys were able to help me in the kitchen, while still retaining taste. It would work with a variety of pasta types including spaghetti. Plus it made enough for dinner for my family of four plus leftovers for lunch the next day. Overall, an easy pasta sauce recipe that is versatile enough to be used with spaghetti, bow ties etc.

For the link go to Rigatoni with Tomato Sauce.

February 7, 2012

Food and Wine Pasta with Roasted Squash, Sausage and Pecans

Pasta recipes always grab my attention. I read through a ton of magazines every month looking for new recipes to try. I glance over any recipe with impossible to find ingredients or a flavor that I know that someone in my family refuses to eat. Then I look through the remaining and pull out all the recipes for my recipe file (which funny story is now in an old suitcase). I have a ton of pasta recipes in my pile of magazine recipes to try in the future. I can always be guaranteed that my children will at least try a pasta recipe, which is more than I can say for other recipes. I normally make pasta at least once a week, so I try to vary the vegetables and meats that I use. The February issue of Food and Wine Magazine had a recipe for Pasta with Roasted Squash, Sausage and Pecans, which looked easy and a perfect way to use winter squash.

This recipe has 11 ingredients. It takes 50 minutes to prepare and cook, 30 minutes of which is active and makes 6 servings. I had no problems finding any of the ingredients at my local grocery store. I did find that my sage didn't work exactly as the recipe stated. When I added my sage to the butter, it only got partially crisp, which was fine since it was for flavor and none of us would have actually eaten the sage leaves. Be careful when roasting the butternut squash or it will burn. I stirred my squash twice during the cooking time to prevent sticking and burning. I followed the remainder of the recipe as written.

The flavor on this dish is mild. The only flavor comes from the sage and the butternut squash. It is a good basic, pasta dish, but it would benefit from either using hot Italian sausage or adding red pepper flakes. My two boys liked the mild flavor and ate their entire serving. My husband and I added red pepper flakes, which we both thought added a nice flavor to the dish.

For the recipe go to Pasta with Roasted Squash, Sausage and Pecans.

December 10, 2011

Family Circle Apple-Sausage Stuffing

I'm lucky that my husband will normally eat my food without complaints. However, the one complaint that he frequently voices about my culinary skills is my lack of ability to make a dish more than once. My husband claims that if he likes a dish and tells me how much he enjoys it, he will never see it again. I think he has now gotten to the point that he never tells me if he loves something for fear that it will never make an appearance at the dinner table again in the foreseeable future. The one exception to this rule is the holidays. I am pretty stuck in my ways about what I like to fix at Thanksgiving, Christmas and Easter. Every once in a while I will try a new variety of mashed potatoes or biscuit, but the main food categories still remain. In the weeks leading up to Thanksgiving this year I decided to experiment with new side dish recipes and came across a recipe for Apple-Sausage Stuffing in the November issue of Family Circle magazine, which looked easy to prepare and a great new way to make a traditional holiday side dish.

This recipe has 13 ingredients. It takes approximately at hour to prep and cook, and makes 8 servings. All the ingredients I was easily able to find at my local grocery store. I used homemade chicken stock and whole-wheat bread which I made the day before to save time during dinner prep. Since I don't salt my chicken stock I had to add a larger amount of salt than if I had bought store bought stock. I found the stuffing to be too dry with the amount of chicken broth stated in the recipe, I would suggest adding additional stock until the stuffing looks sufficiently moist. As written the stuffing was too dry for my family's liking. I would also suggest making sure that your cubes of bread are small enough for them to get toasted adequately. Normally I would always use homemade bread, but this recipe I think might actually work better with store bought. I found that the consistency of the homemade bread didn't work as well as I would have liked. Part of that could have been due to the fact that 10 slices of homemade bread can be vastly different than 10 pieces of store bought. I followed the remainder of the recipe as written.

I liked the combination of the granny smith apple and the sweet sausage in this stuffing. It lent a nice sweet/tart taste to the overall flavor of the stuffing. I think I would have preferred white bread for the bread cubes. The whole-wheat was a little over powering to the rest of the flavor. White bread would allow the flavor of the granny smith and sausage to shine through more effectively. Overall, this recipe would work well as a side dish for poultry or pork and takes very little prep. 

For the recipe go to Apple-Sausage Stuffing.

July 30, 2011

Bon Appetit Onion Frittata

My oldest son was picky about eating eggs for the last 3 years. All of a sudden in the last couple of months he has decided that scrambled eggs are his favorite food and requests them almost everyday. While, my husband and I like scrambled eggs, they aren't our favorite way of preparing eggs on a regular basis, so I have been looking for a compromise. The May issue of Bon Appetit magazine had a recipe for Onion Frittata, which looked like an egg dish that my whole family would enjoy.

This recipe has 10 ingredients. I had to go to multiple stores in order to find fresh basil, sage and rosemary, however, the remainder of the ingredients were easy to find. I think it's another sign that I need to start my own herb garden next year. The prep for this recipe is very easy and the total prep and cooking time was approximately 25 minutes. I used vidalia onions for the sliced onions, since they are in season and a family favorite. I followed the recipe as stated and made no modifications. The one change that I did make to the original recipe was the cooking time, my fritata took closer to 15 minutes to fully set.

My five year old absolutely loved this recipe. He ate multiple servings for dinner and the leftovers the following day. My husband and I liked this recipe, but I felt that it needed more salt and pepper added to the seasoning. The fresh herbs provided a nice complexity, however, I actually think that the recipe could benefit from more flavor from additional onion or garlic. This is a very family friendly recipe and could easily be adapted for a variety of ingredients.

For the recipe go to Bon Appetit Onion Frittata.
Related Posts Plugin for WordPress, Blogger...