Showing posts with label Food Network Magazine. Show all posts

November 15, 2014

Pork and Tomatillo Chili


I've decided to scale Christmas down this year. It seems that Thanksgiving is almost forgotten with the rush to start buying Christmas gifts earlier and earlier. So this year I have talked to my kids about not overdoing the holidays. They will be receiving one large gift from my husband and I and that's it. Now granted they are wanting electronics this year so the one big gift will be a little pricey, but it will still be less than the madness of previous years. In past years between family on both sides my kids have gotten more toys than I would like to admit. This year we will enjoy a big meal with family and the gifts will take a back seat. No mad dash for gifts and the frustration over not finding the 5,000 toys on my kid's wish lists.


The weather here has been cold and is supposed to get colder this week. Since the weather has been less than pleasant I have been making a lot of hot meals. Chili is a family favorite and this recipe for Pork and Tomatillo has great flavor and the meat is very tender.

Adapted from the Food Network Magazine.


Pork and Tomatillo Chili


Ingredients
  • 1 pound tomatillos, husked and rinsed
  • 2 plum tomatoes
  • 1/4 cup canola oil
  • 4 poblano chili peppers
  • 2 jalapeno peppers
  • 3 pounds boneless pork shoulder, cut into 2 inch pieces
  • 2 tablespoons chili powder
  • 2 tablespoons ground cumin
  • 1 onion, chopped
  • 3 cloves garlic, chopped
  • 2 tablespoons cornmeal
  • 4 cups low sodium chicken broth
Cooking Directions
  1. Toss 1 tablespoon canola oil with the tomatillos and tomatoes on a baking sheet.
  2. On the other side of the baking sheet place the poblanos and jalapeños.
  3. Broil in the oven for 10-15 minutes or until blackened.
  4. Place the peppers in a bowl and cover with a plate or plastic wrap.
  5. Let the peppers soften for 10 minutes.
  6. Take the skins off the tomatoes, then core and chop.
  7. Repeat with the tomatillos.
  8. Peel and seed the peppers.
  9. In a bowl combine the pork with the chili powder, cumin, 2 teaspoons of salt, and 1/4 teaspoon of pepper.
  10. In a pot over medium heat add 2 tablespoons canola oil.
  11. Add pork and cook 3 minutes until browned.
  12. Move to a plate.
  13. Add 1 tablespoon canola oil and add the onion and garlic.
  14. Cook 3 minutes until softened.
  15. Add cornmeal and cook for 1 minute.
  16. Add the peppers, tomatoes, and tomatillos.
  17. Scrap up any brown bits from the bottom of the pot.
  18. Add the broth and pork and bring to a simmer.
  19. Cover and let cook for 1 1/2 hours, stirring occasionally.
  20. Uncover and salt and let cook for another 30 minutes.
  21. Remove from the stove and let cool for 10 minutes.
  22. Skim off fat.
Tips: 
  • You can add sliced scallions, pickled jalapeños, or grated cheddar cheese for toppings. 
  • When you trim the pork make sure to keep some the fat for cooking. If you don't have some fat your chili will dry out and your pork won't be as tender. 
  • It may take longer for your peppers to char than 10-15 minutes. Just make sure to flip them when one side blackens so they cook evenly. 

October 30, 2014

Cumin Pork with Adobo Black Beans and Red Pepper Salad


I used to love Instagram. When it first came out I used it all the time and thought it was a great way to share my food photos and I quickly gained over 3,000 followers. Now it seems to be a little bit of a waste of time. It doesn't create any blog traffic the way that Pinterest does (Pinterest is awesome for blog traffic!), interaction is at a minimum, and there seems to be a large number of 20 year old girls taking photos of themselves in bikinis. Now I could rock a mean looking bikini if I wanted to, but that isn't something that at 36 I feel the need to want attention for doing. I think social media is stuck at a crossroads. One can only take so many selfies, be they making duck faces for Facebook, or full body bikini shots for Instagram, before the saturation point is reached. Then what. I think Instagram is at that point. How does it move from an over abundance of people taking photos of every little thing they ate and the full body bikini shot of them doing it, to something that can actually be of use to anyone from a business or professional point of view. In the mean time I refuse to start taking photos of myself holding a pie in a skimpy bikini for more likes.


My family is obsessed with pork. If my husband and two kids had their way we would pretty much eat pork everyday. While I love pork, I try to minimize the amount of pork, beef, and lamb that my family eats, so we only eat red meat approximately once a week. When we do eat pork it's normally in the form of pork tenderloin or bacon. The following is a recipe for Cumin Pork with Adobo Black Beans and Red Pepper Salad.

Recipe adapted from the Food Network Magazine.


Cumin Pork with Adobo Black Beans and Red Pepper Salad


Ingredients
  • 1 thinly sliced red onion
  • 3 limes, juiced
  • 1 teaspoon chopped chipotle chile in adobo sauce
  • 2 teaspoons adobo sauce (from chipotle chili can)
  • 2 teaspoons ground cumin
  • 1 1/2 pounds trimmed pork tenderloin
  • 2 tablespoons extra-virgin olive oil
  • 3 small red peppers, cut into strips
  • 1 15.5 ounce can black beans, drained and rinsed
  • 1 teaspoon honey
  • 1/2 cup chopped fresh cilantro
Cooking Directions
  1. In a small bowl combine half of the sliced red onion with the juice of 2 limes, `1/2 teaspoon cumin, a pinch of salt, and the chopped chipotle.
  2. Heat a skillet over medium heat with 1 tablespoon of olive oil.
  3. Rub the pork with 1 1/2 teaspoons of ground cumin.
  4. Add the pork to the skillet and brown on all sides.
  5. Roast pork on a baking sheet in a 425 degree pre-heated oven for 15-20 minutes (or until the temp reaches 145 degrees).
  6. Transfer to a cutting board, cover with foil, and let the pork rest for 10 minutes before slicing.
  7. Add 1 tablespoon olive oil and the red peppers to the skills that the pork was browned in.
  8. Cook the pepper for approximately 4 minutes, or until slightly softened.
  9. Add 1/4 teaspoon salt and 1/2 cup water.
  10. Cook until the water evaporates, approximately 4 more minutes.
  11. Add to the onion mixture in the bowl.
  12. Add the black beans to the remaining red onion, 2 teaspoons adobo sauce, honey, 1/4 teaspoon salt, cilantro, and juice of one lime.
  13. Serve the beans, peppers, and sliced pork together.
Tips: 
  • You can substitute cooked beans for the canned. 1 1/2 cups of cooked beans is approximately equivalent to a 15 ounce can. 
  • If you don't use olive oil, canola, sunflower etc. can be substituted. 
  • Don't cut the cilantro until right before you are going to use it. Cilantro starts to lose flavor as soon as it's cut. That's why it's best to chop cilantro right before it is added to salsas etc. Cilantro is not one of the herbs that you want to pre-prep, just don't do it. 

October 28, 2014

Sausage and Peppers Burgers


I don't dress up for Halloween. My husband takes my kids trick-or-treating, I stay at home, some years I hand out candy, but most years I don't. I don't dislike Halloween, I just am not a fan of the sugar rush that comes with all the candy. I'm a mean mommy, I don't allow my kids candy or junk food. I do bake things at home, but we have very few packaged foods in our cupboards besides rice, flour, and spices. My kids complain that I have only ingredients, but no food, Personally I don't see that as a bad thing. We eat fresh everyday and I make almost everything from scratch (with the exception of cereal which we don't eat, milk, eggs etc.). So on Halloween my kids become candy monsters. As soon as they come in the door, I take their treat bags. Most of the candy goes with my husband to share at work the next day and my kids are only allowed to keep one small plastic bag full of sweets, no suckers or sugared gum (I hate cavities). Honestly, I am looking forward to when they are old enough to want to go to parties and not door-to-door.


My family used to eat burgers frequently, but now we only eat them once every couple of months. We try not to eat a ton of red meat (my family is finally beginning to love tofu), so when we do eat burgers I try to make them different than the ordinary. This recipe for Sausage and Peppers Burgers combines two types of meat for a juicy and delicious burger combination. The recipe is as follows.

Recipe adapted from the Food Network Magazine.


Sausage and Peppers Burgers


Ingredients
  • 1 pound lean ground beef
  • 6 ounces sweet Italian sausage, casings removed
  • 1 clove garlic, grated
  • 1/2 teaspoon oregano
  • 1 red onion, sliced 1/2 inch thick
  • 2 red bell peppers, cut into 1/2 strips
  • 2 tablespoons extra virgin olive oil
  • 4 slices provolone cheese
  • 4 hamburger buns
  • warmed marinara sauce
Cooking Directions
  1. Combine the sausage, beef, garlic, oregano, 1/4 teaspoon pepper and 1.4 teaspoon salt in a bowl.
  2. After well blended form into 4 patties.
  3. In a skillet over medium heat add olive oil, peppers, and onion.
  4. Sauté until peppers and onions are browned and soft, about 6-8 minutes.
  5. Preheat a grill (or grill pan) to medium high heat.
  6. Add the burgers and cook until browned and cooked all the way through (4-6 minutes per side).
  7. Top with cheese for the last 2 minutes of cooking time.
  8. Add burger to bun, toping with peppers/onions, and warmed marinara sauce.
Tips
  • These burger can be made into smaller patties for children. I make my kids burgers into 1/8 of a pound since they couldn't finish a 1/4 pound burger. 
  • If you don't have a grill a grill pan or a skillet would also be fine for cooking the burgers on the stove. 
  • I have also tried this with chicken sausage and ground chicken. The taste was different (I also added Greek seasoning), but the flavors were still great together, plus it cut down on fat. 

October 19, 2014

Perfect Homemade Hamburger Buns


While I love fall, I have a strong dislike of holiday decorating. The worst part is that I have a closet full of decorations that I put up every year like clock work when my oldest was little. Then I had my second son and things got a little less fun. Now I am lucky if I get the table top tree up for Christmas. I always make big holiday meals and my table looks great, but decorations annoy me. I think they look great in other people's houses. In mine they spell dust, sifting through closets, and generally too much effort. I don't mind the putting up as much as the taking down. One of the funniest memories I have growing up was my dad wrapping yards and yards of christmas lights around a wrapping paper tube to put away. After the 10th one he just threw the rest away and decided to get new ones the year. My mom got mad and decided that we wouldn't decorate the next year. Instead of being upset, my dad and I remember it as the best Christmas ever since we were always the ones that had to do all the decorating and putting away. Luckily my kids are happy with lots of food and just one decorated table top tree. I am happy that it literally takes seconds to put everything away after the holidays. So at Halloween my house won't be the one with the decorated pumpkins, ghosts, and witches. It will still be full of laughter, fun, and food just with a little less decorating than the other houses.


I try to make everything I can from scratch, including almost all breads and baked goods. For years I tried to find the perfect hamburger bun recipe with mixed results. I found one that was quick, but the shape and texture just weren't perfect. Then about a year ago I tried a new recipe and loved it. It was perfect and I have been using it ever since. Here is the recipe, it makes the perfect buns!

Adapted from the Food Network.


Fluffy Homemade Dinner Rolls

Perfect Hamburger Buns


Recipe Type: Side
Preparation Time: 4h, 30m
Cooking Time: 0h, 40m

Ingredients
  • 1 cup warmed milk
  • 3 tablespoons unsalted butter
  • 1/2 cup warm water
  • 3 tablespoons unsalted butter
  • 2 tablespoons granulated sugar
  • 2 1/4 teaspoons active dry yeast
  • 1/4 cup warm water
  • 2 1/2 teaspoons salt
  • 1 large egg, room temp
  • 1 large egg yolk, room temp
  • 5-5 1/2 cups bread flour
Cooking Directions
  1. Heat the milk and 3 tablespoons butter on the stove, just until the butter melts.
  2. Pour the mixture into a bowl and add the 1/2 cup warm water and the remaining 3 tablespoons butter.
  3. Add the salt, sugar, egg, and egg yolk.
  4. Stir to combine.
  5. Dissolve the yeast in the 1/4 cup warm water.
  6. Wait until it foams (about 5 minutes) and then add to the bowl.
  7. Add flour until the dough comes together.
  8. You may not need the full 5 cups.
  9. Turn dough onto the counter and knead for 5-8 minutes.
  10. Adding more flour (or warm water) as needed (you want a soft, but not sticky dough).
  11. Place dough into an oiled bowl, cover with plastic wrap and allow to rise for 2 hours (or until double in size).
  12. Punch down dough, re-cover bowl and allow dough to rise for another hour.
  13. Punch dough down once more.
  14. Make dough into 10 pieces.
  15. Roll each piece of dough into a smooth ball.
  16. Cut each ball through the center (like you would if you were cutting a bun to place a hamburger within) into two pieces.
  17. Place the two pieces back together (the same way they were before you cut them) and pinch the seam close.
  18. Tuck the pinched seam under the ball.
  19. Place the finished bun on a parchment lined baking sheet and slightly flatten the bottom.
  20. Repeat with the rest of the dough.
  21. You should end up with 10-12 total buns.
  22. Cover and allow the buns to rise for 30 minutes.
  23. Pre-heat the oven to 375 degrees.
  24. After rising brush the tops of each bun with melted butter.
  25. Bake for 25-30 minutes.
  26. Brush the buns once more with butter.
Tips: 
  • This recipe may seem daunting at first with all the steps, but it really isn't. Once you have made it once it is very easy and it takes me less than a 1/2 hour of actual work. 
  • If you have a bread maker the steps up until the second rise work great in a bread maker. I normally use my bread maker on the dough cycle to prep bread, it's so much easier. 
  • If you have instant or bread maker yeast, you can skip the step of proofing the yeast in water. I just combine my yeast with the flour and then add it to the wet ingredients. I only proof my yeast about once a month to make sure it's still active. 
  • These also make great sandwich buns, so don't just limit yourself to burgers! 

May 3, 2014

Slow Cooker Chicken Nacho Soup

I went grocery shopping last night with my two kids. We didn't get to the store until 9 and I was worried that the store would be crowded and my kids would be wild. Turns out I love Friday nights at the store. It was dead, no cranky women (like there always are on Saturday afternoons), very friendly cashiers, and my kids were perfect. It helped that they were tired and too sleepy to run around acting crazy. All I know is that it was the best grocery shopping trip I have had with my kids in years. I told my husband this morning that I am switching my shopping to late on Fridays, if nothing else it will help to keep my sanity the rest of the weekend.

It's been soup season in my house. Our spring weather has been all over the place. One minute it's 90 and the next we have snow. My oldest told me that the weather is drunk this year, it definitely has been a little off. Since I love soup year round (even when it's hot, weird I know), I tried a new recipe for Chicken Nacho Soup from the April issue of the Food Network Magazine.

This recipe has 17 ingredients. It takes 8 hours and 20 minutes of total time, 20 minutes of which is active, and makes 4 servings. I only made a few changes to the original recipe. First, I used homemade chicken broth. This is the method I use for most recipes, it saves money and cuts down on the amount of sodium. For the cheese sauce I allowed it to sit for approximately five minutes. This allowed it to thicken and made it easier to pour over the soup. Finally, I added the chicken at the beginning of the recipe. I prefer to cook my chicken in the soup adding flavor. The meat came out very tender, so there was no problem with toughness.

We are big soup fans in my house and this recipe went over well. It was mild enough for my kids to enjoy, but with enough flavor for my husband and I. You can adjust the amount of heat by removing (or not) the amount of jalapeno seeds. The recipe states that this dish makes 4 servings, but it was more than enough for my family of four with leftovers for the next day.

For the recipe go to Chicken Nacho Soup.

November 21, 2013

Pork Tenderloin with Baked Apples and Barley

Pork Tenderloin with Baked Apples and Barley


I hate putting up holiday decorations. After this post I will probably get my Pinterest account revoked for lack of Christmas decoration enthusiasm, but I just don't have any. This anti-love of decorations was cultivated in the 80's. My mother had a basement cubby full of decorations for every holiday, and I do mean every (did you know that you can decorate for President's Day). While she loved the decorations it fell to my father and I to actually haul up all the boxes and do the decorating while she sat on the coach giving directions. One year my dad actually pulled the Christmas tree down after my mother had him re-do the lights again for the 12th time. After that we had pre-lit trees. When my mother passed away I was sent all her ornaments. She made most of them by hand and they are beautiful. I put them up for a few years, but ultimately decided that they are treasures that I would hate to have ruined. So they sit in a carefully done box in the closet and my kids picked out a table top artificial tree last year. It's white with blue lights and tacky, but they love it. They were fine with that being the only decoration and it took minutes to put away, my idea of the perfect Christmas decoration. So this year my house will not bleed Christmas cheer with decorations, but will be brimming with the love of family shown through togetherness and a big Christmas meal. For me that is a perfect Christmas.

One of my family's favorite foods is pork. My boys love it in any form, but especially as bacon or pork tenderloin. This week I tried a new recipe for Pork Tenderloin with Apples from the October 2013 issue of the Food Network Magazine.
Old Iron Furnace
Old Iron Furnace 

This recipe 11 ingredients. It takes 40 minutes of total time, 20 minutes of which is active and makes 4 servings. I only made a few changes to the original recipe. I used Gala apples for the apple variety since they were what was available in my area. My tenderloin took less than 25 minutes to cook, it temped at 145 degrees at 15 minutes of cooking time. Make sure to tent the tenderloin with foil for 10 minutes after baking. This allows the juices to stay in the pork and makes for a moister tenderloin.
Vesuvius Iron Furnace
Vesuvius Iron Furnace 

My two boys fell in love with the barley. They had never eaten it before since I can't have it and therefore I normally don't serve it for dinners. Both of them were determined it tasted like stuffing. The apples were okay, but honestly the pork was better. When taken in the same bite though the flavors complimented each other nicely. The pan sauce was delicious and perfect with the pork.
For the recipe go to Pork Tenderloin with Apples.

Pork Tenderloin with Apples and Shallots


Recipe Type: Main
Summary:
A perfect fall meal of pork tenderloin, baked apples and barley with parsley and shallots. A great complete meal!
Preparation Time: 0h, 20m
Total Time: 0h, 40m
Yield: Serves 4

November 9, 2013

40 Minute Vegetarian Butternut Squash Posole


Butternut Squash Posole


I would love a weekend just to relax. It never seems to happen in my household. With two very active boys, grocery shopping and household needs my weekends seem to be more hectic than weekdays. Mondays end up being the day I recover from my weekend and start the craziness of my normal weekday routine.

The weekend also seems to be the time that my kids start acting a little crazy. They are decent during the week, but come Friday night everything goes south. By Saturday they are sick of each other and want their space. Last weekend my husband and I tried to enjoy a rare Saturday night out, which ended with a wild Sunday morning. Plus my youngest managed to shut his finger in a hotel door and his finger was more than a little swollen and purple. I'm hoping as they get older that things start to settle down.

Since it's winter squash season I have been using a lot of butternut and acorn squash in recipes. I love butternut squash since it's versatile and adds great flavor to dishes. Last week I tried a new recipe for Butternut Squash Posole from the September 2013 issue of the Food Network Magazine.
Butternut Squash Posole Food Network Magazine September 2013
Butternut Squash Posole Food Network Magazine September 2013 

This recipe has 13 ingredients. It takes 40 minutes of total time, 30 minutes of which is active and makes 4 servings. I only made a few changes to the original recipe. First my grocery store can be hit or miss with the types of peppers that they carry. There were no poblanos the week I made this recipe, so I substituted an Aneheim pepper since they were available. I bought regular tomato puree, not no salt added, I just added less salt to the recipe. Topping the posole with avocado is a necessary step. It takes the soup from being average to delicious. I really recommend adding it as a topping.

With 9 grams of protein per serving this is a nice vegetarian dinner recipe. My two kids fell in love with this recipe. They ate almost all 4 servings by themselves. I liked that it was easy to put together, while having enough flavor to satisfy everyone in my family. The only change I would make would be to buy 2 avocados since 1 is not enough for 4 servings.

For the recipe go to Butternut Squash Posole.

div class="hrecipe">

40 Minute Vegetarian Butternut Squash Posole


Recipe Type: Main
Summary:
Easy vegetarian soup recipe. Kid friendly and easy to prep.
Preparation Time: 0h, 30m
Total Time: 0h, 40m
Yield: Serves 4

August 12, 2013

Turkey Burgers with Orange Mustard Glaze

Turkey Burgers with Orange Mustard Glaze


I have a horrible attention span. When I was younger it was much better. As I've gotten older it seems to have gone downhill. It's particularly bad with regards to books and television. I have a bad habit of watching part of a season of a tv show and then stopping. Since my husband and I rarely watch live television I am able to look up the ending to most of the past seasons of shows that I catch up on online. I tend to do the same with books. I will read 3/4 of a book and then skim the rest. Part of the problem is that I have very high expectations. I will read pretty much any book, but I get bored with bad writing very easily. Honestly, there have been only a handful of books, television shows and movies within the last 10 years that have been able to hold my attention for long. I'm not sure if it has to do with me getting older or plots getting worse. Either way my attention seems to be going rapidly downhill. Luckily cooking still holds my interest for hours at a time. That's part of the reason that I love it, it changes every time I make a recipe. Today I tried a new recipe for Turkey Burgers with Orange Mustard Glaze from the Food Network Magazine.
Marble Arch Huntington, WV

This recipe has 14 ingredients. It takes 40 minutes of total time, all of which is active and makes 6 servings. I did make a number of changes to the original recipe. First I did not make 6 - 1/2 pound burgers. That is a lot of meat and my two kids are in finicky eating stages currently. Instead I made 4 burgers and they were about 1/3 pound each. For the grilling I used my indoor electric grill, I am still waiting for my husband to fix our outdoor electric grill. I made my own hamburger buns and used heirloom tomatoes for topping. The only type of paprika I had in my cupboard was smoked paprika, so that is what I used.
Marble Arch Huntington, WV

The glaze for these burgers was delicious. It was a perfect combination of sweet and spicy. If you like your food on the mild side I would suggest seeding the jalapenos. You could also decrease or leave out the chili powder. My kids chose to eat their burgers with the pickles on the burgers instead of the glaze. It was a nice way to make the recipe kid friendly.

For the recipe go to Turkey Burgers with Orange Mustard Glaze.

Turkey Burgers with Orange Mustard Glaze


Recipe Type: Main
Summary:
A simple turkey burger recipe with orange jalapeno mustard glaze. A nice combination of sweet and spicy, plus lower in fat than beef burgers.
Preparation Time: 0h, 25m
Total Time: 0h, 40m
Yield: Serves 6

July 12, 2013

Looking for a Use For Fresh Zucchini? Try Chocolate Zucchini Cake

Click for Recipe for Gluten Free Chocolate Zucchini Cake
Gluten Free Chocolate Zucchini Cake


My first tomatoes were finally ripe enough to eat this morning. So for breakfast I had a sliced heirloom tomato and an omelet with fresh basil from my herb garden. There is something about food that comes from your garden that always tastes so much better. Heirloom tomatoes are one of my favorite foods, they are sweet and delicious. Of course my kids woke up and eat half of the breakfast I had prepared for myself, but who could blame them, it was pretty on the plate and yummy. They also ate the majority of the heirloom cherry tomatoes that are going crazy right now. There are at least 50 of them about to be ripe enough to eat. I love growing fruits and vegetables in my garden and eating the results. This week I had a number of zucchini to use so I turned to dessert recipes. I tried a new recipe for Chocolate Zucchini Cake from the July/August 2013 issue of the Food Network Magazine.

This recipe has 12 ingredients. It takes 1 hour of total time, 30 minutes of which is active and makes 6 to 8 servings. I did make a number of changes to the original recipe. First I used gluten free all purpose flour instead of wheat all-purpose flour. I left out the salt since the flour I use already has it in it. For the spice I used nutmeg. Make sure to squeeze all the water out of the zucchini it really does make a difference on how the finished cake turns out. I use paper towels and wring the water out over the sink. Finally, instead of using a 9 inch square pan I baked the cake in a round 9 inch pan. I prefer being able to serve cake as slices instead of squares.

The chocolate flavor in this cake really comes through. You really can't even taste the zucchini so it's a nice way to use zucchini without feeling like the entire recipe tastes like it came out of the garden. My kids loved this recipe and ate the majority of the cake by themselves. The texture is denser than many cakes, more like a dessert bread or torte. To me the texture was perfect.  It was nice with a cup of coffee for an afternoon snack or would also be nice for a dinner party.

For the recipe go to Chocolate Zucchini Cake.

May 29, 2013

Bring the BBQ Flavor Indoors: Cajun Slow-Cooker Pulled Pork

Click for Recipe for Cajun Slow-Cooker Pulled Pork
Cajun Slow-Cooker Pulled Pork


I ate popcorn for dinner tonight. The weather has been hot and sticky, making me not in the mood for most food. I did make a chicken recipe for my husband and youngest son, but nothing heavy for me. Every summer it's the same. It takes a couple of weeks after the weather gets warm for my body to adjust to eating normally. Even after I adjust I still eat far less than during the cooler months. I do eat a lot of salad and ice cream, not the greatest food options, but cool and refreshing none the less. The males in my family never seem to be affected by the weather, they eat a ton year round. BBQ is one of their favorite foods, they literally love it in the dead of winter through the summer heat. This week I tried a new recipe for Cajun Slow Cooker Pulled Pork from the June 2013 issue of the Food Network Magazine.

This recipe has 12 ingredients. It takes 30 minutes of total time (plus 8 hours in the slow cooker), 20 minutes of which is active and makes 8 servings. I did make a few changes to the original recipe. First, I made my hamburger buns from scratch. I gave up buying hamburger buns a few years back, it is so much cheaper to make them at home. Whenever I make meat in the slow cooker I always brown my meat first. Sear it quickly in a pan on the stove, browning it on all sides in a little bit of olive oil. This step allows the meat to seal in its juices and keep it moist during cooking. Make sure to add the meat fat side up, this will also allow the meat to not become tough.

My husband really enjoyed this recipe. He is a big fan of andouille sausage and this recipe does a great job of combining the sausage with the pork shoulder. The flavors blend well together and it is a nice change of pace from traditional BBQ recipes. Best of all it is all done indoors and the clean up work is very simple.

For the recipe go to Cajun Slow Cooker Pulled Pork.

May 9, 2013

Bucatini with Olive Caper Sauce Recipe

Click for Recipe for Bucatinit with Olive Caper Sauce
Bucatini with Olive Caper Sauce

My oldest has two weeks of school left. To say that he is ready to be done would be understatement. Getting him to be motivated to actually go to the bus in the morning has not been easy. He has also been very food picky. It might have a lot to do with the fact that he lost his first tooth this week and the new tooth coming in his been causing him discomfort. Due to all the activity in our household I have been trying to make quick and easy meals. Earlier this week I tried a new recipe for Bucatini with Olive Caper Sauce from the May 2013 issue of the Food Network Magazine.

Click for Recipe for Gluten Free Bucatini with Olive Caper Sauce
Gluten Free Bucatini with Olive Caper Sauce


This recipe has 11 ingredients. It takes 25 minutes of total time, all of which is active and makes 4 servings. Since I eat gluten free, but the rest of my family does not, I made two versions of this recipe. For the tomato mixture I used kalamata olives, unrinsed capers (we prefer the taste of the salt) and roma tomatoes. I divided the mixture between the regular spaghetti for my family and gluten free spiral pasta for me. Make sure to serve the dish soon after you add the mozzarella, if you wait it will melt and turn into a big cheese clump.

The flavors in this recipe are great. My two boys loved the olives and capers and dividing the tomato mixture worked out well. Not rinsing the capers gave the pasta a nice salty flavor, which I really liked. The sauce would work with variety of pasta types in case you aren't a fan of spaghetti or bucatini.

For the recipe go to Bucatini with Olive Caper Sauce.

April 2, 2013

Recipe for Pesto Pork with Polenta

Click for recipe for Scallion-Basil Pesto with Pork Tenderloin, Spinach and Polenta
Scallion-Basil Pesto with Pork Tenderloin, Spinach and Polenta

I can't believe how quickly this year is already going by. My oldest is done with school next month and will be in second grade next year. There are days when I fell overwhelmed and under appreciated staying at home and then I realize how quickly my kids are growing-up and how much I love spending so much time with them as they grow. As my kids are getting older they are also beginning to eat a lot more. Since both of my kids are boys I don't even want to think about how much food they will be consuming as teenagers. Plus they are close enough in age that they will both be eating my entire refrigerator at about the same time. Keeping snacks readily available and doubling recipes has become a must in my household. One meal that is always a favorite in my house is pork. It doesn't matter how I prepare it, my two boys absolutely love it. Last week I tried a new recipe for Pesto Pork with Polenta from the April 2012 issue of the Food Network Magazine.

This recipe has 12 ingredients. It takes 40 minutes of total time, all of which is active and makes 4 servings. I only made a few changes to this recipe. First to prepare the polenta I sliced it into 1/2 inch thick slices, brushed both sides with olive oil and seared the slices on my indoor electric grill until they had nice grill marks. As I've stated many times before you really need to temp pork. The recipe is 100 percent correct about pulling out the pork at 145 degrees. While resting the pork will cook another 5 degrees. Not letting pork rest or cooking it past 145 degrees will result in tough and overcooked meat. I found that I had to add very little salt to the pesto since Worcestershire sauce is high in salt.

I really like that this recipe is a complete meal. The polenta and spinach make great sides to the pork and the polenta ended up being the most popular part of the dish with my two sons. The pesto has a really nice flavor with an umami undertone from the Worcestershire sauce. In addition to the pork the pesto would also work nicely with fish dish due to its citrus taste.

For the recipe go to Pesto Pork with Polenta.

March 5, 2013

Flavorful Tomato Yogurt Chicken Curry

click for a flavorful recipe for tomato yogurt chicken curry


The area which I live in is slowly getting better about having food other than pizza as dining options. We live in a college town so the majority of food involves a meal with fries or pizza, lots and lots of pizza. Since I eat gluten free pizza doesn't hold the same appeal as it did before my diagnosis. When I first moved and met my husband their were only a few ethnic restaurants and almost all of them were Mexican food. I quickly learned that I was going to have to learn to cook as many things as I could at home or be stuck with the frozen ethnic aisle (which is never great) at our local grocery store. So I bought a ton of cookbooks and failed at making a lot of dishes. However, I kept trying and talking to friends about the dishes that they grew up making in their various households and I learned that with practice all food is doable. Now I look at recipes for the flavors and feel confident that I can make a large variety of foods. Tonight I tried a new recipe for Tomato Yogurt Chicken Curry from the October 2012 issue of the Food Network Magazine.

This recipe has 18 ingredients. It takes 1 hour 15 minutes of total time, all of which is active and makes 4 to 6 servings. I made a few modifications to this recipe. Since I was cooking for my kids (and I have never actually seen them at our local stores) I left out the dried arbol chiles. 14.5 ounce cans of whole tomatoes are another rarity in my area so I bought a 28 ounce can and weighed out the needed amount of tomatoes and liquid. I had leftover baby red potatoes from another recipes so I cut them into fourths and used approximately 10 of them for this recipe. Finally I used 2 percent Greek yogurt not whole since it was what I already had in the fridge.

Using a dutch oven really does make this recipe easier to make. If you haven't already bought a dutch oven they are a great kitchen tool and make it much easier to make soups, stews and curries. Based on my family I would say that this recipe serves 4 people. If you want a larger amount or leftovers I would suggest doubling the recipe. Overall this was a nice basic Indian curry recipe that can be adjusted to suit your desired spiciness level.

For the recipe go to Tomato Yogurt Chicken Curry.

February 28, 2013

Spanish Turkey Meatball Stew


I love my food with lots of flavor. Dishes that are bland or lack any kind of spice have never been something that I liked. Growing-up my mother loved any type of ethnic food she could try and we went to every type of restaurant my mom could find. She also loved going to small ethnic grocery stores to find just the right ingredient for a recipe she had gotten from someone. It was through her that I learned to love and use spices in my cooking. Using the right spice can transform a mediocre dish into something spectacular. Having two boys I am always having to find the right balance between the spice that I want and what my boys will actually eat. So I often modify recipes to still have great flavor with a little less bite. This week I tried a new recipe for Spanish Turkey Meatball Stew from the October 2012 issue of the Food Network Magazine.

This recipe has 12 ingredients. It takes 35 minutes of total time, 30 minutes of which is active and makes 4 servings. I did make a few changes. First I used baby carrots which I sliced instead of full sized carrots. I love using baby carrots in recipes, they are easy to work with since they are never too thick. Instead of using canned chickpeas I made my chickpeas from scratch. A great way to save money is to make a large batch of dried beans and then freeze them in smaller portions. Much cheaper than canned and lower in sodium. For the turkey I used 93% lean. I find that 85% is way too greasy and the more lean varieties are too dry. Since I make my own chicken stock I always have to add salt at the table, but if you use store bought this shouldn't be as much of a problem.

I found that this recipe made more than four servings. There was enough stew for two meals for my family of 4. I did think that it might have been nice if their were some egg noddles to add a little more texture to the soup. I would also suggest adding another cup of chicken broth to make a larger amount of broth. The spiciness was perfect for my two boys, but if you like more of a kick I would suggest adding 1/8-1/4 tsp of crushed red pepper. My two boys were fans of this recipe and add their servings happily, so it was kid friendly (at least in my house).

For the recipe go to Spanish Turkey Meatball Stew.

February 25, 2013

Cilantro Lentils and Lemon-Cumin Rice


My posts have been slim this week. Normally I post once a day, but between family obligations and sick kids I have had no time for my blog. Right now my youngest is miserable on my lap while I attempt to write something that is at least semi intelligible. Whenever I am sick with a cold I love spicy food, the spicier the better. Especially when I have a stuffy nose I love things that have lots of flavor and kick. One of my favorite types of food to make spicy is Indian cuisine. The flavors can be made mild or intense and many recipes are easy to make at home. Last week I tried a new recipe for Cilantro Lentils with Lemon-Cumin Rice from the March 2013 issue of the Food Network Magazine.

This recipe has 10 ingredients in the lentils and 6 in the rice. The lentils take 1 hour of total time, 15 minutes of which is active and makes 6 servings. The rice takes 45 minutes, 5 minutes of which is active and makes 6 servings. I had no problems finding any of the ingredients. I did make a few changes. Instead of butter in the lentils I used canola oil and I increased the cayenne pepper to 1/2 teaspoon. Additionally, I let my lentils cook longer than the recipe suggested. I increased the total time by approximately 1/2 hour. This increased cooking time allowed the lentils to fully thicken. Make sure to salt again before serving, I needed to add an additional 1/2 tsp of salt.

The lemon juice added at the end of the lentil recipe makes all the difference. It really does add a great flavor that finishes the dish. The lentils and the savory rice are delicious together. The tastes play off of each other and are perfect. The rice would also work well with other recipes and could be modified to be more or less savory.

For the recipes go to Cilantro Lentils and Lemon-Cumin Rice.

February 8, 2013

35 Minute Stewed Chicken Breast, Red Bell Pepper and Chickpeas


Today was an experimental baking day. I ran out of eggs the other day and my oldest is always very hungry when he gets home from school. Knowing that I had to think of something fast I made vegan oatmeal cookies. I knew that they were good when my youngest tried to eat the batter before it went into the oven. Needless to say the cookies have all been eaten and I think that I may have convinced my husband that vegan cooking can be delicious when done properly. Of course after all of the cookies were eaten none of my family was hungry for dinner. I decided that since the cookies were almost all oatmeal and brown rice flour, it was pretty close to a healthy breakfast food and I didn't argue too much. Making healthier baked goods has been one of my goals for the last month. I have also been trying to incorporate more chicken into my family's diet. My husband prefers pork, so I have been trying to find chicken recipes with a lot of flavor in order to trick my husband into eating them. This week I tried a new recipe for Stewed Chicken and Chickpeas from the January/February 2013 issue of the Food Network Magazine.

This recipe has 12 ingredients. It takes a total of 35 minutes, 15 minutes of which is active and makes 4 servings. I did make a few modifications to this recipe. First I was unable to find 6 ounce breasts. The meat selection at our grocery store is always limited so I had to use slightly larger chicken breasts. I do think that the recipe would work better with the smaller breasts if you can find them. For the red pepper flakes I used a full teaspoon and I used 1/2 teaspoon of garam masala. I chose to leave off the fresh parsley since my local grocery store refuses to stock flat leaf and I just can't get a taste for curly parsley, the texture gets to me. Since I eat gluten free I left out the pita and served the dish over quinoa which I had cooked with butter and minced garlic. I followed the remainder of the recipe as written.

The red pepper and chickpeas are the star of this dish. The chicken cooked well and was tender, especially given that my family prefers chicken thighs. However, the best part of the dish was definitely the sauce. I thickened the sauce at the end with a small amount of cornstarch and it was great over the quinoa. Additionally, it re-heated very well the next day.

For the recipe go to Stewed Chicken and Chickpeas.

February 5, 2013

Slow-Cooked Green Chile Stew


As you know if you've read my blog for a while, we are a pork family. I have been successful with changing a lot of food habits in my family. I have started using honey and sorghum instead of granulated sugar, olive oil instead of butter and brown rice flour instead of wheat flour. As for proteins I like a varied diet. I think eating anything in large amounts isn't great, but I also don't think that eating pork and beef aren't bad for you either. According to my doctor I have some of the best cholesterol levels he has seen and I eat red meat 2-3 times a week. However, I also prepare a large amount of turkey, fish and chicken. Pork is a meat that my husband loves. In any form be it bacon, tenderloin or roast he devours it. So do my two boys. Cooking as many things from scratch as I can is important to me and one of my favorite meals to make is stew. A great stew can make even a poor cut of meat delicious and can feed my family for multiple meals. This week I tried a new recipe for Green Chile Stew from the January/February 2013 issue of the Food Network Magazine.

This recipe has 14 ingredients. It takes 2 hours and 55 minutes of total time, 25 minutes of which is active and makes 8 servings. I did make a number of changes to this recipe. First I made my own chicken broth which I do not salt. Instead I salt the dish once it's done to reduce the total amount of sodium in my dishes. Second I cubed my pork instead of dicing it. I was unable to find a 3 pound roast, so I bought two smaller roasts and cut them into small cubes. I find dicing meat to be a nuisance and I prefer my meat to have larger pieces in soups and stews. Finally, I changed the overall cooking time. The recipe only cooks the pork for slightly over an hour. To me that isn't long enough to produce a great flavor. Instead I added 8 cups of chicken broth to the pork and allowed it to cook for an hour, then added the hominy and let it cook for another hour. Then I added the potatoes and let it cook for a final 40 minutes. The end result was flavorful and perfect. Since I eat gluten free I served the stew with corn tortillas instead of flour.

If I had made this just for adults I would have made it spicier by leaving in the seeds on the peppers. Since I was cooking for my kids I seeded the peppers. My husband's only complaint was that it wasn't spicy enough, but that is normal since I have to keep my kids tastes in mind when I cook for our entire family. Make sure to add salt at the end, especially if you are using low sodium stock or make your own. I would suggest using additional chicken stock instead of the water suggested in the second part of the recipe. The water would make the soup less flavorful.

For the recipe go to Green Chile Stew.


December 17, 2012

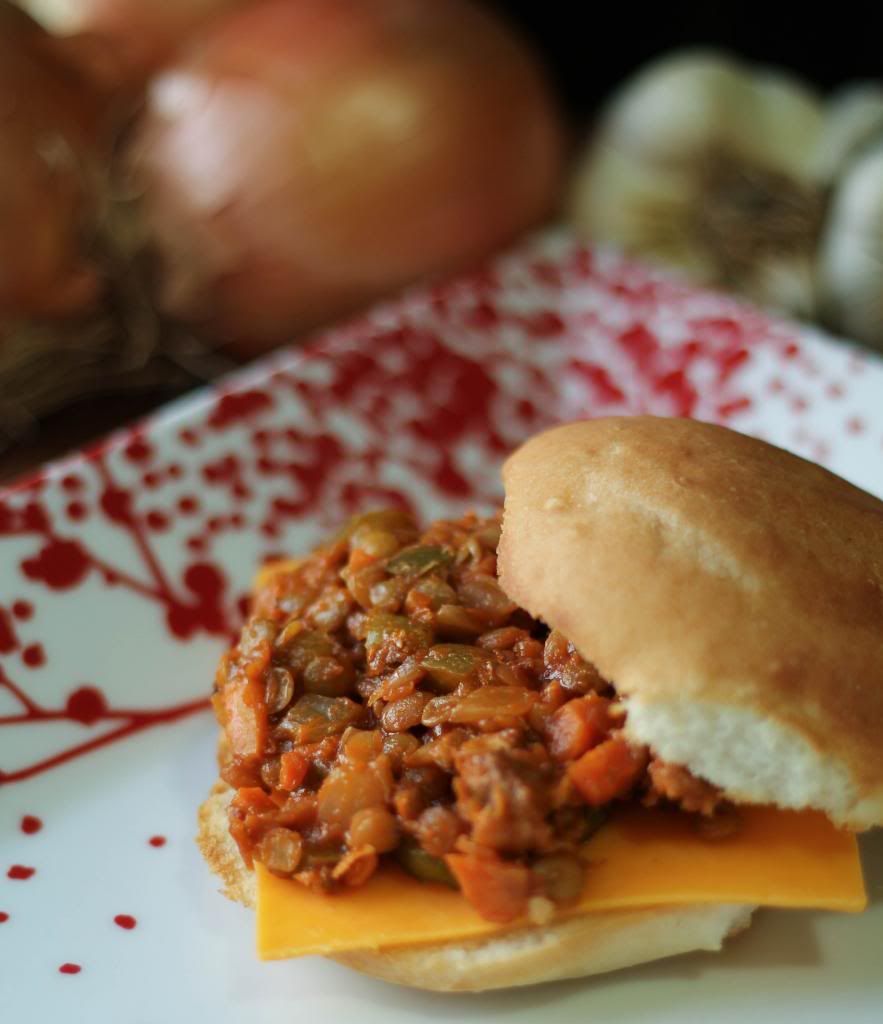
Lentil Sloppy Joes

Photobucket

I can't believe that Christmas is next week. This month/year have gone by so quick! I am taking a laid back approach to the holidays this year. As I have gotten older I have realized that all the craziness of the holidays that I put myself through when I was younger just isn't worth all the stress. My boys are now 4 and 6 and I fully expect to enjoy Christmas instead of obsessing about everything being perfect. Things will still be great, even if the presents aren't perfectly wrapped and dinner is simple, yet still delicious. This year I am determined to enjoy my kids and the time that I have with them. I am old enough now to realize that these moments are fleeting and I would rather enjoy the time than run around making myself tired and cranky. Since next week will be so busy I have been making meals that are easy to put together, while still being nutritious and flavorful. Last week I tried a new recipe for Lentil Sloppy Joes from the December issue of the Food Network Magazine, which looked like a great way to add fiber and iron into my family's diet, while still being low in calories.

This recipe has 15 ingredients. It takes a total of 1 hour 10 minutes, 30 minutes of which is active and makes 6 servings. I did decide to make a few changes to the recipe. First I was not motivated to make ground beef, so I substituted ground lamb instead. Secondly, since I eat gluten free I used gluten free hamburger buns. I would normally make them from scratch, but this time I bought store bought. I chose to use sliced pickles, but not the pickled jalapeno peppers. The recipe suggests that you may need to add up to an additional cup of water in order to cook the lentils, but I did not need to make this addition. I did find that the lamb was a little rich, but a mixture of lamb and beef would be perfect. I followed the remainder of the recipe as written.

I was surprised how great these sloppy joes turned out. I wasn't sure how the lentils would taste, but they worked great with the meat and were a good way to save fat and calories. My husband added jalapenos to his serving and he thought that they were a great addition. If you like spicy foods this would be a great way to add some heat. 

For the recipe go to Lentil Sloppy Joes.

December 8, 2012

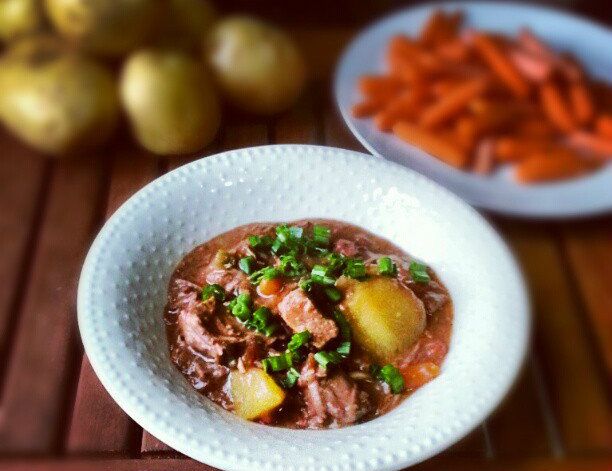
Slow-Cooker Caribbean Beef Stew

e15326bc3ef211e2b19622000a1f9d89_7
The weather in my area has been unseasonably warm. It was almost 70 degrees on Tuesday and it has been making my kids a little bit wild. With the warm days it feels more like spring than almost Christmas. Even though the weather has been all over the place, I refuse to let it change my food plans. This is the time of the year when I make pumpkin cookies, eggnog baked good and most importantly stews. I love stews. They are delicious and comforting. I make them at least twice a month and they are a fall stable in my house. Since I now am eating gluten free I have had to find new stew recipes that work well with gluten free flours. This week I tried a new recipe for Slow-Cooker Caribbean Beef Stew from the December issue of the Food Network Magazine, which looked full of classic Caribbean flavor from the allspice and white pepper and perfect for a busy weeknight.

This reicpe 13 ingredients. It takes a total time of 7 hours and 15 minutes, 15 minutes of which is active and makes 4 servings. I had no problems finding any of the ingredients at my local grocery store. Since I don't use wheat flour I substituted the all-purpose flour for gluten free all-purpose flour. Crock-pots can be very hard to clean so I always use slow-cooker liners to reduce the mess. I let my stew cook on high for 7 hours. When I only put my potatoes in the crock-pot on low for 7 hours they never seem soft enough to me, so I normally cook my stews on high. Finally, I decided to top the servings with scallions for taste and presentation. I followed the remainder of the recipe as written.

Make sure to adequately salt this stew once it is done in the crock-pot. The recipe requires more salt than the recipe states. My husband and I really liked this stew. The flavor was great and the spiciness from the green chiles was delicious. My two boys thought it was a little too spicy for their tastes, but I added sour cream to their servings and then they ate it happily.

For the recipe go to Slow-Cooker Caribbean Beef Stew.

December 7, 2012

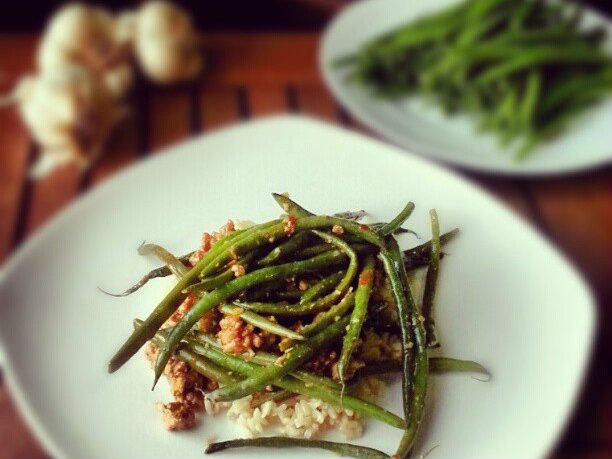
Spicy Turkey and Green Bean Stir-Fry

263013f83d9a11e28c3c22000a1fb85a_7

This time of the year is always crazy in our house. My youngest son turned 4 last week and between school, cooking and gift buying my time is very limited. I seem to always be running out of time and money. Since I bake a lot during the holidays I also try to make sure that my dinners stay at least somewhat healthy. Plus then I can let myself have more holidays cookies, right? I make a lot of chicken throughout the year. It is a great lower fat option and can be delicious in so many recipes. However, chicken can also get a little boring. I try to add in turkey and other poultry to keep my family's taste buds interested. This week I tried a new recipe for Spicy Turkey and Green Bean Stir-Fry from the December issue of the Food Network Magazine, which looked quick, low in fat, and filling.

This recipe has 12 ingredients. It takes 30 minutes of total time, all of which is active and makes 4 servings. I did make a number of changes. First, I have never seen 99 percent lean ground turkey in my area. The only types normally available are 85, 95 and 97 percent. So I bought the 85 percent lean ground turkey. Since my turkey was higher in fat I did not fry it in as much vegetable oil. Plus I drained my ground turkey after it was done browning. I eat gluten free so I used gluten free soy sauce. Always read your labels, since wheat is a top ingredient in many low priced soy sauces. After tasting the recipe as written, I changed a few things. First I doubled the amount of chile paste, soy sauce and added three garlic cloves instead of one. I also served it over brown rice instead of white rice. I stopped serving white rice about 6 months ago and now my two boys prefer brown rice. I followed the remainder of the recipe as written.

After all the changes this recipe worked much better. As the recipe was written it lacked flavor, but after an increase of the chile paste, soy sauce and garlic the taste worked. Finely grated fresh ginger would be another great addition to the flavor in this recipe. I always use magazine recipes as a starting point to making a better recipe. This is an example of a recipe that with a few changes works out well.

For the recipe go to Spicy Turkey and Green Bean Stir-Fry.
Related Posts Plugin for WordPress, Blogger...