Showing posts with label Taste of Home. Show all posts

October 29, 2014

Banana Eggnog Bread


My oldest is starting to get hormones. The hormones I don't mind, I could do without the back talking and general dislike of everything I do that goes along with it. One minute he will be angry and want nothing to do with me and the next he is wanting to sit next to me on the couch and cuddle. He is only 8, but he is definitely beginning to go thru puberty (thanks genetics for early puberty in my family!). My mother and I fought all the time when I was going thru puberty, I didn't think she could do anything right and I would be frustrated by the smallest things. I survived, but I definitely think it's easier to be the kid than the parent once hormones start kicking in. Plus my husband seems to be perfect, he's not baring the brunt of any of the dislike that is aimed in my direction. Apparently it's the beginning of years of good times to come.


Approximately twice a week I bake something for an after school snack. My two boys eat everything in site and without snacks they get cranky quickly. I'm a big fan of breads, sweet, savory, you name it. The following is a recipe for Banana Eggnog Bread that is great for this time of year.

Adapted from Taste of Home Nov. 2014 issue.


Banana Eggnog Bread


Ingredients
  • 1/2 cup unsalted butter, softened
  • 1 1/2 cup granulated sugar
  • 2 eggs
  • 2 medium bananas, mashed
  • 1/3 cup eggnog
  • 1 teaspoon pure vanilla extract
  • 1 3/4 cups all-purpose flour
  • 1 teaspoon baking powder
  • 1/4 teaspoon salt
  • 1/8 teaspoon baking soda
  • 1/2 teaspoon nutmeg
Cooking Directions
  1. Combine butter and sugar and beat until well creamed.
  2. One at a time, add eggs.
  3. Beat well.
  4. In another bowl beat bananas, eggnog, and vanilla.
  5. Add to butter and sugar mixture.
  6. In a separate bowl combine flour, baking powder, 1/4 teaspoon nutmeg, baking soda, and salt.
  7. Add dry ingredients into wet ingredients, mix well.
  8. Pour batter into a greased 9 x 5 loaf pan.
  9. Sprinkle with remaining nutmeg.
  10. Bake in a preheated 350 degree oven for 60-70 minutes.
  11. Tent top of bread with foil if it browns too quickly.
  12. Cool for 10 minutes in pan and then transfer to a rack to cool completely.
Tips
  • If the batter is too thick add additional eggnog. I have made this a few times and the amount of eggnog has ranged from 1/4-1/2 cup. 1/3 cup seems to be approximately the right amount. 
  • Make sure to tent the bread if it browns too quickly. Sweet bread will often overbrown on the sides and be raw in the middle, so make sure that you tent the top if it starts to get browner than you would prefer before the middle has set. 

October 23, 2014

Sweet Asian Meatballs


My youngest son is not a morning person. He wakes up angry and stays angry pretty much until the bus comes in the morning. By the afternoon he is normal again, happy, and content. It's not that he doesn't get enough sleep, he does. He just hates waking up in the morning and lets his feelings be known to everyone around him. Most mornings I have to get him dressed and carry him half way to the bus stop. This isn't bad since he is skinny and only 5 years old. However, I'm hoping that he starts being more of a morning person before he gets taller and bigger than me.


I have had a lot of baking recipes lately since they are the easiest to have time to photograph. Fresh foods such as meat have to be photographed pretty much as soon as they're made without allowing them to get cold so they can still be eaten for dinner. This week I have finally gotten back into my blogging grove and feel that after almost 3 months my schedule has finally settled now that both of my kids are in school. So the recipe I am sharing today is for Sweet Asian Meatballs, the recipe is as follows.

Adapted from Taste of Home.


Sweet Asian Meatballs


Calories per serving: 52
Fat per serving: 2 g

Ingredients
  • 1 lb lean ground turkey
  • 2 garlic cloves, minced
  • 1 tsp plus 1/4 cup soy sauce
  • 1/2 teaspoon ground ginger
  • 1/4 cup rice vinegar
  • 1/4 cup tomato paste
  • 2 tablespoons molasses
  • 1 teaspoon Tabasco
Cooking Directions
  1. Combine turkey, 1 teaspoon soy sauce, ginger, and minced garlic in a bowl.
  2. Shape turkey mixture into balls (approximately 1 inch, I ended up with 25 total).
  3. Place meatballs on a foil or parchment lined baking sheet.
  4. Bake in a preheated 350 degree oven for 25 minutes, turning once to ensure even browning.
  5. Combine remaining soy sauce, molasses, tomato paste, Tabasco, and vinegar in a sauce pan over medium-high heat.
  6. Add meatballs and cook 5 minutes, or until sauce has reduced.
  7. Serve as an appetizer or with rice for a main dish.
Tips
  • If you don't have Tabasco, another type of pepper sauce would also do. 
  • I prefer 93 percent lean ground turkey. A leaner cut ends up too dry, and fatter cuts end up grisly and fatty. 

August 18, 2014

Homemade Italian Seasoning


In an effort to help my oldest son I have instituted a no electronics rule until 7 pm in our house. Basically my kids are only allowed 1/2 of electronics and then by 8 they have to be ready for bed and we read a science or history book for an hour. My oldest claims that I am a horribly mean mommy, however, he has come home with A's on all his tests and papers for the last week and a half. Personally I view the fact that my kids sometimes think my rules are mean as evidence that I'm doing a good job. I have never claimed to want to be my kids best friends. What I do want is for my kids to be successful adults and part of that means not reacting when the rules that I institute result in one of my kids telling me that I'm ruining their lives. In reality I'm doing just the opposite. It would be easier for me if tonight I just let my kids play Minecraft for hours while I caught up on my favorite television shows. Their future wouldn't be as bright though and that's more important to me than taking the easy route.

I attempt to make everything I can from scratch. Having an herb garden helps tremendously since I can dry the fresh herbs and use them in spice mixes etc. Seasoning mixes are one of the easiest things to make at home and cost a fraction of the money of store bought. The following is a recipe for Homemade Italian Seasoning.

Adapted from Taste of Home.

Homemade Italian Seasoning


Ingredients
  • 3 tablespoons dried basil
  • 3 tablespoons dried oregano
  • 3 tablespoons dried parsley
  • 1 tablespoon garlic powder
  • 1 teaspoon dried thyme
  • 1 teaspoon dried crushed rosemary
Cooking Directions
  1. Place all ingredients in a bowl, pestle, or spice grinder. Grind spices (with a back of a spoon if doing by hand) until the spice blend becomes coarse.
Making simple pantry items at home can save a lot of money over the course of the year and taste so much better than store bought. Plus they make great gifts as part of a food gift basket! 

November 12, 2013

Oven Barbecued Chicken

Oven Roasted Barbecued Chicken


I am horrible at making gravy. It's something that I admit fully, a few years back I gave up trying to make it all together. I'm not one of those people that thinks that their gravy is bad, it's really bad. Most of the blame lies in the fact that I never ate gravy growing up. My family was not a biscuits and gravy or gravy in general kind of family. We ate lots of pasta and seafood, but very little gravy. At Thanksgiving the gravy normally came from a jar.

When I married my husband I learned that in some parts of the country gravy is a vital food. West Virginia is one of them. Everyone seems to love biscuits and gravy. I think I mildly annoyed my mother in law when my husband and I were first married. She made biscuits and gravy and I ate my biscuit with jam. That's right, no gravy. My husband on the other hand loves gravy, I think he would eat it with a straw if he could. So on Thanksgiving this year my mother in law is in charge of the gravy, I gave up long ago on making mine perfect. Plus since I can't eat gluten anymore I can't taste it for salt anymore, which would be a  deal breaker with my husband.

My family has been on a chicken kick for the last couple of weeks. It's versatile and easy to prepare, which is nice for weeknight meals. Last night I tried a new recipe for Oven Barbecued Chicken from The June/July 2013 issue of Taste of Home magazine.
Fall Leaves Lake Vesuvius Ohio

This recipe has 12 ingredients. It takes 1 hour and 10 minutes of total time, 25 minutes of which is active and makes 8 servings. I only made a few changes to the original recipe. First I hate breaking down chickens. I had bought thighs and drumsticks on sale a couple of weeks back and froze them. Since I already had them on hand that is what I used for this recipe. For the prepared mustard I used country Dijon. My husband and I both like the strong flavor of this kind of mustard.
Lake Vesuvius Ohio
Lake Vesuvius Ohio

I would make one big change to this recipe, I would skin the chicken. The skin was browned when it went in, but after the BBQ sauce was poured over it and then basted it ended up not being crispy when it came out of the oven. Since all of the flavor was on the skin where the sauce was, it would have been nice to have the skin off so that all the sauce would have been absorbed into the actual chicken. The taste of the BBQ sauce was great though and my kids loved the drumsticks. I liked that the BBQ sauce had a nice vinegar taste, which is the kind of sauce that my family prefers.

For the recipe go to Oven Barbecued Chicken.

Oven Barbecued Chicken

Recipe Type: Main
Summary:
An oven roasted chicken recipe with homemade bbq sauce. Great for parties and kid friendly.
Preparation Time: 0h, 25m
Cooking Time: 0h, 45m
Total Time: 1h, 10m
Yield: Serves 8

October 21, 2013

Caramel Pecan Sticky Buns

Recipe for Caramel Pecan Sticky Buns
Caramel Pecan Sticky Buns


I love my youngest son. We went to the mall a couple of weeks back and my in-laws bought my sons new teddy bears. My oldest named his stuffed animal Mr. Fluffy (it is a cat), my youngest named his teddy bear Steve. That's right Steve. There is a story that makes it a little more logical. My two kids are currently obsessed with Minecraft and one of the characters name is Steve. However, Steve the teddy bear also has a definite back story and personality. My youngest has created a whole story about where Steve came from, what he's afraid of and he even draws pictures for Steve so he doesn't get lonely. When I asked him if Steve got lonely he told me "of course not, he's a teddy bear". A teddy bear named Steve with a back story. I wish that I had half the imagination and simple hilarity of a 4-year-old, I think all adults could use a little more of it.

Today's recipe came about from the groans of my oldest having to eat gluten free bread. While I have to eat gluten free, my kids luckily have not inherited any of my problems. Most of the time they are great about eating gluten free foods, but every once in a while they rebel. This was one of those weeks. So I promised that I would bake my kids something sweet for breakfast made with wheat flour (I wear gloves and use separate bowls etc - I'm lucky that inhaling the flour does not bother me as long as I'm careful). I decided on a recipe for Caramel Pecan Sticky Buns from the Taste of Home website.
Image of Ritter Park Rose Garden Fountain
Ritter Park Rose Garden Fountain

This recipe has 13 ingredients. It takes 3 hours of total time, 30 minutes of which is active and makes 12 servings. I did make a few changes to the original recipe. First, I was out of pecans so I made half the batch with walnuts and half without. Second, I had caramels leftover from a sponsored party so instead of making the caramel sauce I melted 14 caramels and 1/4 cup of 2 percent milk and poured it into the pan. Since the caramels harden a little more than cream and brown sugar I heated the buns in the microwave for 10 seconds before serving the next day. The dough rose beautifully and it was very easy to work with.
Image of Mushroom at Rotary Park Huntington, WV
Mushroom at Rotary Park Huntington, WV

These sticky buns were very popular with my two boys. My mother-in-law tried one when they were a couple of days old and she said that they were still very good reheated in the microwave. The dough was very easy to work with and rose even though my kitchen was on the cooler side. They had risen far above the top of the pan after an hour rise and made perfect large buns. Definitely a recipe I would use again with pecans, almonds, or hazelnuts.

For the recipe go to Caramel Pecan Sticky Buns.

Caramel Pecan Sticky Buns

Recipe Type: Breakfast
Summary:
A delicious pecan sticky bun recipe using wrapped caramels. The dough is easy to work with and rises easily.
Preparation Time: 2h, 30m
Cooking Time: 0h, 30m
Total Time: 3h, 0m
Yield: Serves 12

September 6, 2013

Black Bean and Pumpkin Chili from Taste of Home Magazine

Black Bean and Pumpkin Chili


This morning my youngest ran into the kitchen and announced "I love bacon". Then he ran away into the other room. That's how my household is, the three males in my house have a minor bacon obsession. As I was writing this post my husband went into a 5 minute one sided conversation about how he will only eat crispy bacon and that he judges Tudor's Biscuit World locations (a popular WV breakfast biscuit restaurant) by if they have crispy or chewy bacon. I should be used to this by now since growing up my father insisted on two things for Sunday breakfast, crispy bacon and fried potatoes. Neither of which I was allowed to cook, my bacon was never crispy enough and I have a bad tendency to over flip fried potatoes. A couple of weeks back I made a chocolate cake with bourbon glaze and chocolate covered bacon. My family is still talking about it and honestly I think it might be their favorite thing I have ever made. Maybe I should just cook bacon at every meal and then everything that I make would be well received. My youngest ended the day by informing me that he had seen a sign for bacon donuts and that he wanted one. It looks like I will be spending part of my weekend tracking down this alleged donut or I won't hear the end of it. While the rest of my family is bacon obsessed, I am obsessed with fall foods and in particular pumpkin and apples. Last week I tried a new recipe for Black Bean and Pumpkin Chili from the September/October 2013 issue of Taste of Home Magazine.

Church in the Southside Neighborhood of Huntington, WV
This recipe has 13 ingredients. It takes 4 hours and 20 minutes of total time, 20 minutes of which is active and makes 10 servings. I only made a few changes to the original recipe. First, I made my beans from scratch. I prefer this method since I can control the amount of the salt. I also used my own chicken broth. I don't salt the broth to cut down on sodium. Finally, I didn't add cubed avocado since my kids refuse to eat it currently and I used grilled chicken thighs instead of turkey. I rarely have frozen turkey leftovers, but I frequently have leftover chicken so the substitution was a nice way to save money.

Julian's Market Southside Neighborhood Huntington, WV
With only 5 grams of fat this recipe has a lot of protein (16 grams) while being low in fat. Plus since it's all done in the slow cooker it's very easy to prep and makes more than enough for multiple meals. With fall being right around the corner this recipe will be great when the weather turns cooler.

For the recipe go to Black Bean and Pumpkin Chili.

Black Bean and Pumpkin Chili

Recipe Type: Main
Summary:
Review of Sow Cooker Black Bean and Pumpkin Chili from the September/October issue of Taste of Home magazine. Great for fall!
Preparation Time: 0h, 20m
Cooking Time: 4h, 0m
Total Time: 4h, 20m
Yield: Serves 10

August 30, 2013

Beef and Mushroom Braised Stew

Beef and Mushroom Braised Stew


I don't drive. To many the idea of not driving would be shocking. I know how to drive, but I have always had horrible motion sickness. Behind the wheel I last about 5 minutes before I feel the need to be sick. As you can imagine this doesn't work well when on the road. I have seen doctors who have attempted to fix my inner ear, treated the anxiety part of my motion sickness (I also get very nervous behind the wheel) and none of it has worked. Honestly, when I was 23 I stopped driving and haven't been behind the wheel since. We live in a one car household, I walk everywhere or my husband drives. I lasted all through undergrad, working and grad school without a car. It was never a big hassle and honestly I'm a big proponent of trying to limit your carbon footprint and would love it if everyone drove less. I know many people reading are thinking but my husband and I work different hours, locations etc. and that it's different for us since I stay home. I didn't always stay home. My husband and I both worked 3 jobs during grad school and for two years after. We managed fine with one car, we stayed thin walking, we carpooled and we saved money on gas. If I go back to work I will still not drive. We are used to being a one car household (and one driver) and it works for us. We are just a little different than most households and that's part of what makes everyone in the world great; each of us have our own unique circumstances and things that set us apart. On to the food! This week the males in my house have been on a meat and potatoes kick. So I combined the two and made a recipe for Beef and Mushroom Braised Stew from the September/October 2013 issue of Taste of Home magazine.
Buskirk Field (Looking NE) Marshall University

This recipe has 19 ingredients. It takes 2 hours and 5 minutes, 35 minutes of which is active and makes 6 servings. I made a number of changes to the original recipe. I used homemade dried rosemary and thyme from my garden. Drying herbs is really easy, just wash them, tie them with kitchen twine, place in a brown paper bag with a few holes for air circulation and hang upside down for a week or two. Much cheaper than store bought. For the mashed potatoes I made buttermilk mashed potatoes. Buttermilk mashed potatoes have a great flavor and worked very well with the stew. The final change I made to the original recipe was to caramelize the onions before adding the garlic. The taste of caramelized onions is delicious in beef dishes.
Kentucky Wildflowers

The males in my house were huge fans of this stew. There is something about beef and mushrooms that a lot of men love. My husband ate two huge bowls for dinner and my oldest son went around stealing the beef off the plate of his brother. The finished stew had a great melding of flavor and was nice over the mashed potatoes. It would also be delicious plain with crusty bread.

For the recipe go to Beef and Mushroom Braised Stew.

Beef and Mushroom Braised Stew


Recipe Type: Main
Summary:
A perfect combination of mushrooms and beef roast made into a Beef and Mushroom Braised Stew. Served over mashed potatoes it's delicious!
Preparation Time: 0h, 35m
Cooking Time: 1h, 30m
Total Time: 2h, 5m
Yield: Serves 6

August 7, 2013

Mushroom Stuffed Cheeseburgers

Mushroom Stuffed Cheeseburgers


I am a bad mommy. My oldest son is 7 and doesn't know how to tie his shoes. It isn't for a lack of trying, I have tried many, many times. I blame my husband mostly and his genetics. According to my mother-in-law he was the last kid in his class to tie his shoes. I also blame how kids are taught in school these days. Apparently learning simple skills like tying your shoes is no longer something that public schools teach. Okay. In 1st grade we spent a great deal of time learning to tie our shoes until every kid could do it by the end of the year. The school district that my son is in does not see this as an important skill. They even went so far as to state in a take home note that if my child does not know how to tie his own shoes that the teachers don't have the time to take to tie his shoes for him. I completely understand that teachers are over worked, both of my in-laws were teachers for almost 40 years each. I just wish that some of the skills that used to be emphasized at school such as tying your shoes and cursive would still be viewed as valuable. So I continue to fail miserably at home. I know that a big part of it is that he is left handed. It took working with him for almost a year for him to understand how to hold a pencil and begin to write. I never knew how much harder being left handed makes everything. Hopefully I am not the only bad mommy in the world and that my son turns out to be a normally functioning adult. If not there are always slip on shoes that require no tying what-so-ever. Today's recipe is something that my whole family loves, cheeseburgers. This week I tried a new recipe for Mushroom Stuffed Cheeseburgers from the June/July issue of Taste of Home magazine.

Sugar Grove Christian Church Near Owingville, Kentucky


This recipe has 10 ingredients. It takes 40 minutes of total time, all of which is active and makes 8 servings. I did make a number of changes to the original recipe. First I make my buns from scratch. It saves money and they taste so much better than store bought. Secondly, I thought that I had steak sauce in the fridge, I was wrong. When I got ready to make the recipe I discovered my fault and decided rather than running to the store in the middle of dinner to leave out the steak sauce all together. My husband is still refusing to clean the rust off of our outdoor grill so I used my indoor electric grill to grill the burgers. The cheeseburgers had a problem with slitting open during grilling. Don't feel bad if this also happens to you, they still tasted fine after they were finished cooking.

Mt Sterling, Kentucky


These burgers turned into a mess on the grill. The amount of filling was just too much for the burgers to stay together. The burgers still tasted delicious, they just oozed out their insides a lot on the grill. If you would rather that your burgers stayed intact I would suggest adding only a small amount of the filling to each burger and make sure to form the patties very flat with a good inch or more of space between the filling and the burger edge. The problem was only aesthetic though so if you aren't worried about the way the burger looks, the recipe was fine.

For the recipe go to Mushroom Stuffed Cheeseburgers.

Mushroom Stuffed Cheeseburger


Recipe Type: Main
Summary:
A stuffed cheeseburger recipe with mushrooms, provolone, and red and green peppers. Uses lean beef to cut down on the total fat.
Preparation Time: 0h, 30m
Cooking Time: 0h, 10m
Total Time: 0h, 40m
Yield: Serves 8

July 8, 2013

Don't Buy Overpriced Take-Out, Make it at Home: Asian Chicken Thighs Recipe

Click for Recipe for Asian Chicken Thighs
Asian Chicken Thighs


My oldest is apparently afraid of trains. This morning in a stroke of genius I came up with the idea of purchasing one way train tickets for my two kids and I to go over the mountains to visit my in-laws. The price would be low and it would only take a couple of hours. I was all excited about the idea, until I told my oldest after he woke up. He looked at me and walked away. My husband tried reasoning with him this evening, and he is somewhat willing. We will see. I am biased since my dad worked for the rail road before I was born and starting from the time I was 10 I took the train over the mountains in Washington State to visit my grandmother and aunt. Apparently you have to have an adult with you now, or that was just the 80's and things were very different. Hopefully he will eventually change his mind and love taking the train as much as I do. One thing my son does love is to cook with me. From the time he could crawl he has been more than willing to help in the kitchen. Tonight he helped me to make a new recipe for Asian Chicken Thighs from the June/July issue of Taste of Home magazine.

This recipe has 15 ingredients. It takes 65 minutes of total time, 30 minutes of which is active and makes 5 servings. As I normally do I made a few changes to the original recipe. First, I only used 4 chicken thighs since the ones I found were very large. Secondly, I used fresh squeezed orange juice. It is much cheaper to buy one orange than a whole container of orange juice, plus the taste is better and it is all natural. I was out of reduced sodium soy sauce so I used regular. Finally, to thicken the sauce I removed the chicken thighs and reduced the sauce and then poured it into a gravy boat to pour over each serving at the table.

The sauce in this recipe was delicious. It was great with the chicken or just by itself with rice. The chicken was very tender and fell off the bone. With 25 grams of protein per serving this is a nice protein rich meal. In addition to being delicious it is also child friendly, my two boys loved the recipe.

For the recipe go to Asian Chicken Thighs. 

July 1, 2013

Is Your Herb Garden Overflowing? Try Homemade Tarragon Vinegar

Click for Recipe for Homemade Tarragon Vinegar
Homemade Tarragon Vinegar


I have been recruited into making dinner for the 4th of July. Normally I plan far ahead, this year is a little different. The 4th of July is my mother-in-laws birthday and I honestly forgot that it was already July this week. This summer seems to be flying by. So I spent yesterday afternoon brainstorming and finding recipes. My husband spent his time going to the store to find supplies to fix the rust on his big charcoal grill. Hopefully I don't end up having to finish his project, he has a habit of starting projects and then I end up finishing them. That's why I have a fall back plan of making ribs in the slow cooker, so even if the grill doesn't work out we still will have a delicious meal. My kids are more excited about the baked beans and macaroni and cheese for sides. They are big fans of southern comfort foods. In preparation for all the cooking I am doing this week I spent last week doing a little prep work. In preparation for making potatoes and potato salad I made homemade Tarragon Vinegar from Taste of Home.

This recipe has two ingredients. It takes 10 minutes of total time, all of which is active and makes 32 servings. I made this recipe exactly as written. The only difference I did was to use an old wine bottle for the vinegar. I let the bottle sterilize in a water bath for 10 minutes and then made the vinegar. In order for the vinegar to pour easily I topped the wine bottle with a vinegar spout.

 I love having homemade vinegars on hand. They are great for adding flavor to potato salad, roasted veggies or any recipe calling for savory vinegar. This recipe with only two ingredients is beyond easy. The flavor turned out great and will make delicious potato salad later in the week.

For the recipe go to Tarragon Vinegar.

June 19, 2013

Simple Comfort Food: Easy Baked Spaghetti

Click for Recipe for Baked Spaghetti
Baked Spaghetti


I had a case of blog burnout last week. Approximately twice a year I have to take a break from blogging. I love blogging for so many reasons, but I also have kids and a household to run and sometimes they don't blend well together. So a couple of times a year I have to take a step back. It didn't help that the herb garden that I had spent the last two months perfecting was stolen off my porch over the weekend. Sometimes I really do not understand people or what they are thinking. I was more than a little upset. Luckily the farmer's market had all their herb starters on clearance, so I started a new pot. It will take a while though before it resembles the one that was stolen. I am trying to keep my meals simple this week to keep my sanity. Tonight I tried a new recipe for Baked Spaghetti from Taste of Home.

This recipe has 10 ingredients. It takes 1 hour 25 minutes of total time, 25 minutes of which is active and makes 10 servings. I did make a few changes to the original recipe. First I used frozen spaghetti that I thawed. I seem to always have leftover pasta, so I freeze it for later use. For the seasoning salt I used Tony's for a bit of spice. Finally, my total cooking time was slightly longer than the original recipe. I allowed the spaghetti to bake for 35 minutes with the foil off in order that it fully browned.

Since I can't eat gluten the rest of my family sampled this dish. My kids were huge fans of this recipe. I liked that it was very easy to put together and made enough servings for multiple meals. Plus the servings are very big, so if you cut the pieces smaller you could make it stretch even further.

For the recipe go to Baked Spaghetti.

June 3, 2013

Looking For a Recipe For Your Overripe Bananas? Try Banana Chocolate Chip Muffins


Click for recipe for Gluten Free Banana Chocolate Chip Muffins
Gluten Free Banana Chocolate Chip Muffins


My youngest has fallen in love with the library. He has always been a very active child so my husband and I waited until this last weekend to introduce him to our public library. While he has been 4 since December it is only in the last couple of months that he has been able to understand not to break, rip or destroy other people's property. I was a little worried how he would react to the library since he has shown little interest in books despite my best efforts. Apparently the library was the perfect answer. He has asked to go back to the library the last three days. Best of all this afternoon he asked me to read three library books and he is recognizing his alphabet letters with very little help. I love libraries! I try to bake special treats when my children hit milestones or accomplish something new. In light of my son's new love of reading I made a batch of Favorite Banana Chip Muffins from the June/July issue of Taste of Home magazine.

This recipe has 10 ingredients. It takes 40 minutes of total time, 20 minutes of which is active and makes 12 muffins. I made a number of changes to the original recipes. Since I eat gluten free I used gluten free all-purpose baking mix. The baking mix I use already has salt so I omitted the salt from the recipe. I am not a fan of lumps of banana in my muffins, so instead of mashing the bananas I pureed them in a blender. This allowed for a great banana flavor throughout the muffin and no lumps. My muffins took an additional 5 minutes of baking time, for a total of 25 minutes. Gluten free muffins tend to take a little longer to bake.

My husband isn't a fan of gluten free baking, but he loved these muffins. Pureeing the bananas allowed for a great flavor and texture. My youngest son was a fan of the chocolate chips and ate 3 muffins in just a couple of hours. This recipe is definitely kid and adult friendly.

For the recipe go to Favorite Banana Chip Muffins.

April 21, 2013

Recipe for Sweet and Hot Baked Beans

Click for Recipe for Sweet and Hot Baked Beans
Sweet and Hot Baked Beans

My family loves beans. Three times a day my husband eats some type of beans as part of his meals. He is great about eating an array of beans every week and has lost over 30 pounds due to his good eating habits. My son and I try to eat beans at lunch every day, he loves black beans with feta and could eat them every day if given the chance. Since we live in West Virginia we also eat a ton of pinto beans, we love them. Given that beans are such a large part of our weekly diet I try to come up with new recipes and bean dishes so we don't get bored. Last week I tried a new recipe from the April/May 2013 issue of Taste of Home magazine for Sweet and Hot Baked Beans.

This recipe has 12 ingredients. It takes 5 hours and 20 minutes of total time, 20 minutes of which is active and makes 12 servings. I didn't make too many changes to the original recipe. For the beans I used cannellini beans since they were the type available. I allowed the beans to cook for 6 hours on low and used sweet onions for the onions called for in the recipe.

These beans turned out really well. They were a nice combination of sweet and spicy and made enough for three separate meals for my family of 4. My husband and I enjoyed the recipe the most since the spice from the jalapenos was a little more geared towards adults. However, my youngest decided to eat the beans over rice the next day and loved them. The only complaint I heard in my house was that my husband would have preferred if the onions were sauteed and caramelized before being added to the crock-pot.

For the recipe go to Sweet and Hot Baked Beans.

April 11, 2013

Recipe for 40 Minute Hamburger Buns

Click for Recipe for Homemade 40 Minute Hamburger Buns
Homemade 40 Minute Hamburger Buns


 As I stated last week this week is a freezer week for my family. By eating leftovers out of the fridge once a month I am able to save money and not waste food. I tried doing it once a week with the leftovers from that weeks meals, but my two sons complained about eating the same meals twice. With a few weeks in between they forget the first time they ate the meal and happily eat the freezer leftovers. Even though most of the meals have been leftovers I have baked and cooked sides. I had a number of pounds of hamburger meat that I had ground so I made burgers with it this week. To save money I always make my own hamburger buns. I have a favorite recipe that I have used for years, but this week I ran out of town so I tried a new recipe for 40 minute hamburger buns from Taste of Home.

This recipe has 7 ingredients. It takes 40 minutes of total time, 20 minutes of which is active and makes 12 servings. I eat gluten free, but the rest of my family has no problems with gluten. Luckily I have never had a reaction cooking meals for them making wheat flour, I just make sure to keep my cutting boards etc. separate. For bread I always using King Arthur Bread Flour. I really find that it makes a superior product and the texture is great. I actually ran out of bread flour at 2 cups, so for the other  1 1/2 cups I used brown rice flour. This recipe is pretty straight forward and the only major changes I made were to make 7 buns instead of 12 and increase my baking time by 5 minutes since my buns were larger.

While my family still prefers my normal recipe for buns (which takes 6 hours with rises) this recipe was well received and I really like that it only takes 40 minutes start to finish. Making homemade buns and breads can be time consuming and this recipe is a nice way to get homemade bread on the table quickly.

For the recipe go to 40 Minute Hamburger Buns.

February 10, 2013

Rosemary-Apricot Pork Tenderloin with Curried Apricot Rice


I have already gotten tired of candy and Valentine's Day is still days away. I'm not anti-Valentine's Day, but I do hate all the sweets that go along with the holiday. Many people think that I am mean, but I do not allow candy and pre-packaged sweets in my house. And when I say none I mean none. I bake cookies, cakes and treats from scratch, but I try to limit the amount of granulated sugar that my family consumes so I bake with honey and molasses. Inevitably during holidays my kids receive candy and treats from relatives. Since they don't normally eat foods with large amounts of corn syrup and sugar they tend to get very cranky and melt down after only a few pieces. Today the candy that they have went into a bag for my husband to take to work. This happened after my oldest cried for an hour wanting another piece of candy after he had eaten way too many mini Butterfingers bars. He's lucky that I didn't throw them in the trash, which I have also been known to do. To make up for all the candy eating that happened in my house the last couple of days, I decided for dinner tonight to make a protein that my kids would like. Pork is always a popular favorite and everyone in my house absolutely loves pork tenderloin. Tonight I tried a new recipe for Rosemary-Apricot Pork Tenderloin from the December/January 2012 issue of Taste of Home magazine.

This recipe has 8 ingredients. It takes 40 minutes of total time, 15 minutes of which is active and makes 8 servings. For the rosemary I used crushed dried rosemary. Fresh rosemary is just too expensive at the store and my herb garden was non-existent last summer thanks to squirrels and cats. For the apricot preserves I used all natural preserves. I am not a fan of the cheaper jams that use corn syrup as a main ingredient. They taste too sugary and have more apple juice than actual fruit. Last summer I canned a bunch of jam that I had planned on using this winter, but thanks to my two boys it was eaten within a couple of months. For a side dish I modified the Curried Apricot Couscous recipe from the same page of the magazine. Since I eat gluten free I substituted rice for the couscous, added 3 cups of homemade chicken stock and modified the cooking time to 20 minutes. The recipe cooks the pork to 160 and pulls it out of the oven to rest. That is way too high of a temp. The FDA now states that the temp for pork is 145 with a 5 minute rest. During the rest the temp will go up approximately 5 degrees to 150. If you were to cook the pork to 160 degrees, it would be over done. If you don't already own a well made meat thermometer, buy one. They are a very important kitchen tool that can mean the difference between delicious and over cooked meat. I temp all meat that I cook to ensure that it gets just done without before over done and tough.

 The pork in this dish turned out very tender. My two boys stated they weren't hungry for dinner, but after tasting the pork they ate an entire serving. The glaze has a nice sweetness, without being over sweet and is balanced nicely by the rosemary. I think for this recipe I prefer using the dried rosemary like I did, so it wasn't overpowering and worked well with the glaze.

For the recipe go to Rosemary-Apricot Pork Tenderloin.

February 7, 2013

Moist Lemon Blueberry Pound Cake Made Using Yogurt


I have been eating spicy foods all day today. They seem to be the only things that I can taste due to the unfortunate luck of catching a cold yesterday. I am such a baby that I would almost rather go through another c-section recovery than have a bad cold. Part of it has to do with having pneumonia and being hospitalized last winter. Now every time I get a cold it feels as if someone is sitting literally on my chest. Before having pneumonia this never happened. I was warned that this would happen, but it still doesn't make the experience any more pleasant. So I have been taking zinc lozenges, drinking tea with honey and trying not to be too pathetic. My husband was super sweet and brought me home a bag of spicy chips, spicy peanuts and chocolate. I knew there was a reason I married that man, sometimes he is just plain awesome. Since I have been feeling under the weather I am glad that I baked a number of snacks earlier in the week. One of my favorite ingredients to bake with is blueberries, whether fresh or frozen they are delicious. This week I tried a new recipe from the February/March 2013 issue of Taste of Home Magazine for Lemon-Blueberry Pound Cake.

This recipe has 13 ingredients in the cake and 2 in the glaze. It takes an hour and 20 minutes of total time, 25 minutes of which is active and makes 12 servings. I did make a number of changes to the original recipe. First since I eat gluten free I used brown rice flour to replace the all-purpose flour. I have also been trying to cut down on the amount of granulated sugar that my family consumes so I substituted honey for the two cups of sugar. Since less honey is needed in recipes I reduced the total amount to 1 1/2 cups and used 6 ounces instead of 8 ounces of lemon yogurt. Finally, instead of butter I used canola oil and low-fat cream cheese instead of regular. I found that my baking time was slightly longer due to the changes, approximately 5 minutes total. While the frosting looked yummy, I left it off to reduce the amount of sugar. I followed the remainder of the recipe as written.

My two boys loved this pound cake. Even with all the substitutions the cake came out very well. It wasn't as sweet as the original recipe would have been, which I liked. Using two cups of sugar would make for a very sweet cake and I prefer a cake that is a little less sweet to serve to my kids, plus it was great with a cup of tea as a snack in the afternoon.

For the recipe go to Lemon Blueberry Pound Cake.

December 12, 2012

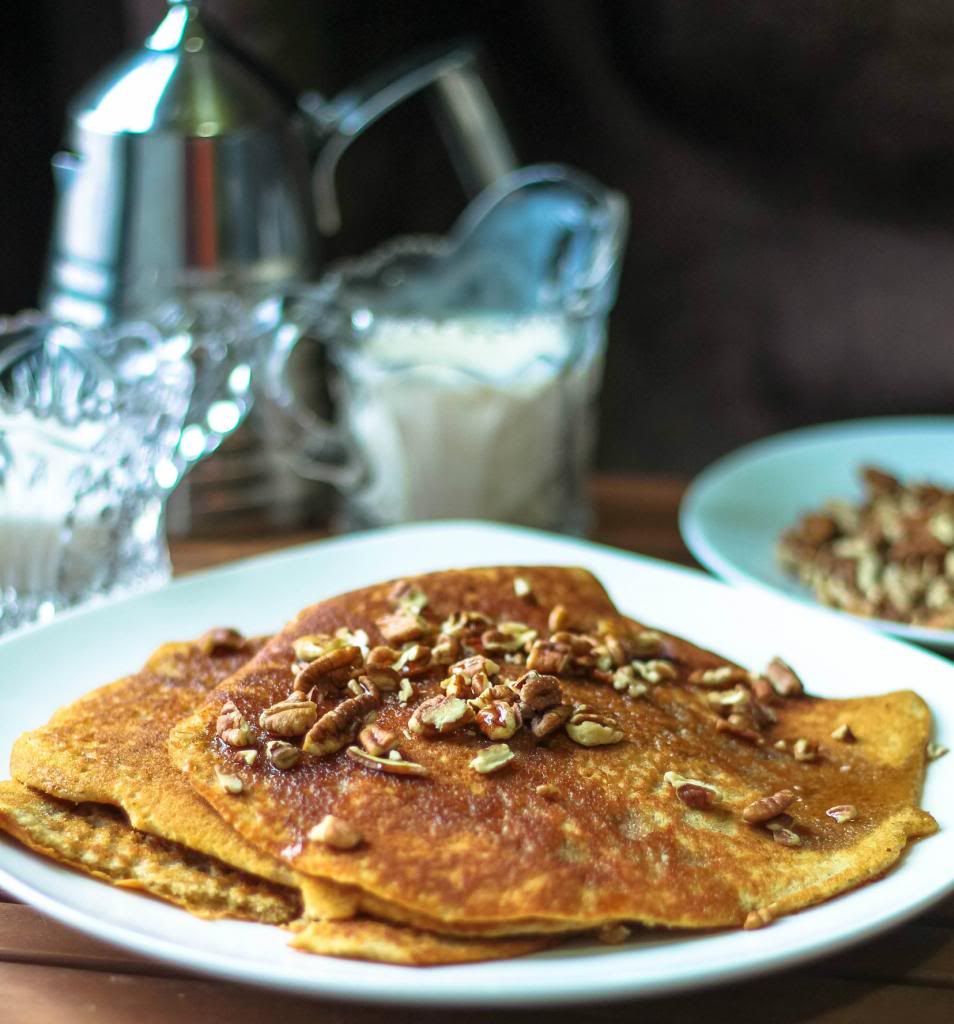
Gluten Free Pecan Apple Pancakes

IMG_0012-2

My husband thinks that there is something wrong with me because I love mornings. I pop out of bed and am ready to start my day. While most people take a while to wake-up, as soon as I open my eyes I am awake. My oldest son is just like me. He wakes up early and reads books until the rest of the house starts their day. My youngest son on the other hand is just like my husband. He takes hours to fully be awake and is grumpy most of the morning. Since our mornings are so vastly different I try to make breakfast foods that everyone will love. The one food that everyone in my house can agree on is pancakes. My boys love them and so do I. Since going gluten free it has been hit or miss with finding suitable gluten free pancake recipes. Some have turned out great, while others have been flat and lacking any flavor. This week I tried a new recipe for Pecan Apple Pancakes from the December issue of Taste of Home magazine, which looked like a great breakfast recipe to make gluten free.

This recipe has 14 ingredients. It takes 10 minutes of cooking per batch, 15 minutes of prep and makes 18 pancakes. I had no problems finding any of the ingredients at my local grocery store. I did make a few changes. First off since I don't use mace often and don't like buying spices that I will not use I left it out of this recipe. I fully intended to make these pancakes with apples and even bought them at the grocery store. However, by the time I made the recipe my two boys had eaten all the apples so I left them out. Finally, since I eat gluten free I used gluten free all-purpose flour. I found that since I made these gluten free and left out the apples I had to increase the amount of flour by 1/2 cup. The pancakes were still runny, but worked well when made on the griddle. I followed the remainder of the recipe as written.

My youngest son and I loved these pancakes. They turned out sweet and almost crisp. With maple syrup and toasted pecans as a topping they were delicious. I was happy that they were easy to convert to gluten free and my kids didn't even notice that I had changed anything. I would definitely make these again.

For the recipe go to Gluten Free Pecan Apple Pancakes.

December 10, 2012

Oatmeal Brulee with Ginger Cream

333fc0c0420411e2837022000a1fa4bb_7

As I have discussed many times before, breakfast is the meal I struggle with the most. My natural tendency in the morning is to grab a cup of coffee and nothing else until the middle of the afternoon. The men in my house on the other hand wake-up very hungry. My two boys pop out of bed in the morning and want food right away. If I take more than 5 minutes, they start following me around asking why I haven't started their breakfast. Since my husband leaves for work at 6 in the morning I try to make sure that the meals I make for breakfast are quick and easy. I really don't have the energy to go full out at 6:30. However, on weekends I like to take the time to make a more labor and time intensive breakfast. Weekend breakfasts allow my family to talk about what has happened during the week and be together. This weekend I tried a new recipe for Oatmeal Brulee with Ginger Cream from the December/January issue of Taste of Home magazine, which looked delicious and perfect for fall.

This recipe has 15 ingredients. It takes 40 minutes of total time, 30 minutes of which is active, and makes 4 servings. I had no problems finding any of the ingredients at my local grocery store. Since I eat gluten-free I used gluten-free oats, however, regular oats would work just as well for people who can eat gluten. I haven't seen fresh raspberries in months so I bought frozen. The broiler on my oven has been broken for years so I used the broiler on my toaster oven. My total broiling time was longer since I used this method, about 15 minutes total. Instead of using butter to grease my ramekins, I used non-stick spray. I followed the remainder of the recipe as written.

I loved this recipe. The ginger cream was delicious and the crusty sugar topping was very popular with my two kids. Plus, the time was reasonable for a weekend meal and the oatmeal was perfect with hard boiled eggs for breakfast. This is definitely a recipe I would make again.

For the recipe go to Oatmeal Brulee with Ginger Cream.

November 19, 2012

Triple Bean Bake with Bacon


My mother cooked a lot of great meals growing-up. We never had a lot of money, but she was always able to make something delicious. The one food that she never really made was beans. She would occasionally use beans in chili or soup, but it wasn't a huge stable in our diet. I think a lot of it had to do with my dad being a huge meat eater and the local church by our house giving out meat every week to families. It was also the 80's when everyone ate more meat than they do now. Even when I moved out on my own and was a vegetarian I ate a lot of tofu and nuts, but beans were always an after thought. None of my friends seemed to eat a lot of beans either, so maybe Seattle in the 90's had a bean aversion. When I moved to West Virginia, beans were everywhere. Restaurants, grocery stores you name it beans were there. It took me a long time to adjust to eating beans on a regular basis, but eventually they became a stable in my diet. My two kids have always eaten beans and absolutely love them. They become very excited when I make a recipe with their favorite type of bean. Last week I tried a new recipe from the June/July issue of Taste of Home magazine for Triple Bean Bake with Bacon, which looked sweet and full of one of my family's favorite foods, bacon.

This recipe has 8 ingredients. It takes 30 minutes of baking, 15 minutes of prep and makes 8 servings. I had no problems finding any of the ingredients at my local grocery store. My husband is very particular about the type of bacon that we buy and insists on thick-cut. I do admit that thick-cut bacon is delicious and works very well in recipes. I prefer to keep my bacon whole when frying and then cut it into pieces when finished. The texture is better and the bacon is crispier when fried in this manner. I let my beans bake for an additional 15 minutes after the suggested baking time in the recipe. This additional time allowed the beans to fully thicken. I followed the remainder of the recipe as written.

These beans turned out very sweet with a bit of a kick from the horseradish. My two boys really loved these beans and ate their whole servings. The level of sweetness could be adjusted based on the strength of the horseradish that you use. Milder horseradish will make for sweeter beans. I do suggest the additional baking time in order for the beans to thicken completely. This dish would be a great side dish for roasted or fried chicken.

For the recipe go to Triple Bean Bake with Bacon. (registration required)
Related Posts Plugin for WordPress, Blogger...